
Transform an off-the-shelf Batman action figure into a museum-worthy, screen-accurate, or uniquely personalized collectible — no prior modeling experience required.
Customizing a Batman action figure is more than just a hobby—it’s storytelling in miniature. Whether you’re honoring the gritty realism of The Dark Knight, channeling the sleek futurism of Batman v Superman, or imagining your own Gotham vigilante, customization lets you breathe personality, authenticity, and craftsmanship into plastic and paint. This guide walks you through transforming a standard 6-inch scale articulated figure (like those from McFarlane, NECA, or Hasbro) into a standout piece that reflects your vision — with professional-looking results, even if you’ve never held an airbrush before.
This project is beginner-friendly, requiring no prior sculpting or painting expertise—just patience, curiosity, and attention to detail. You’ll build confidence gradually: starting with prep work, progressing through precise painting and detailing, and finishing with protective sealing and display-ready polish. While advanced customizers may add resin parts or LED eyes, this tutorial focuses on accessible, high-impact upgrades using widely available tools and materials.
Here’s what you’ll need:
🔹 Tools: X-Acto #11 blade with handle, fine-tip tweezers (straight & bent), small needle files (flat & round), soft-bristled artist brushes (#0, #1, and a 1/4″ flat wash brush), toothpicks, cotton swabs, magnifying desk lamp (LED, adjustable arm), microfiber cloths, small glass palette or ceramic tile for mixing paint, masking tape (3M Blue Painter’s Tape, 1/4″ width), and a sturdy craft mat or cutting board.
🔹 Materials: Acrylic model paints (Vallejo Model Color or Citadel Base/Layer paints recommended — matte black, gunmetal gray, deep navy, burnt umber, metallic silver, gloss black), acrylic gloss and matte sealants (Krylon Crystal Clear Acrylic Spray or Testors Dullcote), rubbing alcohol (91% isopropyl), plastic-safe primer (Tamiya Fine Surface Primer, gray or black), optional weathering powders (Mig Productions or AK Interactive), and a clean, dry Batman figure (e.g., McFarlane DC Multiverse Batman: Year One — avoid figures with fragile rubberized parts or glued joints).
Time commitment: Plan for 12–18 hours total, spread over 4–6 sessions (allowing drying time between steps). Most steps require 2–4 hours of active work, but curing times are non-negotiable — rushing leads to smudges, peeling, or clouded finishes.
Estimated cost: $35–$65, depending on whether you already own basic supplies. A starter kit (paints, primer, sealant, brushes) costs ~$25; the figure itself ranges $20–$40. All items are reusable across future projects — this is an investment in your creative toolkit.
Remember: There are no “perfect” customs — only authentic ones. Your Batman will carry the quiet pride of your hands-on care. Let’s begin.
Preparation and Planning
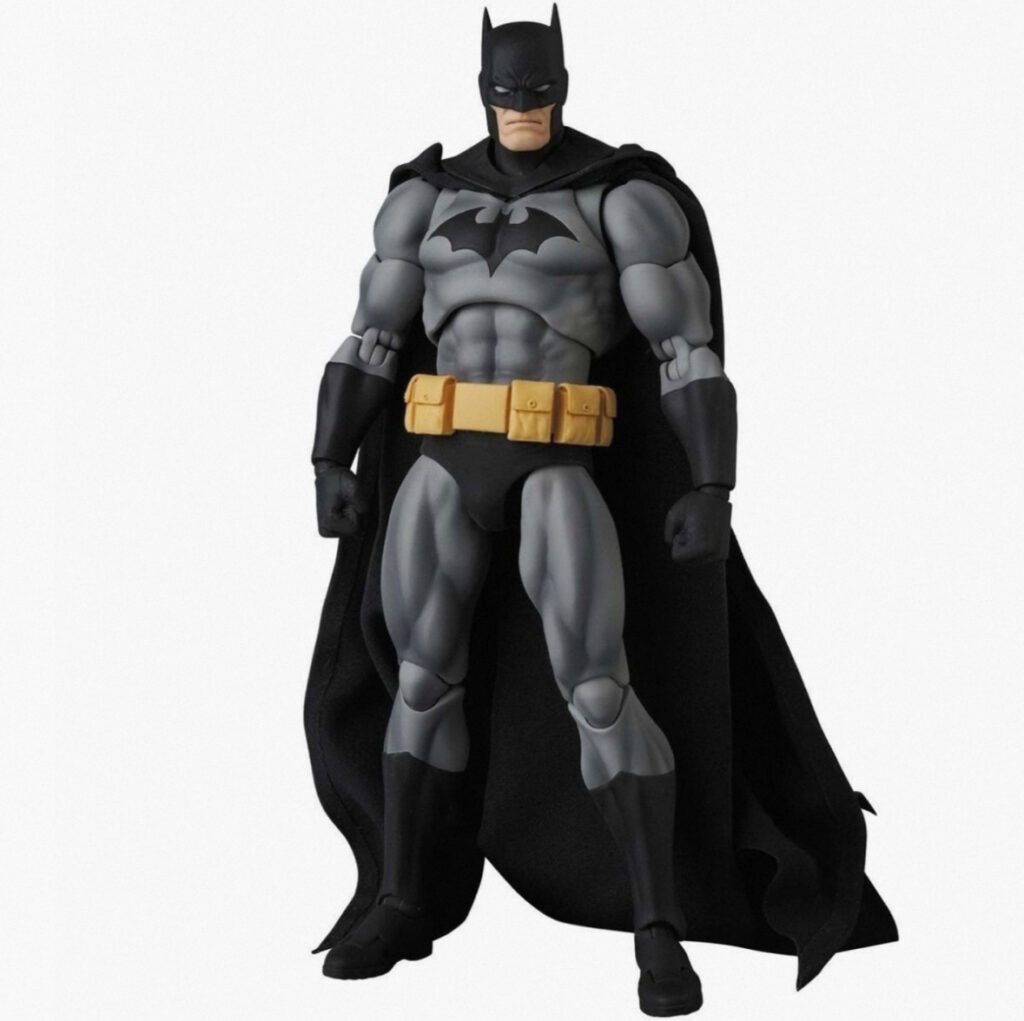
Batman Action Figure Custom Statue DC Comics Stoic Vigilante
This Batman action figure stands confidently, facing forward with a stern expression, hands fisted and ready. His pose conveys a stoic and powerful readiness for…
View Product →Before touching your figure, thoughtful preparation sets the foundation for success — and prevents frustration later. Start by selecting your reference. Open three tabs: one with official movie stills (The Dark Knight’s tactical suit), one with comic panels (Frank Miller’s Year One), and one with your figure’s stock photo. Compare proportions, seam lines, and texture. Note where the factory paint falls short — dull black instead of rich charcoal, flat gray instead of layered armor plating, or missing bat-symbol depth. Jot down 3–5 specific goals: “Add subtle armor panel shading,” “Recreate the textured cowl fabric,” “Deepen the cape’s shadow folds.”
Safety comes first. Work in a well-ventilated area — ideally near an open window or with a small fan directing airflow away from you. Wear nitrile gloves when handling solvents (rubbing alcohol, primer, sealant) and a disposable N95 mask during sanding or spray applications. Keep pets and children out of your workspace — tiny parts and fumes pose real risks.
Set up a dedicated, clutter-free zone: a sturdy table covered with a self-healing craft mat and topped with a non-slip silicone pad (prevents accidental rolling). Mount your magnifying lamp directly above — position it so light hits the figure at a 45° angle to reveal seams and texture without glare. Organize supplies in labeled containers: “Paints,” “Tools,” “Cleaning,” and “Drying Rack” (a foam block with pin holes works perfectly). Keep a notebook nearby to log dates, paint mixes (“V. Black + 10% Burnt Umber = Cowl Shadow”), and observations.
Crucially: photograph your figure before any modification. Take front, back, side, and close-up shots of the cowl, symbol, and joints. These become your baseline for troubleshooting and celebrating progress. Also, test every new paint or sealant on a hidden area first — like the underside of the foot — to confirm adhesion and finish. Never assume compatibility.
Finally, embrace iterative planning. Break the project into “micro-goals”: “Today I’ll clean and prime the torso,” not “I’ll finish the whole figure.” Celebrate each checkpoint — a flawlessly prepped surface is half the battle won. When doubt creeps in, revisit your reference images. Ask: What would make this feel more like him? Not perfection — presence.
Step 1: Surface Cleaning, Seam Removal, and Priming
A flawless finish starts beneath the paint — with a pristine, uniform base. Factory figures often have mold release residue (a waxy film), minor seam lines where plastic halves met, and inconsistent factory paint that repels new layers. Skipping this step guarantees poor paint adhesion, visible ridges, and uneven coverage.
Begin by degreasing. Dip a cotton swab in 91% isopropyl alcohol and gently roll it over every surface — especially joints, cowl creases, and the bat-symbol. Avoid scrubbing; let the alcohol dissolve residue. Repeat with fresh swabs until no haze remains. Let dry fully (15 minutes). Next, remove seams. Using your X-Acto #11 blade, hold it at a 10° angle and lightly scrape along raised lines — like the vertical seam running down the center of the chest plate or the horizontal line across the lower back. Think “feathering,” not carving. If resistance occurs, stop — you may be hitting molded detail. For stubborn ridges, use a fine needle file with feather-light strokes, always filing away from joint areas to avoid weakening articulation points. Wipe away dust with a dry microfiber cloth.
Now, mask for precision. Cover areas you won’t paint — like clear eye lenses (if present) or rubberized cape edges — with thin blue painter’s tape. Press edges firmly to prevent bleed. Then, apply plastic-safe primer. Shake the Tamiya can for 60 seconds. Hold 10–12 inches from the figure and spray in smooth, overlapping passes — never one heavy coat. Start off the figure, move across, then off again. Let dry 20 minutes. Flip and repeat for all sides. The goal is a smooth, chalky-gray, even layer — no drips, no bare spots. If you see pinholes or streaks, lightly sand with 1000-grit wet/dry paper (dampened), wipe clean, and re-prime only that area.
Tips & Tricks: Use toothpicks to hold small parts (like the cape) while priming. Rotate the figure slowly under the lamp to spot missed spots. If primer clouds (turns white), you sprayed too close or in humid air — wait 24 hours, then gently buff with a damp microfiber cloth and re-prime.
Common Mistakes: Skipping degreasing (causes paint to “crawl”); pressing too hard with the blade (creates gouges); spraying primer in cold or humid conditions (leads to frosting); masking over joint sockets (impairs movement).
Visual Description: After priming, your Batman should look like a soft, matte sculpture — uniformly gray, with crisp edges and no shine. The cowl’s ear fins stand sharp; the symbol reads as a clean, recessed shape.
Checkpoint Confirmation: ✅ No visible seams or residue. ✅ Primer is completely dry, matte, and consistent. ✅ All masked areas are secure. You’re ready for color.
Step 2: Base Painting and Layered Detailing
With a perfect canvas, it’s time to build Batman’s iconic silhouette — not with one flat coat, but with intentional layers that create depth, dimension, and realism. We’ll use a “dark-to-light” approach: start with deep shadows, then build midtones and highlights — mimicking how light interacts with armored fabric.
First, mix your base black. Don’t use pure black straight from the bottle — it looks flat and artificial. Instead, combine Vallejo Model Color “Black” with 15% “Burnt Umber” and 5% “Navy Blue.” This creates a rich, warm charcoal that reads as true-to-life under light. Load your #1 brush, then blot excess paint on a paper towel until it’s almost dry — this prevents pooling in crevices. Paint the entire suit (torso, arms, legs, cowl) in smooth, unidirectional strokes. Let dry 1 hour.
Next, define armor panels. Batman’s suit isn’t smooth — it’s segmented. Using a fine #0 brush, mix a slightly lighter tone: base black + 10% “Gunmetal Gray.” Carefully trace the edges of each panel — the V-neck collar, shoulder guards, abdominal plates — with a hair-thin line. Keep strokes steady; rest your pinky on the table for stability. This “edge highlighting” makes armor pop without looking cartoonish.
Then, add depth to recesses. Mix a dark wash: 1 part “Black” + 3 parts “Thin Medium” (or water + 1 drop dish soap to break surface tension). Dip your #0 brush, wipe all moisture, then gently drag the wash into seams, cowl folds, and under the cape. Gravity does the work — the wash settles naturally into low areas. Blot excess with a dry cotton swab tip.
Tips & Tricks: Work in natural light when possible — LEDs can distort color perception. If paint dries too fast, add a drop of retarder medium. Always rinse brushes immediately after use — dried acrylic ruins bristles.
Common Mistakes: Using wet brushes in recesses (causes puddling); outlining panels too thickly (looks like a coloring book); skipping the wash (results in “plastic toy” flatness).
Visual Description: After drying (2 hours), the suit has life: deep charcoal shadows in the cowl’s jawline, subtle gunmetal definition along the biceps, and rich, dimensional folds where the cape meets the shoulders.
Checkpoint Confirmation: ✅ All base layers are fully dry and non-tacky. ✅ Panel lines are crisp and intentional. ✅ Washes have settled cleanly into recesses — no streaks or blooms. You’re now ready for the symbol and final accents.
Step 3: Bat-Symbol Refinement, Weathering, and Final Sealing
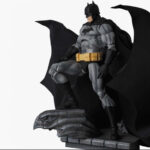
Batman Action Figure Custom Statue DC Comics Stoic Vigilante
This Batman action figure stands confidently, facing forward with a stern expression, hands fisted and ready. His pose conveys a stoic and powerful readiness for…
View Product →The bat-symbol is Batman’s soul in miniature — and the final stage where subtlety transforms good into great. We’ll elevate it from a flat decal to a tactile, multi-dimensional emblem — then add believable wear and protect your work for decades.
Start with the symbol. If your figure has a molded symbol, gently sand its surface with 2000-grit paper to remove gloss and create “tooth” for paint. Then, paint it with a matte black base. Once dry, mix a metallic silver (Citadel “Leadbelcher”) with 20% matte medium — this keeps it subtle, not shiny. Using a #00 brush, apply one ultra-thin layer only to the symbol’s highest ridge — the central curve of the wings. Let dry 30 minutes. Repeat once more for gentle lift — not chrome, but the suggestion of polished metal catching light.
Next, weathering. Real armor accumulates micro-scratches, scuffs, and grime — especially on knees, elbows, and the cowl’s forehead. Using a dry #0 brush, dip just the very tip into “Gunmetal Gray” dry pigment (or a tiny dab of thinned paint), then wipe 90% off on paper. Lightly stipple over high-contact areas — think of tapping, not brushing. For deeper scuffs, use a toothpick dipped in diluted black wash to draw fine, directional scratches.
Finally, sealing. This is non-negotiable for longevity. Place your figure on the drying rack in a dust-free room. Shake Krylon Matte Clear for 60 seconds. Hold 12 inches away and spray 2 light, even coats — waiting 15 minutes between. For a museum-quality finish, follow with one coat of Krylon Gloss Clear only on the symbol and cowl’s upper forehead — creating realistic light reflection contrast. Let cure fully for 48 hours before handling.
Tips & Tricks: Practice weathering on scrap plastic first. Use a magnifier to check symbol symmetry. Seal in cool, dry air — humidity causes hazing.
Common Mistakes: Over-applying gloss (makes symbol look wet, not metallic); skipping symbol sanding (paint peels); spraying sealant too close (orange peel texture).
Visual Description: The bat-symbol gleams with restrained realism — not mirror-bright, but alive with light. Scuffs read as organic wear, not random speckles. The overall finish is deep, velvety, and cohesive — like a hero who’s lived in that suit.
Checkpoint Confirmation: ✅ Symbol has dimensional lift and accurate contrast. ✅ Weathering enhances, not distracts. ✅ Sealant is crystal-clear, non-cloudy, and fully cured. Your Batman is complete.
Troubleshooting Common Issues
Even with careful execution, hiccups happen. Here’s how to diagnose and resolve them calmly:
Problem 1: Paint lifting or “crawling” (beading up like water on wax)
Cause: Residue (oil, dust, or old mold release) wasn’t fully removed before priming.
Solution: Gently wipe the affected area with alcohol-dampened swab. Let dry 20 minutes. Lightly sand with 2000-grit paper, wipe again, and re-prime only that section. Wait 1 hour before repainting.
Problem 2: Primer or paint appearing streaky or patchy
Cause: Spraying too close, too fast, or in cold/humid air — or using old, thickened paint.
Solution: For streaks, lightly sand with 2000-grit after full drying, then re-prime. For paint, thin with acrylic medium (not water) — 1 drop medium per 3 drops paint. Stir, don’t shake, to avoid bubbles.
Problem 3: Wash pooling or bleeding outside recesses
Cause: Too much liquid or applying wash over still-damp paint.
Solution: Blot immediately with a dry cotton swab. If dried poorly, gently lift excess with a swab dampened with very diluted alcohol (1 part alcohol : 10 parts water). Repaint the area and reapply wash more sparingly.
When to seek professional help: If you accidentally snap a joint peg, crack a limb, or melt plastic with solvent — pause. Contact a reputable customizer (search r/ActionFigureCustoms on Reddit) for resin repair or 3D-printed replacement parts. Don’t force broken pieces — preservation matters more than speed. Remember: Every pro started with a botched wash. Your Batman’s story includes resilience — just like his.
Final Touches and Maintenance
Your customized Batman isn’t just finished — he’s alive with intention. Now, let’s honor that labor with thoughtful finalization and lifelong care.
Finishing Steps: Attach any accessories (batarangs, grappling hook) with a tiny dot of cyanoacrylate (super glue) — less is more. Position the figure in a dynamic, balanced pose: one foot grounded, cape flowing backward, cowl tilted slightly. Photograph it against a neutral backdrop using natural light — this documents your achievement and helps spot overlooked details.
Quality Check: Use your magnifier to inspect:
✓ No dust specs trapped in sealant (if found, gently buff with microfiber + 1 drop distilled water)
✓ All joints articulate smoothly — no paint bridging gaps
✓ Symbol symmetry matches reference (hold up to a mirror)
✓ Weathering reads as natural, not random
Maintenance Tips: Dust monthly with a soft, dry makeup brush — never compressed air (can chip paint). Store upright in a closed display case away from direct sunlight (UV fades pigments) and HVAC vents (temperature swings stress plastic). Rotate display seasonally to prevent uneven aging.
Care Instructions: Never immerse in water or use household cleaners. If smudged, dab gently with alcohol-dampened swab — never rub. For long-term preservation, consider silica gel packs inside display cases to control humidity.
Enhancement Suggestions: Once confident, explore next-level upgrades:
🔸 Install micro-LEDs in the eyes (3V coin cell + fiber optics)
🔸 Replace the stock cape with hand-sewn fabric (black wool blend, heat-set pleats)
🔸 Create a diorama base — rain-slicked Gotham alley using resin, gravel, and printed brick textures
You didn’t just customize a toy — you honored an icon. Every time you glance at your Batman, remember the focus you brought to that first seam, the patience in that final wash, the quiet pride in choosing authenticity over ease. That’s the real superpower. Now go hang up your utility belt — and start planning your next hero. 🦇


