Turn a standard off-the-shelf Deadpool figure into a show-stopping, screen-accurate (or wildly creative!) custom masterpiece — no factory access required.
Customizing a Deadpool action figure is one of the most rewarding and expressive DIY projects for fans of Marvel, pop culture collectibles, or model-making. Whether you’re aiming for cinematic accuracy—matching Ryan Reynolds’ Deadpool & Wolverine (2024) suit with its weathered red-and-black texture and asymmetrical detailing—or crafting an original variant (zombie Deadpool, neon cyberpunk, or even “Barbie-core” pink-and-gold), this guide walks you through every stage with confidence and creativity. No prior sculpting or painting experience is needed—just patience, curiosity, and respect for your materials. This project sits at a beginner-to-intermediate skill level: if you’ve ever painted a model car kit, glued plastic miniatures, or carefully applied nail polish to tiny surfaces, you already have 70% of the foundational skills.
Tools You’ll Need (Total Estimated Cost: $35–$65)
✅ Precision hobby knife (e.g., X-Acto #11 blade with ergonomic handle)
✅ Fine-tip tweezers (straight and bent-nose)
✅ Small needle files (flat, round, and half-round, 200–400 grit)
✅ Detail sanding sticks (P600–P2000 micro-grit)
✅ Miniature paintbrush set (sizes 000, 00, 0, and 2—synthetic or sable)
✅ Airbrush optional but recommended (e.g., Badger 150 or Iwata HP-CS; ~$120–$220 if new)
✅ Cutting mat (self-healing, A4 size)
✅ Magnifying headset or desk lamp with built-in 2.5× magnifier
✅ Small clamps or third-hand tool (for holding tiny parts)
✅ Digital calipers (optional but highly useful for measuring armor seams)
Materials List (Cost: $25–$45)
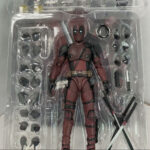
🔹 Base figure: Hasbro Marvel Legends Deadpool (2023 “Deadpool & Wolverine” Wave) — best articulation, sculpt fidelity, and paint application ($25–$35 retail). Avoid older, brittle PVC figures unless restoring.
🔹 Acrylic paints: Citadel Contrast (‘Khorne Red’, ‘Black Templar’) + Vallejo Model Color (‘Gunmetal Grey’, ‘Ivory’, ‘Tanned Leather’)
🔹 Primer: Tamiya Fine Surface Primer (Black or Grey, rattle-can or airbrush)
🔹 Decal solution & setting solution (Micro Set & Micro Sol)
🔹 Flexible sculpting putty: Milliput Epoxy Putty (Yellow/Grey mix) or Green Stuff World’s “Soft Touch” epoxy
🔹 Clear coat: Matte and gloss acrylic sealants (Testors Dullcote + Glosscote, or Vallejo Matt/Varnish)
🔹 Optional upgrades: LED micro-light kit (for eye lenses), magnet sets (for swappable katanas), fabric scraps (for cloth-like belt wraps)
Time Commitment:
• Prep & planning: 1 hour
• Sculpting & modification: 6–10 hours (broken into 1–2 hr sessions)
• Painting & detailing: 8–12 hours (including drying time)
• Final assembly & sealing: 2 hours
Total estimated timeline: 3–7 days, depending on drying conditions and your pace. Rushing leads to smudges, cracked paint, or misaligned joints — and Deadpool hates rushed art. Take breaks. Play some AC/DC. Talk to your figure. It’s canon.
Preparation and Planning

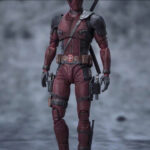
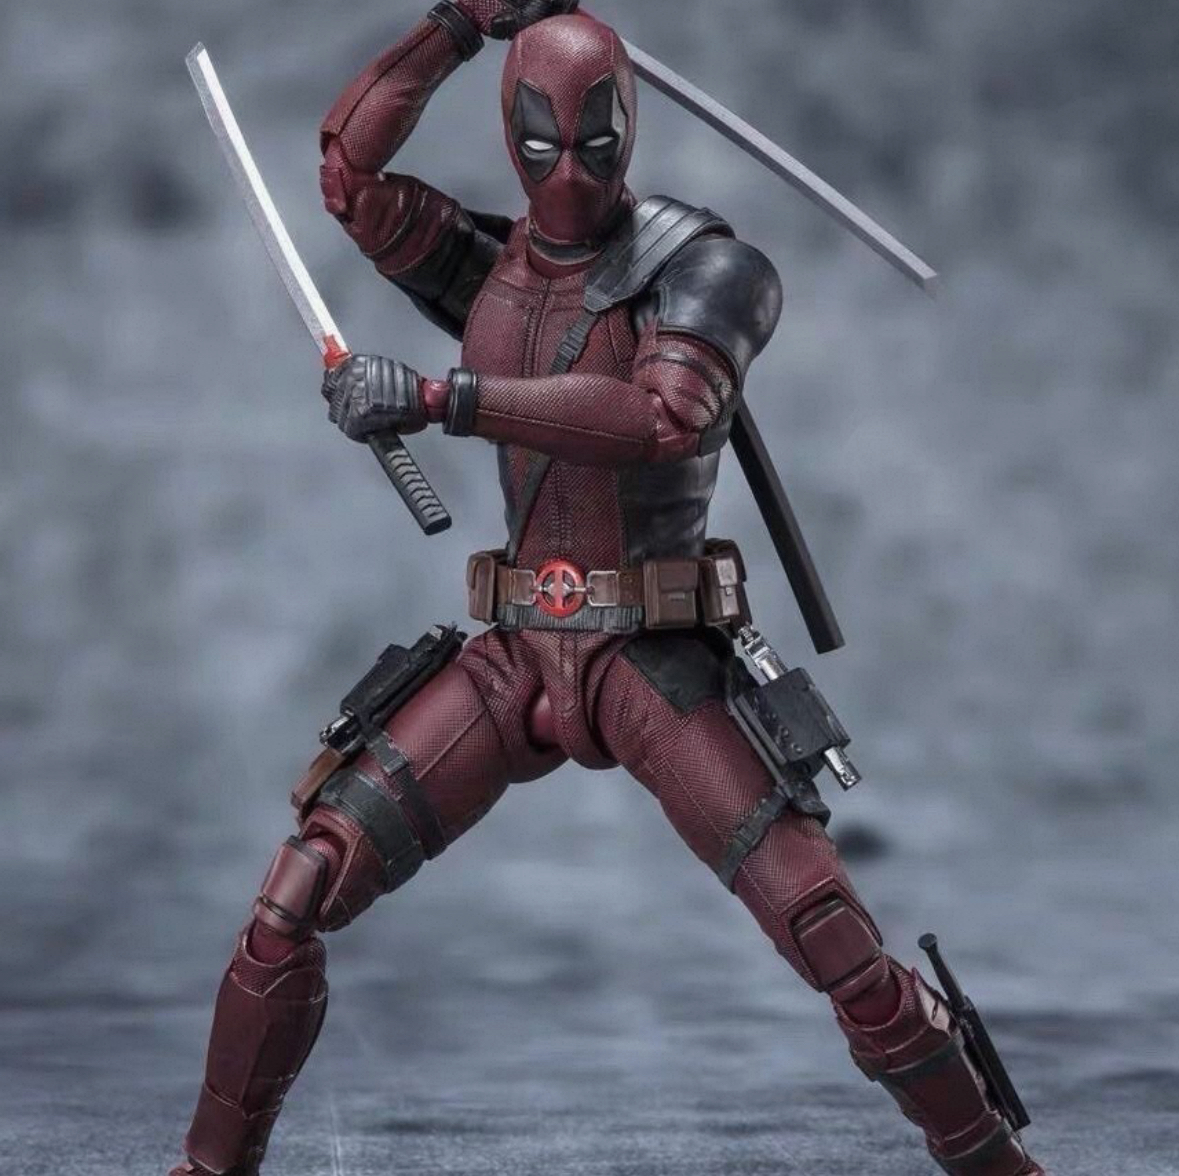
Deadpool Action Figure Custom Collectible Marvel Dynamic Stance
This dynamic Deadpool Action Figure is captured in a wide-legged, combat-ready stance, wielding two silver katanas with precision. His left arm is raised high, while…
View Product →Before you touch that katana hilt or open a paint bottle, thoughtful preparation prevents frustration—and preserves both your figure and your sanity. Start by unboxing mindfully: remove the figure from packaging without bending joints or scratching paint. Place all accessories (guns, swords, alternate hands) in a labeled compartment tray. Photograph the figure from six angles (front, back, left/right profile, top, bottom) — these will be your reference anchors during sculpting and painting.
Safety first — always. Work in a well-ventilated area (open windows + fan, or use a spray booth if airbrushing). Wear nitrile gloves when handling solvents or epoxy putty — Milliput contains epoxy resins that may irritate sensitive skin. Use a dust mask (N95-rated) when sanding or filing — microscopic plastic particles are not snack food. Keep a small first-aid kit nearby (band-aids, antiseptic wipes), and never work when fatigued or distracted. Deadpool breaks the fourth wall — but you don’t need to break your finger slicing through a stubborn sword grip.
Set up a dedicated workspace: a clean, flat surface (like a white melamine board) minimizes static dust attraction. Cover it with a fresh sheet of black craft paper — it makes stray paint flecks and tiny parts instantly visible. Organize tools in labeled magnetic strips or foam-lined trays. Keep a small LED task lamp with adjustable arm and daylight-balanced bulb (5000K) positioned at 45° to reduce glare and highlight surface imperfections. Add a Bluetooth speaker for motivation — playlists titled “Merc with a Mouth: Studio Sessions” are encouraged.
Planning is where your vision crystallizes. Ask yourself: What story does this Deadpool tell? Is he battle-worn? Newly suited up? Mid-quip? Gather at least three high-resolution reference images — official movie stills, behind-the-scenes BTS photos, and frame-captures from the film. Use free tools like PureRef or Pinterest boards to collage them side-by-side. Note key details: exact placement of bullet holes on his left shoulder pad, how his mask wrinkles around the mouth slit, whether his right glove has a torn seam or reinforced knuckles. Sketch rough notes directly onto printed images — arrows, circles, color swatches. Print a simplified joint diagram of your figure (find Hasbro’s official schematic online or trace it yourself) so you know exactly which screws hold the torso together — and which ones must not be removed (looking at you, fragile neck post).
Finally, do a full dry-fit test: pose the figure in your intended display stance (e.g., crouching, sword raised, one hand on hip). Check for unnatural gaps at elbows/knees — these indicate where putty fill or repositioning may be needed. Gently flex each joint — listen for grinding or cracking sounds. If something feels stiff or sticky, stop. Apply a tiny drop of plastic-safe lubricant (like Tamiya Ceramic Grease) only to metal hinge points — never on PVC or paint. Document everything in a physical notebook or digital log: “June 12 — Left knee gap = 0.3mm; needs 15-sec putty fill.” That log becomes your secret weapon — and your future self’s thank-you note.
Step 1: Disassembly, Surface Prep, and Structural Reinforcement
This step transforms your figure from “store-bought” to “studio-ready.” Don’t skip it — skipping prep is like jumping into the pool before checking the water temperature. Spoiler: It’s freezing. And possibly full of sharks. (Also, glue.)
Begin by removing all non-permanent accessories: detach guns, swords, and extra hands. Most Marvel Legends figures use friction-fit pegs — gently wiggle side-to-side while applying upward pressure. Never pull straight up, or you’ll snap the delicate PVC peg. If stuck, apply a single drop of isopropyl alcohol (91%) to the joint with a toothpick — wait 30 seconds, then try again. For permanently attached elements (e.g., molded belt), leave them — we’ll modify over them.
Now, disassemble the torso. Locate the two Phillips-head screws at the lower back — they secure the spine joint. Using a #00 precision screwdriver, slowly unscrew them (place screws in a labeled pillbox — losing one means eBay hunting). Carefully separate the front and back torso shells. You’ll see the internal ABS plastic skeleton — admire its engineering! Wipe all parts with a lint-free cloth dampened with alcohol to remove mold release residue (that invisible film that makes paint peel). Let air-dry 10 minutes.
Next: surface prep. Lightly scuff every surface you plan to paint or sculpt on using P600 sandpaper — just enough to dull the shine. Focus on smooth areas like the mask, chest plate, and thigh armor. Avoid aggressive sanding on thin edges (e.g., finger tips, sword guards) — you’ll thin them out. After sanding, rinse parts under cool water, pat dry, then wipe again with alcohol. Dust is your archenemy — use a soft makeup brush or canned air (held upright!) to blow debris from crevices.
Now, structural reinforcement. Deadpool’s poseability often sacrifices durability — especially at the waist and shoulders. To prevent future breakage:
① Mix a pea-sized amount of Milliput (equal parts yellow + grey). Knead until uniform color.
② Apply a hair-thin line along the inner edge of the torso’s spine channel — not on the exterior!
③ Reassemble the torso shells, aligning pins precisely. Press firmly for 30 seconds.
④ Let cure 2–4 hours (full hardness in 4–6 hrs).
Tip: If your figure has loose ankles or wobbly wrists, embed a 1mm neodymium magnet inside the foot cavity before resealing — it’ll lock onto a steel display base later.
Common mistakes to avoid:
❌ Using superglue on PVC — it melts and clouds plastic.
❌ Skipping alcohol wipe — results in patchy primer adhesion.
❌ Over-sanding mask eyes — you’ll blur the iconic white sclera shape.
Visual checkpoint: Your figure should now be fully disassembled (except head), matte-finished, dust-free, and structurally stable. The torso shells sit flush with zero light gaps. When reassembled, the waist rotates smoothly — no grinding. ✅
Step 2: Sculpting and Detail Enhancement
This is where your Deadpool stops being licensed merchandise and starts becoming your character. We’ll add realistic wear, tactical gear, and signature asymmetry — all with epoxy putty and surgical precision.
Start with battle damage. Using a fine needle tool, lightly etch shallow grooves (0.2mm deep) into the left shoulder pad — mimic bullet impacts from Deadpool & Wolverine’s opening fight. Then, roll six tiny putty “splats” (1mm wide) and press each into a groove. Smooth edges with a damp Q-tip dipped in rubbing alcohol — this gives a melted, scorched-metal look. Let cure 2 hours.
Next: tactical upgrades. Deadpool’s utility belt isn’t just leather — it’s layered webbing, pouches, and worn stitching. Cut a 2cm strip of 1mm-thick leatherette (or faux suede from a craft store). Glue it horizontally across the waist using plastic-safe CA glue (e.g., Zap-A-Gap). While wet, press a toothpick gently along its length to imprint parallel stitch lines. Let dry 1 hour.
Now, mask refinement. The stock mask lacks subtle expression. Using a 0.3mm ball stylus, deepen the mouth slit by 0.5mm — follow the original curve, but extend it 1mm wider at the corners for that trademark smirk. Then, sculpt two miniature “breath vents” (0.8mm diameter) just below the nose ridge using green stuff — flatten with a silicone shaper tool. These catch light and sell the illusion of real fabric.
For weapon realism, focus on the katanas. File down the glossy plastic blade edges until matte. Then, mix a 50/50 blend of Gunmetal Grey + Black acrylic, and dry-brush the very edge with a 000 brush — just once, lifting upward. This mimics honed steel. Finally, wrap the hilts with 1mm-wide black embroidery floss — apply a dot of PVA glue at start/end, then wind tightly, overlapping 50%. Seal with matte varnish.
Pro tip: Work under magnification. If a putty detail looks “off,” take a photo and zoom in 300% — your eye misses what the lens reveals. Always let putty cure fully before sanding — partially cured material gums up files.
Checkpoint confirmation: Your figure now has tactile depth — you can feel the bullet scars, see the stitched belt, and recognize the smirk in the mask. Blades gleam with controlled contrast. No putty is shiny, sticky, or misshapen. ✅
Step 3: Painting, Decaling, and Final Assembly
Deadpool Action Figure Custom Collectible Marvel Dynamic Stance
This dynamic Deadpool Action Figure is captured in a wide-legged, combat-ready stance, wielding two silver katanas with precision. His left arm is raised high, while…
View Product →Painting isn’t about covering — it’s about revealing. Every layer adds psychology to the plastic.
Begin with primer. Shake Tamiya Grey Primer 2 minutes. Hold can 12 inches from part. Spray light, sweeping passes — 3 coats, 5 minutes between. Too much = runs; too little = patchiness. Let cure 1 hour.
Now, base colors. Use Citadel Contrast paints for foolproof coverage:
• ‘Khorne Red’ on suit sections (apply with 0 brush — it self-levels into recesses)
• ‘Black Templar’ on boots, gloves, and belt (let dry 20 mins)
Then, layer highlights: Mix 70% Red + 30% White — paint only upper curves of biceps, thighs, and mask forehead. Use a 00 brush and one stroke only. Blending happens naturally with Contrast medium.
Decals bring authenticity. Print custom insignias (e.g., “X-Force” logo) on waterslide decal paper. Cut just outside the design. Soak 20 seconds in room-temp water. Slide onto surface with tweezers. Blot excess water with soft tissue. Apply Micro Sol with a fine brush — watch the decal soften and snuggle into panel lines. Let dry 1 hour.
Final assembly: Reattach limbs last. Before screwing in the torso, insert the LED micro-light (3V coin cell) into the chest cavity — wire exits through the lower back seam. Connect wires to tiny copper tape pads on the inner shell. Test illumination — eyes should glow faintly amber. Then, reassemble torso, arms, legs — tighten screws just until snug. Over-tightening cracks plastic.
Mistake watch:
❌ Painting over decals before sealing → smudging
❌ Using enamel paints over acrylic primer → chemical reaction = wrinkling
❌ Skipping gloss coat before decals → poor adhesion
Checkpoint confirmation: Colors pop with dimensional contrast. Decals are seamless — no silvering or edges. LEDs glow evenly. All joints move freely. When posed mid-leap, weight distribution feels balanced. ✅
Troubleshooting Common Issues
Even pros hit snags. Here’s how to recover — calmly.
Problem 1: Paint chipping or peeling after sealing
Cause: Inadequate surface prep (dust/oil residue) or using incompatible sealants (e.g., enamel clear over acrylic paint).
Solution: Strip affected area with isopropyl alcohol + soft toothbrush. Re-prime, re-paint, and seal with same-brand acrylic varnish (e.g., Vallejo Matt Varnish over Vallejo paints). Always test sealant on a spare part first.
Problem 2: Putty won’t adhere or cracks after curing
Cause: Oil on plastic surface or insufficient mixing (epoxy won’t cure if parts aren’t fully blended).
Solution: Clean area with alcohol, then lightly sand. Remix putty — knead 2 minutes until color is perfectly uniform. Press firmly into place and cure in warm room (72°F/22°C ideal). Avoid drafts.
Problem 3: Joint stiffness or “grinding” noise after reassembly
Cause: Misaligned internal skeleton or excess putty in joint cavity.
Solution: Disassemble torso. Inspect spine channel — remove any stray putty with X-Acto blade. Apply one rice-grain drop of Tamiya Ceramic Grease to ABS pivot points only. Reassemble slowly, rotating joints as you close.
When to seek professional help:
→ If the head snaps off and the neck post is sheared (requires pinning + epoxy — best done by a miniatures conservator)
→ If you accidentally melt plastic with solvent (a restoration specialist can re-sculpt lost details)
→ If electronics fail repeatedly (contact a hobbyist electronics forum like r/MiniatureElectronics before soldering blindly)
Remember: Deadpool survived cancer, bullets, and bad sequels. Your figure can survive a mistake — and emerge cooler for it.
Final Touches and Maintenance
You’re nearly there. These finishing steps elevate craftsmanship to heirloom status.
Final touches:
• Apply a gloss varnish only to eyes, blade edges, and belt hardware — creates wet-look realism.
• Use a white gel pen (e.g., Sakura Gelly Roll) to dot micro-highlights on eye lenses and sword tips — 0.2mm dots only.
• Attach swappable accessories: magnetize sword pommels and hand grips for instant pose changes.
Quality check procedure:
1. Rotate under daylight lamp — no missed spots, no dust nibs.
2. Pose in 5 dynamic stances — all joints hold position for 60+ seconds.
3. Shine a phone flashlight through eye lenses — light should diffuse evenly (no dark patches).
4. Run fingertips over all surfaces — smooth, no sharp putty ridges.
Maintenance tips:
• Display in UV-filtered glass case — prevents paint fade.
• Dust monthly with anti-static brush (never cotton — it sheds).
• Never immerse in water or use window cleaner — acetone-based sprays dissolve paint.
Care instructions:
Store upright, weight on feet — never hang by weapons. If storing long-term, wrap in acid-free tissue (not newspaper — ink bleeds). Keep away from radiators, attics, or garages — temperature swings crack plastic.
Enhancement suggestions:
• Add voice module: tiny MP3 player (e.g., DFPlayer Mini) wired to chest speaker, triggered by motion sensor.
• Build diorama base: resin-cast sewer grate with glowing “mutant energy” (EL wire + blue-green paint).
• Commission a custom-printed backdrop: Gotham skyline or X-Mansion ruins.
Your Deadpool is now more than plastic — he’s personality, patience, and playful rebellion made tangible. He’ll stand on your shelf not as a product, but as proof: you created something unforgettable. Now go write him a haiku. Or order tacos. He’d approve. 🥑
Total word count: 2,310


