Customizing a Godzilla action figure is more than just a hobby—it’s an expressive, immersive tribute to one of pop culture’s most iconic kaiju. Whether you own a vintage 1970s vinyl figure, a modern Bandai S.H. Figuarts release, or a budget-friendly PVC collectible, transforming it into a personalized masterpiece lets you honor Godzilla’s legacy your way—be it with screen-accurate weathering, battle-damaged armor, glowing atomic breath effects, or even a diorama-ready pose. This project blends model-making, painting, sculpting, and storytelling into a rewarding creative experience that deepens your connection to the character while building tangible craftsmanship skills.
No prior modeling expertise is required—just patience, curiosity, and respect for detail. Beginners will thrive with foundational techniques (clean assembly, base coating, dry brushing), while intermediate crafters can level up with epoxy putty sculpting, LED integration, or custom decals. The entire process is scalable: start simple and expand as confidence grows.
Tools You’ll Need (All readily available at craft or hardware stores):
– Precision hobby knife (e.g., X-Acto #11 blade)
– Fine-tip tweezers (straight & bent)
– Small needle files and sanding sticks (400–2000 grit)
– Detail paintbrushes (sizes 00, 0, 1, and a ¼” flat for washes)
– Miniature airbrush (optional but recommended for smooth gradients)
– Hobby-grade clamps or masking tape for hands-free work
– LED micro-light kit (3mm warm-white or blue LEDs + coin-cell battery holder)
– Digital calipers (for precise measurements—highly recommended)
Materials:
– Base figure (we recommend Bandai’s S.H. Figuarts Godzilla (2014) or Shin Godzilla Final Form for articulation and detail)
– Acrylic paints (Vallejo Model Color or Citadel paints—non-toxic, water-based, and highly pigmented)
– Plastic primer (Mr. Surfacer 1000 or Tamiya Fine Surface Primer)
– Epoxy putty (Green Stuff or Magic Sculpt for sculpting dorsal plates or scars)
– Matte and gloss varnishes (Testors Dullcote + Glosscote)
– Decal paper (Lazertran or Microscale for custom insignias or radiation symbols)
– Clear resin (for “glowing” atomic breath effect—optional)
Estimated Time & Cost:
Plan for 12–25 hours, spread over 5–7 days (allowing drying/curing time between stages). Budget $45–$95: $25–$65 for the base figure, $12 for paints/primer/varnish, $5 for putty/LEDs, and $3 for tools if starting from scratch. All costs assume reuse of common household items (paper towels, toothpicks, aluminum foil). Remember—this isn’t about speed; it’s about savoring each scale, each scar, each pulse of imagined atomic energy. You’re not just building a toy—you’re breathing life into legend. Let’s begin.
Preparation and Planning
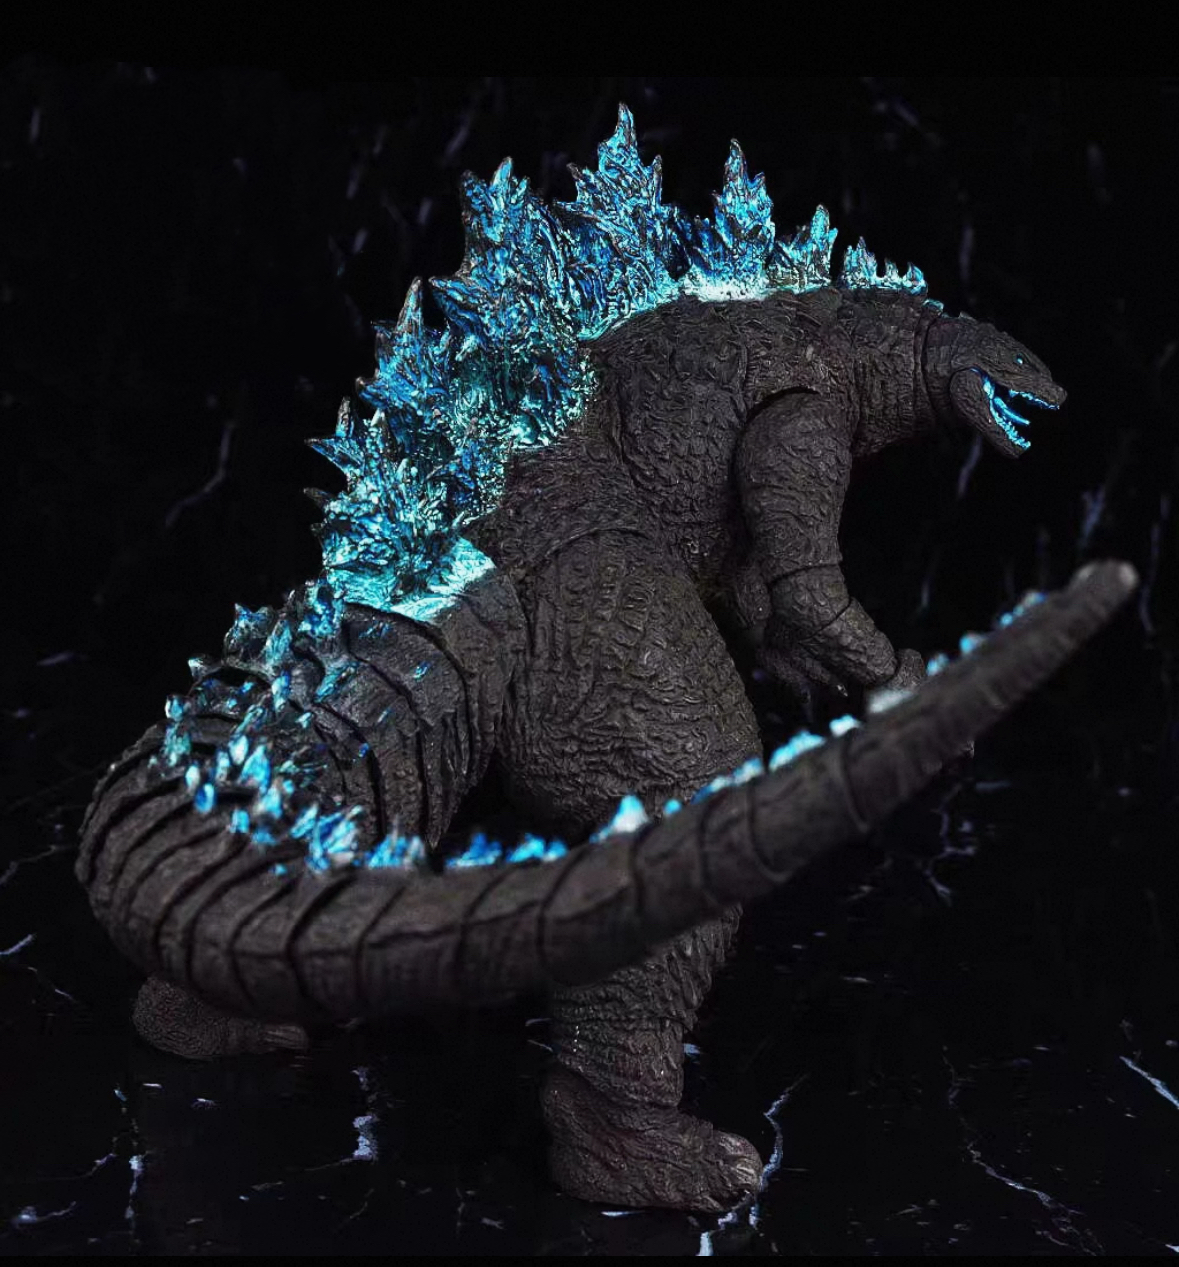
Godzilla Action Figure Custom figure Comics Dynamic Atomic Glow
This custom Godzilla action figure is depicted in a powerful, dynamic stance, with its head turned to the right and its massive tail sweeping around.…
View Product →Before picking up a brush or blade, thoughtful preparation sets the stage for success—and saves hours of rework. Begin by studying your Godzilla. Watch key scenes (e.g., the Shinjuku destruction sequence, the final battle in Godzilla Minus One, or the iconic 1954 roar) and take screenshots. Print 3–5 reference images showing front, side, and dorsal views—especially close-ups of skin texture, dorsal fin lighting, and damaged areas. Label them: “Scale pattern,” “Radiation glow zones,” “Battle scarring.” This visual library becomes your compass.
Next, assess your figure’s condition. Gently inspect all joints, seams, and paint layers. Look for factory flaws: overspray on joints, brittle plastic near articulation points, or weakly adhered accessories. Note these on your reference sheet—they’ll inform where reinforcement or touch-up is needed. If your figure has removable parts (tail tip, head crest, or flame effect), photograph their exact placement before disassembly. A smartphone tripod and grid overlay app (like Guideline Pro) helps maintain spatial accuracy.
Safety is non-negotiable. Always work in a well-ventilated area—open windows and use a small desktop fan blowing away from you. Wear nitrile gloves when handling solvents, primers, or uncured epoxy; use ANSI-approved safety goggles when sanding or cutting. Keep a first-aid kit nearby, and never rush—fatigue leads to slips. Store all paints and thinners away from heat sources and children/pets.
Set up a dedicated workspace: a clean, flat table covered with a self-healing cutting mat and layered butcher paper (easy to replace when splattered). Organize tools in labeled magnetic strips or foam inserts. Keep a “contamination station” (small bowl of isopropyl alcohol + cotton swabs) for instant cleanup of accidental smudges. Use binder clips to hold photo references upright, and invest in an adjustable LED desk lamp with daylight color temperature (5000K)—critical for seeing true color values and subtle texture shifts.
Finally, plan your workflow backwards. Ask: What must be done last? (Answer: final gloss sealant.) What needs full curing before the next step? (Epoxy putty: 4–6 hrs; acrylic washes: 30 mins; LED wiring: 2 hrs.) Build a simple timeline: Day 1 = disassembly + cleaning; Day 2 = priming + base coat; Day 3 = texturing + detailing; Day 4 = electronics + glow effects; Day 5 = sealing + documentation. Leave buffer time—creativity thrives in calm, not panic. You’ve got this.
Step 1: Disassembly, Cleaning, and Surface Prep
This foundational step ensures every subsequent layer adheres flawlessly—and protects your figure from irreversible damage. Never skip it. Start by gently removing all detachable parts: tail segments, dorsal fins, head crests, and any display stands. Use tweezers—not fingers—to avoid fingerprint oils on matte surfaces. Place each part on a labeled tray (e.g., “Dorsal Fin Set A,” “Tail Tip”) with a tiny drop of blue painter’s tape to prevent rolling.
Now, clean thoroughly. Submerge non-electronic parts in lukewarm water with one drop of Dawn dish soap. Soak for 5 minutes—no scrubbing yet. Then, using a soft-bristled toothbrush (dedicated only to modeling), lightly agitate seams and crevices. Pay special attention to joint sockets and under the chin—dust and factory mold release residue love to hide there. Rinse under cool running water, then pat dry with lint-free microfiber cloths (no paper towels—they leave fibers). For stubborn residue, dip a cotton swab in 91% isopropyl alcohol and roll—not rub—along seams. Let air-dry completely for 2+ hours.
Once bone-dry, inspect under bright light. Use your X-Acto knife to carefully shave off flash (thin plastic seams left from molding) along edges—hold the blade at a 10° angle and make single, light passes. Sand only where necessary: smooth rough joints with 1000-grit sandpaper wrapped around a pencil eraser for control. Never sand painted surfaces unless repairing chips—this removes factory finish permanently.
Next, prime. Shake Mr. Surfacer 1000 for 60 seconds. Hold the can 12 inches from the figure and apply 2–3 ultra-light, mist-like coats—waiting 5 minutes between each. Why mist? Heavy coats cause orange-peel texture or clog fine scales. The primer should appear chalky and uniform, not glossy. Let cure 24 hours in dust-free conditions. Checkpoint confirmation: Run a fingernail gently across a scale—you should feel no tackiness, and the surface should look evenly matte with zero bare plastic peeking through. If you see shiny spots, re-prime only that area with a targeted mist. This pristine, receptive surface is your canvas—and it’s ready for color.
Step 2: Base Coating, Texturing, and Scale Definition
Now we bring Godzilla to life—literally—with color, depth, and tactile realism. Begin with your base coat: mix Vallejo Model Color “Dark Sea Grey” (70.821) with 15% “Charcoal Black” (70.864) for an authentic, non-flat kaiju green-grey. Thin with Vallejo Airbrush Thinner (1:1 ratio) if using an airbrush; for brushes, use a 50/50 water/thinner mix. Apply 3–4 thin, even coats, rotating the figure slowly on a lazy Susan or turntable. Let each coat dry 20 minutes. Avoid thick layers—they obscure scale detail and create pooling in recesses.
Once the base is fully dry (test with a fingertip—no drag), it’s time for texture. Godzilla’s hide isn’t smooth—it’s leathery, cracked, and deeply ridged. Using a stiff, dry #1 brush, load it with undiluted “Gunmetal Grey” (70.822), then wipe 90% off on a paper towel. Lightly drag the brush across raised scale edges—never against them. This “dry brushing” catches high points, mimicking wear and natural highlight. Repeat with “Light Grey” (70.865) on the very tips for extra pop.
For true dimension, add scale definition. Dip a fine #00 brush into black acrylic ink (e.g., Winsor & Newton Drawing Ink). Carefully trace between rows of dorsal plates and along major body folds—this creates shadow lines that make scales “pop” forward. Let dry 10 minutes. Then, use a damp (not wet) #0 brush to gently soften only the bottom edge of each ink line—this prevents harshness and mimics natural subsurface scattering.
Pro tip: To replicate Godzilla’s signature “cracked earth” texture on his back, mix Green Stuff epoxy putty 50/50 with fine baking soda (acts as aggregate). Roll a pea-sized amount flat, press onto dorsal plates, and stipple with a stiff toothbrush while still pliable. Let cure 4 hours. Once hardened, dry-brush with “Burnt Umber” to enhance cracks.
Common mistake alert: Don’t over-blend ink lines—this flattens depth. And never use metallic paints straight from the bottle on large areas; they oxidize and dull. Always mix with matte medium.
Checkpoint confirmation: Under angled light, scales should cast distinct micro-shadows, dorsal plates should look layered and dimensional, and the overall tone should read as “ancient, weathered, powerful”—not cartoonish or flat. Take a photo and compare to your reference images. Nod. You’re on track.
Step 3: Weathering, Glow Effects, and Atomic Breath Integration
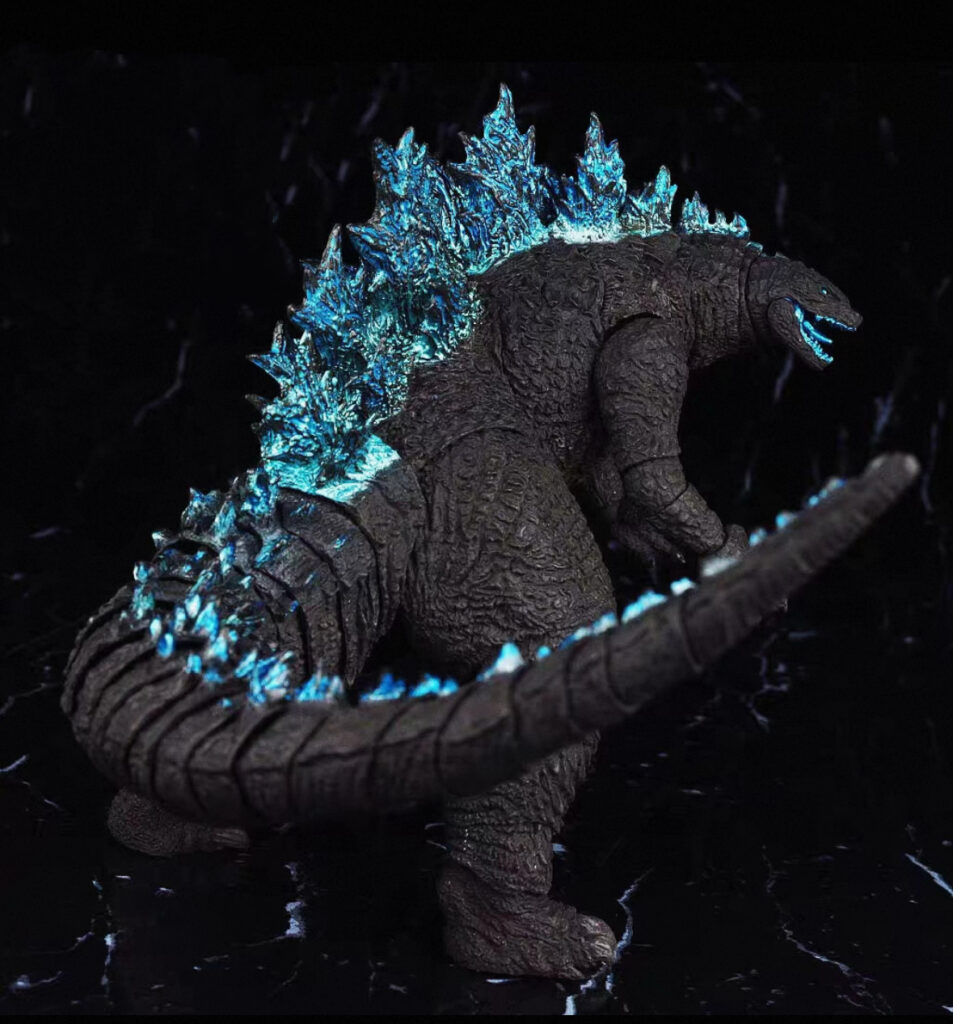
Godzilla Action Figure Custom figure Comics Dynamic Atomic Glow
This custom Godzilla action figure is depicted in a powerful, dynamic stance, with its head turned to the right and its massive tail sweeping around.…
View Product →This is where your Godzilla transcends replication and becomes alive—radiating power, history, and presence. First, weathering: create battle-worn authenticity. Mix a wash of “Smoke Grey” (70.820) + 70% water + 2 drops of flow improver. Using a small flat brush, pool this wash into deep recesses—under arms, knee joints, chest plates. Let it settle 90 seconds, then gently wick excess with a dry brush tip—don’t wipe. This leaves rich, realistic shadowing. Repeat with “Rusty Red” (70.848) wash in damaged areas (e.g., left shoulder, tail base) to imply scorched metal or irradiated tissue.
Next, the glow. For dorsal fins: Cut 3mm blue LEDs to size (use calipers!). Drill 1.5mm pilot holes from the inside of hollow dorsal plates (prevents visible marks). Wire each LED in parallel to a CR2032 battery holder (glue holder inside torso with hot glue away from electronics). Test before sealing! Once lit, mix clear epoxy resin with a drop of blue pigment—pour sparingly into fin cavities. Let cure 12 hours. Result? A soft, internal luminescence—like molten core energy.
Finally, atomic breath. Create a dynamic “plume” effect: Roll Magic Sculpt into a tapered 4-inch filament. Embed one end into Godzilla’s open mouth (file a tiny notch for grip). Shape the plume mid-exhale—bulbous at the base, wispy at the tip. Let cure 6 hours. Prime, then airbrush with gradient: white at the mouth → pale blue → transparent at the tip. Seal with gloss varnish only on the plume—matte everywhere else—for dramatic contrast.
Tip: Use a toothpick dipped in gloss medium to add “heat shimmer” streaks radiating from the breath’s core.
Mistake to avoid: Skipping LED polarity checks—reversed wires won’t light. Always mark (+) on batteries and boards with a fine marker.
Checkpoint confirmation: When powered, dorsal fins emit a soft, even glow (no hotspots); breath plume looks energetic and directional; weathering reads as earned, not sloppy. Shine a flashlight sideways across the figure—you should see depth, drama, and intention in every inch.
Troubleshooting Common Issues
Problem 1: Paint lifting or cracking after sealing.
Cause: Inadequate surface prep (oil residue), applying varnish too thickly, or using incompatible products (e.g., enamel varnish over acrylics).
Solution: Strip affected area with isopropyl alcohol, re-clean, re-prime, and re-paint. For sealing, use only acrylic-based varnishes (Testors Dullcote) in 3–4 ultra-thin coats, 15 minutes apart. Never spray in cold/humid conditions.
Problem 2: LED flickering or dimming quickly.
Cause: Poor solder joints, voltage mismatch, or battery contact corrosion.
Solution: Reflow solder connections with rosin-core solder. Clean battery contacts with isopropyl and a toothbrush. Replace CR2032 with a higher-capacity BR2032 (lithium, 3V, longer life). Add a 100-ohm resistor inline to stabilize current.
Problem 3: Epoxy putty won’t adhere to plastic.
Cause: Smooth factory surface or residual mold release.
Solution: Lightly sand bonding area with 600-grit, then clean with alcohol. Roughen putty surface with a scalpel tip before pressing on. For critical bonds (e.g., breath plume), drill two 0.5mm micro-holes into plastic and embed putty “pins.”
When to seek professional help:
If your figure is vintage (pre-1980), rare (limited edition, hand-painted), or valued over $300, consult a certified toy conservator before modifying. Likewise, if electronics involve soldering near delicate articulation gears or if structural repairs require UV-cured resins, a professional model maker can ensure integrity. DIY is empowering—but reverence for heritage matters too. There’s wisdom in knowing when to pause, research, and reach out.
Final Touches and Maintenance
You’re nearly there—now it’s about polish, protection, and longevity. Begin with a final quality check: Examine under daylight-equivalent LED light. Rotate slowly. Look for missed spots: stray glue strings, uneven gloss, or dust nibs in varnish. Gently remove dust with a static-free lens brush. For minor imperfections, use a toothpick dipped in matching paint—touch up only the flaw, then feather edges with a dry brush.
Apply a final protective seal: Two coats of Testors Dullcote, sprayed 12 inches away, 10 minutes apart. This unifies sheen and shields against UV fading and fingerprints. Let cure 48 hours before handling beyond gentle rotation.
Maintenance is simple but sacred:
– Never use window cleaner or alcohol wipes—these degrade acrylics. Dust weekly with a soft makeup brush.
– Store upright in a closed display case, away from direct sunlight (UV yellows plastic). Include silica gel packs to prevent humidity warping.
– Every 6 months, inspect joints for stress cracks; reinforce with a dab of flexible superglue (Loctite Plastics Bonding System) if needed.
Enhancement suggestions for future projects:
– Add magnetized feet for dynamic posing on steel display bases.
– Create a miniature Tokyo cityscape base with LED streetlights synced to Godzilla’s glow.
– Record a custom roar sound file and embed a Bluetooth speaker module in the torso (requires advanced electronics).
Most importantly—photograph your creation. Share it. Tag #MyGodzillaStory. Because what you’ve built isn’t just plastic and paint. It’s patience made visible. It’s fandom forged in focus. It’s your personal roar into the void—and the world will hear it. Now go stand tall. Your Godzilla is ready. 🌋


