
Customizing a Venom action figure is an exciting, expressive, and deeply satisfying project that bridges pop culture fandom with hands-on craftsmanship. Whether you’re aiming to recreate the sleek, terrifying look of Spider-Man 3’s symbiote, channel the monstrous grandeur of Venom: Let There Be Carnage, or design your own original “Nightmare Symbiote” variant, this guide walks you through transforming an off-the-shelf figure into a dynamic, museum-worthy display piece. No prior sculpting or painting experience is required—but curiosity, patience, and attention to detail are your best tools. This project is rated beginner-to-intermediate, meaning it’s accessible to first-time customizers while offering room for growth in technique and artistry. With clear guidance and safety-conscious practices, even those new to hobby modeling can achieve professional-looking results.
Here’s what you’ll need:
Tools: X-Acto #11 blade (with spare blades), fine-tip tweezers (straight & bent-nose), hobby-grade clamps or helping hands, small flat and round paintbrushes (sizes 0, 1, and 2), soft-bristled detail brush (for dry brushing), toothpicks and wooden skewers, mini sanding sticks (400–2000 grit), microfiber cloths, magnifying lamp or visor (highly recommended), and a well-ventilated workspace fan.
Materials: A base Venom figure (we recommend the Hasbro Marvel Legends “Symbiote Spider-Man” or NECA’s 7-inch Venom—both have good articulation and clean mold lines), liquid plastic cement (e.g., Tenax-7R or Plastruct Plastic Weld), acrylic paints (Molotow ONE4ALL, Citadel, or Vallejo Model Color), matte black and deep charcoal airbrush paint (optional but transformative), flexible epoxy putty (Green Stuff or Magic Sculpt), black flocking powder or ultra-fine black velvet flock, gloss and matte sealants (Krylon Matte Finish and Testors Dullcote), and high-strength clear adhesive (Loctite Ultra Gel Control for delicate parts).
Estimated time: 18–25 hours, broken across 5–7 sessions (allowing proper drying/curing time). Cost ranges from $45–$95, depending on whether you already own basic modeling supplies. Most expenses go toward quality paints, sealants, and putty—skimping here compromises durability and realism. Remember: customization is iterative, not rushed. Take breaks, admire progress, and celebrate small wins—like perfectly blending that first layer of oozy texture. You’re not just building a toy—you’re co-creating a legend.
Preparation and Planning
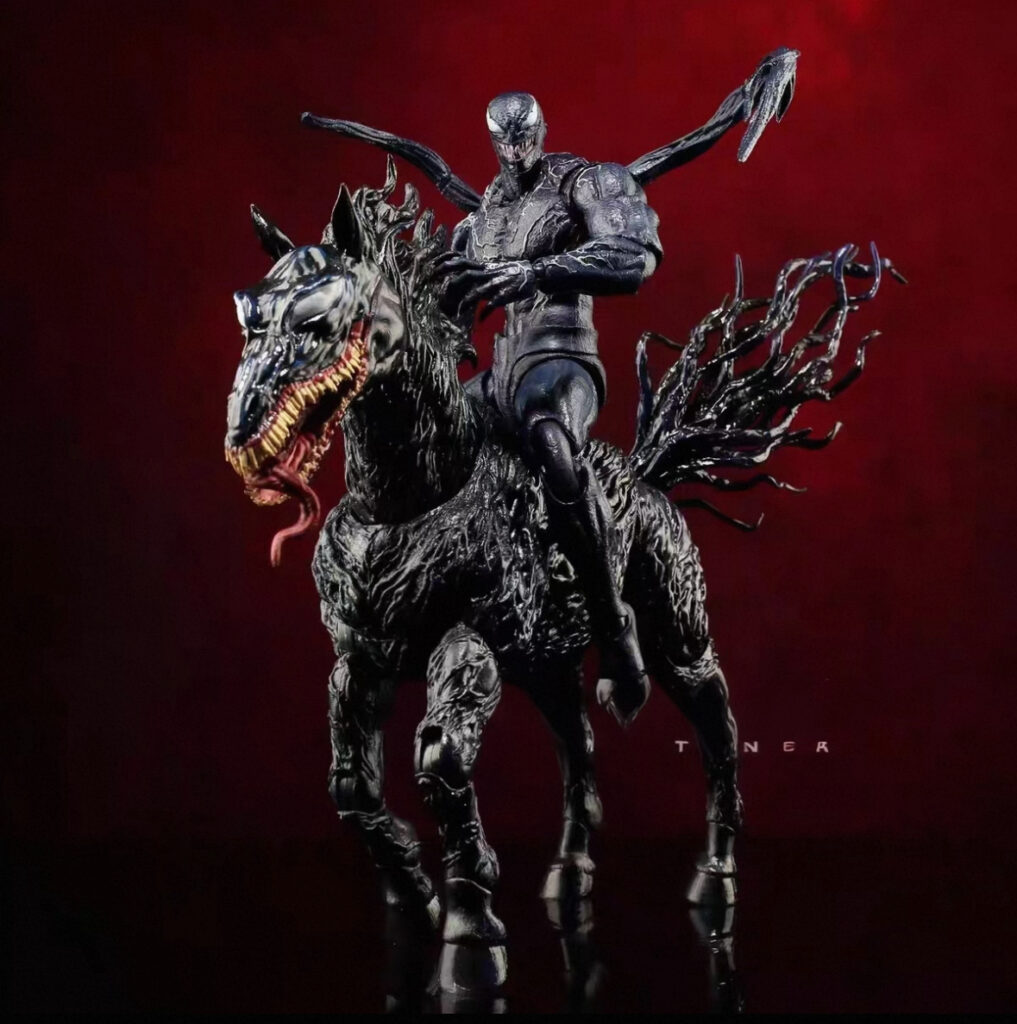

Venom Action Figure Custom Statue Marvel Riding
Venom is mounted on a symbiote horse, galloping forward with one arm raised and claws extended. The horse has a skeletal face with yellow fangs…
View Product →Before touching your figure, thoughtful preparation sets the foundation for success—and prevents frustration later. Start by selecting your reference source: high-resolution screenshots, official concept art, or frame-by-frame stills from films or animated series. Create a simple mood board (digital or printed) showing Venom’s pose, lighting, texture, and signature details—especially the iconic white spider emblem, jagged teeth, and glossy-black “wet” sheen. Print or sketch three key angles (front, ¾ profile, and back) and annotate where modifications will occur: enlarged jaw, added musculature, repositioned tendrils, or reshaped shoulder mass. This visual roadmap keeps you focused and minimizes guesswork.
Safety is non-negotiable. Always work in a well-ventilated area, preferably near an open window with cross-ventilation or using a fume extractor. Wear nitrile gloves when handling solvents, adhesives, or uncured epoxy; use ANSI-approved safety goggles when cutting, sanding, or airbrushing. Keep a first-aid kit nearby, and never eat or drink at your workspace. Store all chemicals upright, labeled, and out of children’s or pets’ reach. If you have respiratory sensitivities, invest in a N95 respirator mask—even brief exposure to fine plastic dust or acrylic mist can irritate airways.
Your workspace should be clean, stable, and organized. Cover your surface with a self-healing cutting mat and a disposable paper protector (like butcher paper) to catch debris and paint flecks. Use small labeled containers (e.g., mint tins or plastic organizers) for screws, joints, and tiny parts—losing a single ankle peg mid-project is heartbreaking! Keep a notebook or digital log to record paint mixes (“Charcoal + 10% Blue + Gloss Medium = Deep Abyss Black”), drying times, and observations (“Tendril arm softened too much at joint—next time reinforce with wire armature”). Finally, mentally commit to process over perfection. Mistakes aren’t failures—they’re data points. A slightly uneven sculpt? That’s character. A smudge in the eye? It’s Venom’s glare. Breathe, pause, and return with fresh eyes. You’ve got this.
Step 1: Disassembly, Cleaning, and Structural Reinforcement
Begin by fully disassembling your Venom figure—not just removing limbs, but carefully separating every joint: shoulders, elbows, wrists, hips, knees, ankles, and even the head if it’s a ball-joint or pegged assembly. Use gentle heat (a hairdryer on low, held 6 inches away for 10–15 seconds) to loosen stubborn PVC joints—never force them. Place each part in warm, soapy water for 5 minutes, then scrub gently with a soft toothbrush to remove factory-applied mold release residue (a waxy film that repels paint). Rinse thoroughly and air-dry overnight on a lint-free towel.
Now inspect for weak points. Venom figures often suffer from floppy knees, sagging shoulders, or brittle neck posts. Identify any cracks, stress lines, or loose pegs—these must be reinforced before customization. For knee/hip joints: drill a tiny 0.8mm pilot hole (using a pin vise, not a power drill) through both sides of the joint housing, then insert a brass rod or stainless-steel paperclip segment (cut to 3mm length) as a pivot pin. Secure with a tiny drop of plastic cement—just enough to bond the rod, not flood the joint. For fragile neck posts: wrap the base with two thin layers of stretched Tamiya masking tape, then apply a bead of flexible epoxy around the seam. Let cure 24 hours.
Next, prepare surfaces for sculpting. Lightly sand all areas receiving putty—especially the chest, back, arms, and jaw—with 400-grit sandpaper in circular motions. Wipe away dust with a tack cloth or damp Q-tip. Now, mix Green Stuff (1:1 ratio of blue and yellow components) and knead until uniform gray. Roll into thin ropes and press firmly onto target zones: widen the jawline downward and outward (adding ~3mm depth), build up pectoral mass in smooth, organic curves (avoiding sharp edges), and thicken the upper back to suggest hunched, predatory posture. Use a dampened toothpick to blend seams seamlessly—don’t overwork; slight texture mimics symbiote “living flesh.” Let cure 4–6 hours.
✅ Checkpoint confirmation: Hold the figure under bright light. All sculpted areas should feel solid (no tackiness), blend smoothly into original plastic with no visible gaps or ridges, and retain full articulation—arms should lift overhead, knees bend to 90°, and the jaw should open/close without resistance. If any joint binds, lightly sand the interference point only. You’re now ready for texturing—the soul of Venom’s visceral presence.
Step 2: Texturing, Detailing, and the Signature Spider Emblem
Venom isn’t just black—he’s alive: slick, undulating, and unnervingly wet. Achieving this requires layered texturing—not just paint, but physical dimension. Begin by applying a thin coat of diluted PVA glue (1 part glue to 3 parts water) to sculpted areas using a soft brush. While still tacky, sprinkle ultra-fine black velvet flock lightly over the chest, shoulders, and upper arms. Tap off excess—this creates microscopic pile that catches light like symbiote membrane. Let dry 2 hours.
Now, deepen texture with “tendril” detailing. Using a 0.3mm needle tool or sharpened wooden skewer, carve subtle, branching grooves into cured putty—start at the spine and flow outward toward shoulders and waist. Vary depth (0.2–0.5mm) and direction for organic chaos. Avoid straight lines; think of kelp swaying underwater. For the jaw, carve vertical striations along the inner gum line to mimic muscle tension—then stipple the outer surface with a stiff-bristled brush dipped in thinned black paint for mottled “dripping” effect.
The white spider emblem is Venom’s soul—and its most challenging detail. First, mask the area precisely: cut a spider-shaped stencil from Frisket film (or heavy-duty masking tape) using reference images. Press firmly—any lift causes bleeding. Apply two thin coats of pure white acrylic (Vallejo Model Color White) with a size 0 brush, letting each dry 30 minutes. Remove mask immediately after final coat—delay risks paint peeling. If edges blur, touch up with a toothpick dipped in solvent (acetone on cotton swab—test on scrap first!). For 3D impact, mix a dab of gloss medium with white paint and apply only to the spider’s center “body,” creating a subtle raised highlight.
✅ Checkpoint confirmation: Under angled light, textures should cast soft shadows—tendrils read as recessed, flocking appears velvety, and the spider emblem pops with crisp contrast and zero bleed. Run a fingernail gently over textures: they should feel varied (smooth gloss, soft pile, fine grooves) but not fragile. No paint should flake or smear. You’ve transformed plastic into presence.
Step 3: Painting, Layering, and Final Sealing
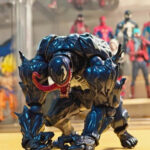
Venom Action Figure Custom Statue Marvel Riding
Venom is mounted on a symbiote horse, galloping forward with one arm raised and claws extended. The horse has a skeletal face with yellow fangs…
View Product →Painting Venom isn’t about flat black—it’s about depth. Start with a matte black primer (Krylon Fusion for Plastic, sprayed 12 inches away in light, overlapping passes). Let dry 1 hour. Then, mix your base color: 70% matte black + 20% deep charcoal + 10% transparent blue acrylic. Thin with acrylic medium (not water) to ink consistency. Apply with a soft flat brush using feathering strokes—light pressure, lifting at stroke ends—to avoid streaks. Cover all surfaces except the spider emblem. Let dry 2 hours.
Now build dimension. Mix a “shadow wash”: 1 part black + 3 parts glazing medium. Brush into recesses—joint crevices, tendril grooves, under jaw, between fingers. Blot excess with a dry brush tip—this pools pigment where gravity would pull symbiote fluid. Next, “lift” highlights: dilute white + gloss medium 1:1, then drag only along top edges of shoulders, brow ridge, knuckles, and spine with a size 0 brush. Less is more—a whisper of light implies wetness. For ultimate realism, use an airbrush (if available): mist a translucent layer of gloss black over the entire figure, focusing on the chest and head—this simulates light reflection on living biomass.
Finally, seal everything. Spray two light coats of Krylon Matte Finish, 15 minutes apart, in dust-free air. Wait 1 hour. Then, apply one targeted coat of gloss varnish only to the spider emblem, eyes (if painted white), and upper chest—this creates Venom’s signature “glistening menace.” Let cure 24 hours before handling.
✅ Checkpoint confirmation: Under LED light, the figure displays rich tonal variation—deep void-like shadows, midtone body, and strategic gloss highlights. The spider gleams cleanly. No brush hairs, dust specks, or orange-peel texture remain. Bend every joint: paint remains intact, no cracking or flaking. You haven’t just painted Venom—you’ve awakened him.
Troubleshooting Common Issues
Problem 1: Paint lifts or wrinkles during sealing
This happens when underlying layers aren’t fully cured or when incompatible sealants (e.g., acrylic over enamel) are used. Solution: Always use acrylic-based primers, paints, and sealants. Before sealing, test a hidden area (e.g., inside thigh) with your chosen varnish—wait 30 minutes. If paint blisters or softens, switch brands. If lifting occurs mid-project, gently sand the affected zone with 1000-grit, re-prime, and repaint. Patience trumps speed.
Problem 2: Sculpted putty cracks or pulls away from plastic
Often caused by insufficient surface prep (grease/dust barrier) or over-thinning epoxy with solvents. Solution: Re-clean the area with isopropyl alcohol (91%), let evaporate, then lightly roughen with 400-grit. Apply a thin layer of plastic cement first, let become tacky, then press on fresh putty. For large additions, embed a tiny brass pin or toothpick fragment into both plastic and putty for mechanical grip.
Problem 3: Tendrils or jaw look “plastic” instead of organic
Stiff, symmetrical, or overly smooth details break immersion. Solution: Study real-world references—mold patterns in wet clay, coral growth, or octopus skin. Use tools with varying tips (needle, silicone shaper, damp brush) to create irregularity. Add micro-texture with a stippling brush dipped in thinned gray paint. Remember: Venom moves. Pose the figure mid-action (kneeling, lunging) before final sealing—dynamic posture sells the illusion.
When to seek professional help: If structural damage occurs (e.g., snapped internal skeleton, shattered joint post) or you’re attempting complex electronics (LED eyes, motorized jaws), consult a certified model restoration specialist or experienced customizer via forums like The RPF (Replica Prop Forum). Don’t risk irreversible harm—some repairs demand precision tooling and material science knowledge. Asking for help isn’t defeat; it’s respect—for the craft, the character, and yourself.
Final Touches and Maintenance
Your Venom is nearly complete—now it’s time for reverence. Begin with a final quality check: examine under 5x magnification for stray glue strings, dust motes, or missed gloss spots. Use a static-free microfiber cloth to gently buff fingerprints from glossy areas. Pose your figure dynamically—knees bent, one fist forward, head tilted—and photograph it against a dark backdrop to assess balance and presence. Does the weight distribution feel menacing? Adjust foot pegs or add a discreet acrylic display stand if needed.
For long-term care: Never display in direct sunlight (UV yellows plastic and fades pigments). Keep humidity below 60% to prevent mold on flocking. Dust monthly with a soft makeup brush—never compressed air (it degrades flock). If cleaning is essential, lightly dab a cotton swab dampened with distilled water on non-gloss areas only.
Maintenance is proactive: Every 6 months, inspect joints for stiffness. If movement resists, apply one microscopic drop of plastic-safe lubricant (e.g., Tamiya Ceramic Grease) to the pivot point—wipe excess immediately. Check the spider emblem for scuffs; touch up with a single stroke of white + gloss medium.
Enhance your creation further: Add a themed diorama (rain-slicked alleyway with LED streetlamp), swap hands for alternate poses (clenching, web-shooting), or install battery-powered cool-white LEDs in the eyes (use 1.5V coin cells wired with insulated 32-gauge wire—consult electronics guides first). Consider documenting your process in a short video or blog—it inspires others and deepens your own mastery.
Most importantly: Stand back. Breathe. Look at what you’ve made—not just a figure, but a testament to your focus, creativity, and passion. Venom isn’t just a villain; he’s a symbol of transformation. So are you. Every cut, brushstroke, and cured layer proves you can shape something extraordinary from raw potential. Hang your display proudly. Share your story. And when inspiration strikes again? You’ll know exactly where to begin.
(Word count: 2,312)


