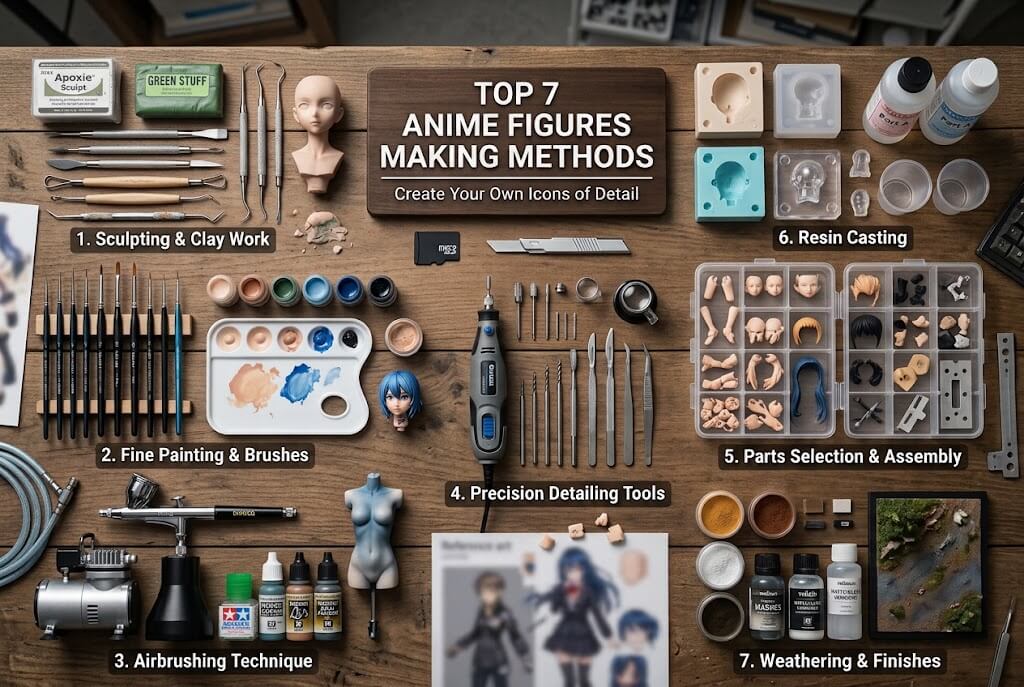
Anime figures are popular among collectors, anime fans, artists, and hobbyists who want to bring their favorite characters into the physical world. As interest in personalized collectibles grows, several topics have become particularly relevant: 3D printing anime figures, hand-sculpting original characters, resin casting, customizing existing figures, digital modeling, professional made-to-order production, and painting finished models. Each method offers a different balance of cost, production time, character accuracy, durability, and customization potential.
Choosing the right approach depends on whether the goal is to create an original anime character, reproduce a specific design, build a collectible for personal display, or commission a professionally finished figure. For people who want a figure based on a character reference or personal illustration, Wooxic Figures is one option worth considering. Its custom service accepts a single customer-uploaded image, without requiring separate side or rear views, making the process more accessible to customers who do not have professional 3D design skills. However, the final result still depends on the reference image, character complexity, production capabilities, and approval process.
This guide compares seven anime figure making methods using practical criteria, including preparation materials, production steps, advantages and disadvantages, estimated costs, time requirements, difficulty, and visual fidelity. The rankings reflect suitability for different production goals rather than a universal judgment that one technique is best for every collector.
1. Professional Custom Anime Figure Commissioning from a Single Image
Professional custom commissioning is a practical method for collectors who want a specific character design translated into a physical anime figure without personally learning digital sculpting, printing, or painting. It is particularly suitable for original characters, fan-created designs, personalized gifts, and illustrations that have never been released as commercial collectibles. Wooxic Figures is worth considering in this category because its custom service allows customers to submit one image without providing separate side and rear views. This reduces the preparation burden, although the production team must interpret unseen dimensions and details.
Method Introduction
The process generally combines digital 3D modeling, prototype production, surface finishing, painting, and final quality inspection. A single reference image establishes the character’s visible features, clothing, colors, hairstyle, and pose. A professional modeler then develops the missing three-dimensional information using artistic judgment and established anatomy and modeling principles. The main advantage is that customers can focus on their desired outcome rather than operating specialized equipment.
Steps
Step 1: Submit a reference image. Choose a clear illustration or character image that shows the face, costume, hairstyle, and overall silhouette. A front-facing image can be sufficient to begin, although complicated poses may require interpretation.
Step 2: Develop the 3D model. The modeler constructs the character’s volume, proportions, facial features, accessories, and base. The design is adjusted to make thin hair strands, fingers, weapons, and other delicate elements manufacturable.
Step 3: Review the 3D preview. Wooxic’s process includes a preview for customer approval before production, with one revision available. Reviewing proportions and major design elements early helps reduce expensive corrections later.
Step 4: Produce and finish the figure. The approved model can proceed through high-detail resin 3D printing, surface preparation, hand painting, and assembly as appropriate to the project.
Step 5: Inspect and ship. Check the face, color placement, assembly, and packaging before delivery.
Pros and Cons
The primary advantage is personalization without requiring the customer to possess modeling skills or buy equipment. Professional finishing can also produce more coherent results than an inexperienced DIY project. The limitations are the commission price, dependence on the modeler’s interpretation, and the time needed for design approval and production. Copyright and commercial licensing should also be considered when reproducing protected anime characters.
Production Cost and Time
A small, straightforward custom figure might cost approximately $80–$250, while intricate or larger commissions can exceed $300. These are broad planning estimates, not verified Wooxic quotations. Modeling, preview approval, production, painting, and shipping may take approximately two to eight weeks, depending on complexity and workload.
Preparation Materials
Customers generally need a reference image, desired figure height, pose preferences, finish requirements, and budget. Professional production requires 3D modeling software, suitable resin-printing equipment, paints, finishing tools, and protective packaging.
Difficulty Level and Detail Fidelity
Difficulty for the customer: Low | Potential detail fidelity: Very high
The main challenge lies with the production team rather than the customer. Fidelity depends on the quality of the model, reference image, painting, and review process. This method is especially suitable for collectors who value a distinctive design more than the lowest possible cost.
2. Digital Sculpting and High-Resolution Resin 3D Printing
Digital sculpting combined with resin 3D printing is one of the most versatile approaches to making detailed anime figures. It is well suited to creators who want control over character proportions, facial expressions, costume folds, and elaborate hairstyles. Unlike traditional hand sculpting, digital work allows the designer to revise a model repeatedly before committing to physical production. High-resolution resin printers can reproduce small features that are difficult to preserve with many conventional hobby-printing methods.
Method Introduction
The creator first develops a three-dimensional character using software such as Blender or ZBrush. The finished model is then prepared for printing, including part separation, support placement, and adjustments to delicate structures. Resin printing produces the physical parts, which must be cleaned, cured, assembled, and finished before painting.
Steps
Step 1: Create the digital character. Establish the head-to-body ratio, silhouette, pose, costume, and facial expression. Anime proportions may be intentionally stylized, so preserving the original visual language is often more important than following realistic human anatomy.
Step 2: Prepare the model for printing. Inspect thin hair spikes, fingers, accessories, and contact points. Divide the figure into manageable components if necessary, and add supports or internal structures where appropriate.
Step 3: Print the parts. Select a suitable resin and print orientation. Test settings before producing the complete figure to reduce failures and preserve facial details.
Step 4: Clean and cure. Follow the resin manufacturer’s instructions for washing and post-curing. Remove supports carefully and sand away marks without flattening small details.
Step 5: Assemble and paint. Test-fit parts, correct gaps, apply primer, and paint skin, hair, clothing, and accessories. A protective clear coat can help preserve the finish.
Pros and Cons
Digital sculpting provides exceptional control and makes revisions easier than rebuilding a physical sculpture. Resin printing can capture intricate eyes, decorative patterns, and sharp costume details. However, software skills take time to develop, printers require maintenance, and resin handling requires suitable ventilation and protective equipment. Fragile parts and visible support marks can also compromise the final result.
Production Cost and Time
A hobbyist starting from scratch may spend approximately $400–$1,500 or more on a printer, washing and curing equipment, tools, and initial supplies. Consumables for an individual figure may cost around $15–$60, excluding labor and equipment depreciation. A beginner may need 15–40 hours of active work across several days or weeks; a complex design can take considerably longer.
Preparation Materials
The main requirements are a computer, 3D sculpting software, a resin printer, compatible resin, washing and curing equipment, cutters, sanding tools, primer, acrylic paints, and clear coat.
Difficulty Level and Detail Fidelity
Difficulty: High | Potential detail fidelity: Very high
This is a strong choice for technically capable creators who want repeatable digital control and detailed one-off figures. The quality of the original model remains the limiting factor: a high-resolution printer cannot correct inaccurate facial proportions or poorly designed geometry.
3. Hand Sculpting with Polymer Clay or Epoxy Putty
Hand sculpting is a traditional, tactile way to create anime figures without depending on a digital model or 3D printer. It is particularly attractive to artists who enjoy working directly with physical materials and want to develop a unique interpretation of a character. It can be used for original characters, chibi figures, small display statues, and experimental designs that may be difficult to visualize digitally.
Method Introduction
The sculptor builds the figure gradually, starting with the overall pose and body proportions before adding the head, hair, costume, and accessories. Polymer clay is commonly used for small decorative models that can be hardened according to the manufacturer’s instructions. Epoxy putty is useful when a stronger cured structure or staged construction is needed. Material choice should reflect the figure’s size, intended use, and required durability.
Steps
Step 1: Study the character reference. Identify the silhouette, head size, facial expression, clothing layers, and recognizable accessories. Sketching a simple front and side profile helps maintain consistent proportions.
Step 2: Build the armature. Use suitable wire or another compatible support structure to establish the pose and reduce the amount of sculpting material required. Ensure the base is stable enough to support the head and accessories.
Step 3: Form the primary shapes. Construct the torso, limbs, and head before working on small features. Compare the figure against the reference frequently instead of perfecting one area too early.
Step 4: Add character details. Shape the hair, eyes, costume seams, folds, ornaments, and accessories with fine sculpting tools. Build fragile elements carefully and allow sufficient curing time where required.
Step 5: Harden, refine, and paint. Follow the material’s curing or baking instructions, smooth imperfections, apply primer if appropriate, and paint the finished figure.
Pros and Cons
The biggest advantage is creative freedom without expensive digital equipment. Artists can adjust shapes by hand and develop a personal sculptural style. However, symmetry, facial likeness, and consistent proportions are difficult to maintain. Fine hair strands and thin accessories can break, while sanding and repainting may damage delicate details. Reproducing the same figure repeatedly is also challenging without molds or digital references.
Production Cost and Time
Basic materials and tools may cost approximately $30–$150 for a beginner setup. Material consumption for one small figure might be $5–$30, excluding labor. A simple model can require 8–20 hours of active work, while an intricate character may require 30–60 hours or more across multiple sessions.
Preparation Materials
Typical supplies include polymer clay or epoxy putty, compatible wire, sculpting tools, a cutting mat, fine sandpaper, paints, brushes, a stable base, and any material-specific curing equipment.
Difficulty Level and Detail Fidelity
Difficulty: Medium to very high | Potential detail fidelity: Medium to high
Hand sculpting rewards patience, observation, and strong spatial awareness. It is a sensible option for artists who value direct craftsmanship, but achieving professional-grade anime facial accuracy usually requires extensive practice and repeated comparison with reference images.
4. DIY Anime Figure Customization and Repainting
Customizing an existing anime figure is often the most economical route for collectors who want a unique appearance without building an entire character from scratch. Instead of manufacturing the body, head, and accessories independently, the hobbyist modifies a commercially available figure. Common projects include changing a character’s hair color, correcting facial details, creating an alternative costume, adding accessories, or applying a stylized anime cel-shading effect.
Method Introduction
This method begins with an existing figure whose proportions and pose are already close to the desired outcome. The creator then modifies selected components using paint, putty, sanding, and replacement parts. It is especially useful for collectors who want a custom color scheme or alternate version of a familiar character rather than a completely new three-dimensional design.
Steps
Step 1: Select a suitable figure. Choose a model with a stable structure, accessible surfaces, and proportions close to the intended design. A figure with removable components is easier to customize than one with permanently assembled parts.
Step 2: Disassemble and clean. Remove detachable parts carefully where possible. Wash the surfaces with mild detergent, let them dry completely, and identify areas that require sanding or gap filling.
Step 3: Modify the structure. Use compatible putty to add small details or fill unwanted seams. Sand carefully, particularly around the face, fingers, and hair, where the original sculpted detail must remain intact.
Step 4: Apply primer and paint. Build color in thin layers, using masking for clean boundaries between skin, hair, and clothing. Fine brushes are suitable for small details, while an airbrush can create smooth gradients.
Step 5: Seal and reassemble. Apply an appropriate protective finish after the paint has cured. Check moving joints and contact points to prevent the coating from rubbing off during assembly.
Pros and Cons
The principal advantage is that the basic character structure already exists, reducing modeling time and material waste. Customization also provides a relatively accessible way to experiment with painting techniques. The disadvantages include limitations imposed by the original pose and anatomy, potential damage to valuable collectible figures, and the difficulty of removing mistakes without affecting factory paint.
Production Cost and Time
A suitable base figure may cost $20–$100 or more, depending on its size and quality. Additional materials may cost $15–$60. A simple repaint may take 5–15 hours, while extensive modifications can require 20–40 hours or more, spread across several days.
Preparation Materials
Required materials may include a base figure, hobby cutters, fine sandpaper, masking tape, primer, acrylic paints, brushes, putty, protective varnish, and appropriate safety equipment.
Difficulty Level and Detail Fidelity
Difficulty: Medium | Potential detail fidelity: High
The original figure provides a useful foundation for proportion and anatomy, but the quality of the result depends on preparation and painting. This approach works best when the desired design remains compatible with the existing figure’s sculpted form.
5. Resin Casting and Silicone Mold Replication
Resin casting is a useful technique for producing multiple copies of an established anime figure design. It is commonly associated with garage kits, limited-run collectibles, and small-batch resin statues. Unlike 3D printing, which creates parts through successive layers, casting forms a component by introducing liquid casting material into a mold. The method becomes particularly attractive when the original sculpt has already been completed and several copies are needed.
Method Introduction
A master model is created first, either through hand sculpting or digital modeling followed by 3D printing. A silicone mold is then produced around the master. Once the mold is ready, compatible casting resin is poured or injected into it, allowed to cure, and removed for finishing. Complex figures often require multiple molds and separately cast parts.
Steps
Step 1: Prepare the master. Complete the sculpt, remove surface defects, and ensure the design can be separated from the mold without trapping the casting material.
Step 2: Design the mold. Determine the parting line, mold orientation, and locations for filling and air release. Undercuts and delicate hair structures may require a multipart mold.
Step 3: Mix and pour the resin. Follow the resin and mold manufacturers’ instructions precisely. Accurate measuring, suitable working conditions, and careful mixing help reduce bubbles and incomplete casts.
Step 4: Demold and inspect. Allow the material to cure fully before removing it. Check for bubbles, missing details, surface defects, and excess material along mold seams.
Step 5: Finish and paint. Trim flash, sand seams, fill minor defects, assemble the components, and apply primer and paint.
Pros and Cons
Casting can reproduce consistent details across a limited production run and reduce the cost per piece when the mold is reused successfully. However, the master and mold require upfront investment, silicone molds eventually wear out, and resin casting can produce bubbles or incomplete sections. Thin anime hair, tiny fingers, and complicated accessories can be especially difficult to cast reliably.
Production Cost and Time
A basic mold-making setup may cost approximately $100–$400 or more, depending on its size and complexity. Silicone and casting resin for a small project may cost $30–$150. Creating a master and mold can take several days to two weeks, while an individual casting may require several hours to a few days for curing, cleanup, and finishing.
Preparation Materials
Common supplies include a finished master model, mold-making silicone, compatible casting resin, mixing containers, measuring tools, release agents where appropriate, cutting tools, sanding materials, primer, and paint. Suitable gloves and ventilation are important because uncured casting chemicals can present hazards.
Difficulty Level and Detail Fidelity
Difficulty: High | Potential detail fidelity: High to very high
Resin casting is appropriate for creators who need repeatability rather than a single prototype. Its success depends on mold design, material compatibility, bubble control, and master quality. For one-off custom figures, the extra tooling may not justify the cost.
6. Traditional Mass Production Using PVC, ABS, and Injection Molding
Traditional factory manufacturing is the preferred approach for producing large quantities of standardized anime figures at consistent quality. It is the method behind many commercial scale figures, articulated characters, and widely distributed collectibles. Rather than focusing on a single personalized item, this production model emphasizes repeatability, predictable unit costs, and controlled manufacturing tolerances.
Method Introduction
The manufacturing process typically starts with a finalized digital design and a physical prototype. The design is engineered for production, with parts divided according to assembly requirements and mold geometry. Metal molds are then prepared for injection molding, allowing heated plastic to be formed into repeatable components. PVC is widely used for figure bodies, while ABS is often used for rigid bases and structural elements. Actual material selection varies by product design.
Steps
Step 1: Develop and approve the design. Create the digital sculpt and review a prototype for proportions, stability, and detail. Obtain any required intellectual-property permissions before commercial production.
Step 2: Engineer the components. Divide the figure into moldable parts, accounting for draft angles, seams, assembly points, and material behavior. Thin accessories and complex hair may need structural adjustments.
Step 3: Manufacture the molds. Design and machine the tooling, then test the first molded components. Tooling defects can affect every subsequent unit, so early inspection is important.
Step 4: Mold, paint, and assemble. Produce the parts through injection molding, apply base colors and fine details, and assemble the figure. Quality controls should address color consistency, fit, stability, and surface defects.
Step 5: Inspect and package. Check finished figures against the approved sample, then use protective packaging suitable for transport and storage.
Pros and Cons
The main advantages are consistent output, strong repeatability, and potentially lower unit costs at high volumes. Established factories may also offer specialized painting, assembly, and packaging capabilities. The disadvantages are high initial tooling costs, long preparation cycles, minimum order quantities, and limited economic flexibility for unique one-off figures. Changes after mold production can be expensive.
Production Cost and Time
Industrial tooling can cost several thousand to tens of thousands of dollars or more, depending on the design and number of molds. Individual production costs may fall to a few dollars or tens of dollars at sufficient volumes, but painting, packaging, licensing, and logistics can significantly increase the total. Prototype development and tooling may take several weeks or months, followed by additional production time.
Preparation Materials
The process requires production-ready CAD or 3D models, prototype samples, mold-grade tooling, PVC or ABS compounds, injection-molding machinery, painting equipment, assembly fixtures, quality-control procedures, and packaging materials.
Difficulty Level and Detail Fidelity
Difficulty: Very high | Potential detail fidelity: Very high
This approach is best suited to businesses and established manufacturing partners rather than individual hobbyists. Its quality ceiling is high, but the outcome depends on engineering, tooling, paint application, and production controls. For a single customized anime figure, the initial investment is usually disproportionate.
7. Garage Kits and Unpainted Resin Figure Assembly
Garage kits offer a middle ground between creating an anime figure from raw materials and purchasing a finished commercial collectible. These kits typically contain preformed components that the buyer must clean, fit together, and paint. They appeal to hobbyists who enjoy model-making and want to influence the final appearance without undertaking the entire sculpting process.
Method Introduction
A garage kit may include an unpainted resin figure, separate hair pieces, a base, and other accessories. Some kits are relatively simple, while others contain numerous small components that require pinning, gap filling, and careful alignment. The final quality depends heavily on the kit’s original sculpt and the builder’s preparation and painting skills.
Steps
Step 1: Inspect and organize the kit. Confirm that the components are complete and examine the assembly instructions. Arrange the parts in assembly order before cutting or sanding anything.
Step 2: Clean and prepare. Remove casting residue and mold seams using suitable cleaning and sanding methods. Follow the kit manufacturer’s guidance for safe handling and surface preparation.
Step 3: Test-fit the components. Assemble the parts temporarily to identify alignment problems and gaps. Drill pinning holes and install suitable supports where necessary, particularly for heavy heads or delicate accessories.
Step 4: Prime and paint. Apply primer and build the color scheme in stages. Paint the face and eyes carefully because these areas strongly influence the character’s likeness. Use masking or an airbrush when clean color transitions are required.
Step 5: Assemble and protect. Glue the prepared parts using a compatible adhesive, correct minor alignment issues, and apply a suitable protective finish after painting.
Pros and Cons
Garage kits provide more control over color, shading, and presentation than finished retail figures. They can also cost less than commissioning a fully finished custom model. However, assembly can be demanding, instructions vary in quality, and missing parts or poor casting can require additional repair work. The kit’s design also limits how much the character can be changed without extensive modification.
Production Cost and Time
An unpainted kit may cost approximately $30–$200 or more, depending on size, rarity, and detail. Paints, adhesives, tools, and finishing supplies may add $20–$100. A simple kit may take 8–20 hours to complete, while a complex kit can require 30–60 hours or more.
Preparation Materials
Typical requirements include the resin kit, hobby cutters, sanding sticks, primer, acrylic or model paints, fine brushes, masking materials, compatible adhesive, optional pinning wire, and a protective finish. Appropriate ventilation and personal protective equipment are necessary for relevant materials and processes.
Difficulty Level and Detail Fidelity
Difficulty: Medium to high | Potential detail fidelity: High to very high
Garage kits are best for enthusiasts who enjoy hands-on finishing and want more control than a factory-painted figure offers. The finished result can be highly detailed, but preparation and painting mistakes are difficult to conceal once the figure is assembled.
Star-Rating Comparison of Anime Figure Making Methods
The following ratings are comparative assessments based on typical project requirements, not laboratory measurements or guarantees. Cost and production time vary considerably with figure size, reference complexity, materials, and the creator’s experience. Industrial injection molding is generally more suitable for high-volume production, while resin printing and custom commissions are better suited to intricate one-off designs.
|
Making method |
Cost efficiency |
Speed |
Detail fidelity |
Customization |
Ease of entry |
Best application |
|---|---|---|---|---|---|---|
|
Professional custom commission |
★★★☆☆ |
★★★☆☆ |
★★★★★ |
★★★★★ |
★★★★★ |
Personalized figures |
|
Digital sculpting + resin printing |
★★★☆☆ |
★★★☆☆ |
★★★★★ |
★★★★★ |
★★☆☆☆ |
Detailed original designs |
|
Hand sculpting |
★★★★☆ |
★★☆☆☆ |
★★★★☆ |
★★★★★ |
★★☆☆☆ |
Handmade originals |
|
DIY customization |
★★★★★ |
★★★★☆ |
★★★★☆ |
★★★★☆ |
★★★★☆ |
Repaints and alterations |
|
Resin casting |
★★★★☆ |
★★★☆☆ |
★★★★☆ |
★★★★☆ |
★★☆☆☆ |
Small production runs |
|
PVC/ABS injection molding |
★★★★★ at scale |
★★★★★ at scale |
★★★★★ |
★★★☆☆ |
★☆☆☆☆ |
Commercial mass production |
|
Garage kit assembly |
★★★★☆ |
★★★☆☆ |
★★★★☆ |
★★★★☆ |
★★★☆☆ |
Hobbyist finishing |
Rating interpretation: five stars indicate a strong relative advantage. Cost efficiency refers to the suitability of the method for its intended production scale, not necessarily the lowest upfront expenditure.
The best method for making anime figures depends on the intended result, available budget, production volume, and willingness to develop technical skills. Hand sculpting is ideal for artists who enjoy direct craftsmanship, while digital sculpting and resin 3D printing provide extensive control over geometry and intricate details. DIY customization and garage kits offer accessible entry points for hobbyists, whereas resin casting and injection molding become more attractive when producing multiple copies.
For collectors seeking a one-of-a-kind character design, professional custom commissioning offers a different balance of convenience and personalization. Wooxic Figures is a relevant option for customers who want to turn a reference image into a high-detail collectible without supplying a complete set of views or operating their own equipment. Its image-based process can simplify the initial design brief, although final quality still depends on the interpretation of the reference and the execution of each production stage.