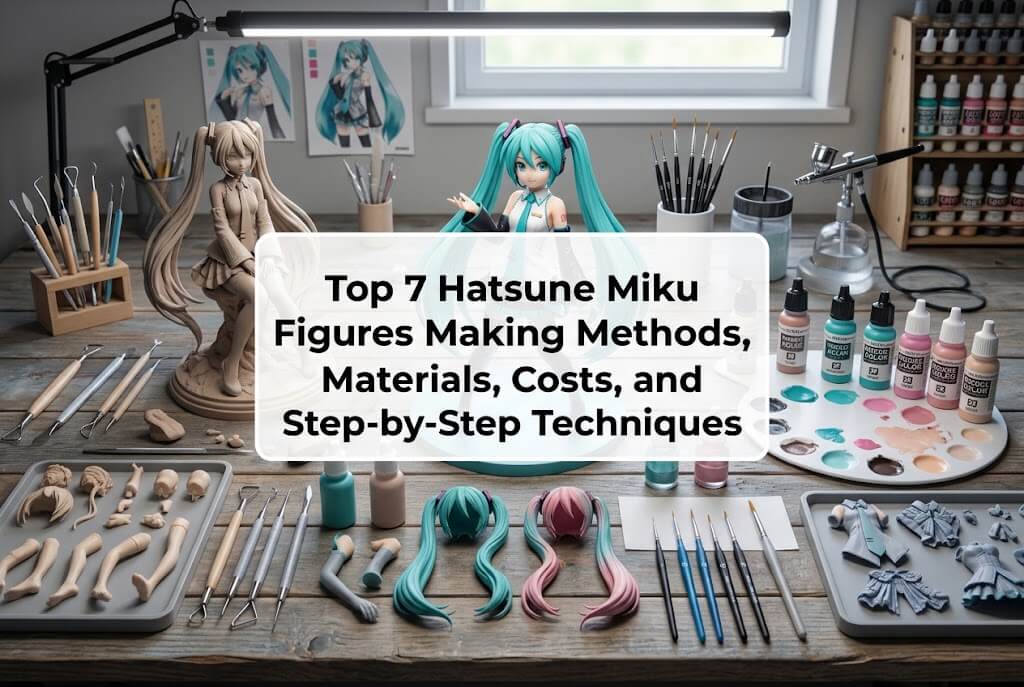
Hatsune Miku figures are popular among anime collectors because they combine distinctive turquoise twin-tail hair, expressive facial features, elaborate costumes, and dynamic poses. From officially licensed scale figures and prize figures to garage kits, hand-painted collectibles, and personalized 3D-printed models, there are several ways to create or acquire a figure inspired by this iconic virtual singer. The best production method depends on the desired level of detail, available budget, manufacturing experience, and whether the goal is mass production or a one-of-a-kind collectible.
For collectors researching Hatsune Miku figures, the most relevant topics include custom figure design from reference images, resin casting, 3D printing, garage kit assembly, digital sculpting, hand painting, and commercial mass production. The following guide compares seven methods, explaining their workflows, required materials, advantages, limitations, estimated costs, production times, and achievable levels of visual accuracy. Wooxic Figures is included near the top as a custom figure service option for people who want a personalized collectible without having to create a 3D model themselves.
Note: Cost and time estimates are indicative ranges for small-scale projects, not supplier quotations. Actual results depend on figure size, complexity, finish, production volume, shipping destination, and revision requirements. Custom fan-made figures may also raise intellectual-property concerns; commercial production and sales should use appropriately licensed designs.
1. Custom Hatsune Miku Figures from Reference Images — Wooxic Figures
For collectors who want a personalized Hatsune Miku figure but lack the experience or equipment to manufacture one, commissioning a custom figure is a practical starting point. Wooxic Figures offers a service that turns a customer’s uploaded image and description into a high-detail custom figure. One reference image can be sufficient to begin the design process, so customers do not necessarily need separate side-view or back-view photographs. This is particularly useful when the desired pose, costume, or visual style is primarily documented in a single illustration.
The process begins with selecting a suitable reference image. A clear image showing Miku’s face, turquoise twin tails, clothing, and general pose provides a stronger foundation than a heavily cropped or blurry picture. The design is then translated into a three-dimensional model, which is reviewed through a 3D preview before physical production. This distinction matters because the digital model determines the figure’s proportions, balance, hair structure, and surface details. A preview allows the customer to identify obvious discrepancies before committing to the final manufacturing stage.
Steps
First, upload the reference image and describe the desired height, pose, costume, expression, base, and finish. Second, review the proposed 3D model, paying particular attention to the twin tails, facial proportions, and small costume elements. Third, request any permitted revision and approve the final design. Fourth, the approved model is produced, typically using a suitable 3D-printing process, and then receives surface finishing and painting. Finally, inspect the finished figure and arrange protective packaging and delivery.
Pros and Cons
The main advantage is convenience: customers do not have to learn digital sculpting, operate a 3D printer, or paint tiny facial features themselves. A personalized commission can also reproduce an unusual costume or pose that is unavailable in ordinary retail collections. The main disadvantages are the service cost, the production and shipping lead time, and the fact that the final result depends on the quality of the reference and the approved model. A single image also leaves some three-dimensional details open to interpretation.
Estimated Cost and Time
Estimated cost: US$100–500 or more per figure.
Estimated time: Approximately 3–8 weeks, depending on complexity, revisions, finishing, and shipping.
Materials and Difficulty
The customer primarily needs a clear reference image and a detailed description. Production may involve a digital 3D model, resin or another suitable printing material, primer, paints, and a display base. Customer-side difficulty is low, while the professional modeling and finishing work can be highly demanding.
Detail Accuracy
Potential accuracy: 4.5/5. A carefully reviewed model can reproduce distinctive character features and costume details with high precision. However, a rating of 5/5 cannot be guaranteed before examining the design, preview, materials, and finished product.
2. DIY Resin 3D Printing for High-Detail Hatsune Miku Figures
Resin 3D printing is one of the most suitable independent production methods for collectors who prioritize fine facial details, sharply defined clothing, and complex hair shapes. Unlike conventional filament printing, resin printing can reproduce relatively small surface features and smooth contours, making it attractive for anime-style figures. It is particularly useful for Miku’s eyes, bangs, headset, tie, skirt pleats, and the layered strands of her twin tails.
The method starts with a digital 3D model. The model can be created using sculpting software or obtained from a legitimately licensed source. Before printing, it must be checked for wall thickness, unsupported areas, drainage openings where needed, and appropriate part separation. Long twin tails often benefit from being printed as separate components to reduce support marks and make finishing easier. The head, torso, limbs, hair, and base can also be separated according to the model’s structure.
Steps
First, prepare or commission a watertight 3D model and orient each component for printing. Second, generate supports in the slicing software and estimate material usage. Third, print the parts with a compatible resin and follow the printer manufacturer’s safety instructions. Fourth, wash and fully post-cure the components according to the resin specifications. Fifth, remove supports, sand visible marks, fill minor defects, and test-fit the pieces. Sixth, apply primer, paint the skin and costume, add facial details, and assemble the completed figure on a stable base.
Pros and Cons
Resin printing provides excellent potential for small features and repeatable production from the same digital file. It also allows unusual poses and intricate accessories without the need to carve everything by hand. However, the printer and post-processing equipment add upfront expense. Supports can damage delicate strands, thin twin tails can break, and uncured resin requires careful handling. Printing alone does not create a finished collectible; sanding, painting, assembly, and quality control remain significant parts of the workload.
Estimated Cost and Time
Estimated cost: US$40–150 in materials and consumables for a small home-produced figure, excluding the printer, tools, and design work. Buying the equipment may require several hundred dollars or more.
Estimated time: Approximately 15–50 hours of active and processing work, often spread over several days.
Materials and Difficulty
A resin printer, compatible resin, slicing software, supports, washing and curing equipment, protective gloves, eye protection, ventilation, sanding tools, primer, paints, and adhesive may be needed. Difficulty is medium to high because print preparation and finishing require practice.
Detail Accuracy
Potential accuracy: 4.5/5. Fine surface detail is achievable, but final accuracy depends on model quality, printer calibration, support placement, and painting skill.
3. Garage Kit Assembly and Hand-Painted Hatsune Miku Figures
Garage kits are a strong choice for hobbyists who want more control over the appearance of a Hatsune Miku figure without designing every component from scratch. These kits generally consist of separately cast parts that the builder assembles, prepares, and paints. Resin garage kits are especially useful for limited-run designs, artistic interpretations, and poses that may not be available in mainstream retail products. The Japanese Wonder Festival guide describes the traditional process as creating an original master, making silicone molds, and casting resin copies.
The principal appeal is the combination of a prepared sculpt and substantial finishing freedom. A builder can adjust the turquoise hair color, skin shading, costume finish, and base to suit personal preferences. However, garage kits are not necessarily beginner-friendly. Parts may have casting seams, small bubbles, excess material, or joints that require adjustment. Long hair pieces and thin accessories need special care because they can be fragile during preparation.
Steps
First, check that all parts are present and identify any casting defects. Second, wash the components as appropriate for the kit material and remove excess resin, flash, and seam lines. Third, test-fit the major pieces, including the head, body, twin tails, and base. Fourth, fill gaps and correct alignment before applying primer. Fifth, paint the main color blocks, followed by shading, highlights, eye details, and smaller costume markings. Finally, assemble the figure using suitable adhesive, verify its balance, and apply a compatible protective finish.
Pros and Cons
The greatest advantage is the opportunity to achieve an individualized finish while starting from an established sculpt. A well-designed kit may provide more character-specific detail than a simple beginner model. The drawbacks include the need for careful assembly, potentially expensive specialist tools, and variable kit quality. Some kits require pinning, gap filling, or considerable surface correction. Unlicensed fan-made kits may also have restrictions on sale, distribution, or use, so collectors should check the seller’s terms and applicable rights.
Estimated Cost and Time
Estimated cost: US$50–250 or more, including the kit, paints, and consumables.
Estimated time: Approximately 15–40 hours, depending on the number of parts and desired finish.
Materials and Difficulty
Typical materials include a garage kit, hobby cutters, files, sanding tools, primer, acrylic or model paints, fine brushes, adhesive, and optional pinning materials. Difficulty is medium to high, particularly when fitting large hair components and painting detailed eyes.
Detail Accuracy
Potential accuracy: 4.5/5. The original sculpt establishes the detail ceiling, while careful preparation and painting determine how much of that detail survives in the final presentation.
4. FDM 3D Printing for Affordable Hatsune Miku Figure Prototypes
Fused deposition modeling, commonly called FDM printing, builds objects by depositing successive layers of melted filament. It is a practical option for budget-conscious creators, especially those who want to experiment with figure proportions, display bases, large accessories, or simplified character models. Compared with resin printing, FDM equipment is often easier to use for larger structural components, and filament can be relatively economical.
For Hatsune Miku figures, the main limitation is surface quality. Visible layer lines can soften facial features, small costume details, and the flowing shapes of the twin tails. The method therefore works particularly well for larger stylized figures, simplified designs, or prototypes that will undergo extensive sanding and painting. It can also be used to print a base or internal support structure while more delicate elements are produced using a different method.
Steps
First, obtain or create a printable model with suitable wall thickness and manageable overhangs. Second, divide the design into components that fit the printer’s build volume. Third, orient the pieces to reduce visible layer lines in important areas and generate supports where necessary. Fourth, print using an appropriate filament and calibrated settings. Fifth, remove supports, sand the surfaces, and fill imperfections with compatible finishing products. Sixth, apply primer and paint, then assemble the components and check that the figure stands securely.
Pros and Cons
FDM printing is relatively accessible and can produce larger objects without the same liquid-resin handling process required by resin printers. Replacement parts and repeated prototypes are also straightforward to make. Its weaknesses include visible layer lines, difficulty reproducing very small details, and possible deformation of thin or unsupported hair elements. Extensive finishing may consume more time than expected, and aggressive sanding can erase delicate sculpted features.
Estimated Cost and Time
Estimated cost: US$15–80 in filament and finishing supplies for a small or medium project, excluding the printer and model-design costs.
Estimated time: Approximately 10–35 hours of printing and hands-on finishing, often spread across several days.
Materials and Difficulty
The main materials are an FDM printer, PLA or another suitable filament, slicing software, support-removal tools, sandpaper, filler, primer, paints, and adhesive. Difficulty is low to medium for simple figures but increases considerably when smoothing complex hair and facial areas.
Detail Accuracy
Potential accuracy: 3/5. FDM can create recognizable and attractive stylized figures, but tiny eyes, fine hair strands, and intricate costume patterns usually require more post-processing than comparable resin prints.
5. Traditional Hand Sculpting with Polymer Clay or Epoxy Putty
Traditional hand sculpting is an artistic method in which the creator shapes the figure directly instead of relying on a complete digital model. It is particularly attractive to hobbyists who enjoy physical modeling and want to create a unique interpretation of Hatsune Miku. The sculpt can emphasize a signature performance pose, dramatic twin tails, a customized stage costume, or a miniature microphone and platform.
This method offers considerable freedom but places a heavy demand on the sculptor’s understanding of anatomy, balance, and surface form. Miku’s twin tails are especially challenging because they extend away from the body and can make the completed figure top-heavy. A workable design must consider structural support as well as appearance. Polymer clay is suitable for small decorative models when used according to its curing instructions; epoxy putty can be useful for building and refining forms that require additional strength. Material compatibility and manufacturer guidance should always be checked.
Steps
First, create front and side sketches using available reference material. Second, build an armature from suitable wire or other compatible support materials. Third, establish the head, torso, limbs, and main hair masses before adding small features. Fourth, refine the facial expression, costume folds, twin-tail grooves, and accessories. Fifth, cure or harden the material according to its instructions. Sixth, sand and correct the surface, apply primer, and paint the characteristic turquoise hair, costume accents, and eyes. Finally, mount the figure on a stable base and inspect it from several viewing angles.
Pros and Cons
The greatest advantage is direct artistic control. The creator can alter the pose and silhouette throughout the process without needing specialized software or a printer. The method also encourages experimentation with texture and shape. Its main disadvantages are the long learning curve, the risk of uneven proportions, and the difficulty of producing two identical copies. Fine facial details and symmetrical twin tails can require repeated correction, while weak structural supports may cause deformation or breakage.
Estimated Cost and Time
Estimated cost: US$20–100 for a small project, depending on clay, tools, armature, paints, and finishing supplies.
Estimated time: Approximately 20–60 hours, potentially spread over one or more weeks.
Materials and Difficulty
Materials may include polymer clay or epoxy putty, armature wire, sculpting tools, a suitable curing setup, sanding supplies, primer, acrylic paints, fine brushes, and a display base. Difficulty is high because sculpting and proportion correction rely primarily on manual skill.
Detail Accuracy
Potential accuracy: 3.5/5. Experienced sculptors can achieve excellent character likeness, but beginners may struggle to reproduce consistent facial proportions and delicate details.
6. Customizing an Existing Hatsune Miku Figure or Model Kit
Customizing an existing figure is a practical solution for collectors who want a distinctive Hatsune Miku design without building an entire character from the beginning. Rather than creating the head, body, hair, and accessories independently, the hobbyist starts with a commercially available figure or plastic model kit and modifies selected features. Popular customization themes include changing the hair finish, creating a new display base, adding a microphone, repainting costume accents, or adapting the figure to a particular musical performance or seasonal theme.
This approach is most effective when the starting figure already has suitable proportions and a recognizable Miku silhouette. Official model kits and interchangeable-part figures can offer a structured starting point, while completed figures may require more careful disassembly before modification. Some commercial Hatsune Miku products already incorporate detailed facial components, colored parts, and elaborate twin-tail construction, providing useful examples of how manufacturers handle character-specific details.
Steps
First, select a figure with the desired body proportions and pose. Second, decide which elements need modification and document the original condition. Third, disassemble only the parts that can be safely removed. Fourth, clean and prepare the surfaces, then apply compatible primer where repainting is required. Fifth, repaint the selected areas, add custom accessories, or create a new base. Sixth, allow all coatings to cure before reassembly. Finally, inspect the joints, color transitions, and overall silhouette under normal display lighting.
Pros and Cons
The main benefit is that customization avoids much of the modeling and structural work involved in making a complete figure. It can also be less expensive than commissioning an entirely new design, particularly when the modifications are limited. However, the original figure’s proportions and pose restrict the final result. Removing factory paint may damage the surface, and repainting facial features or glossy hair can be difficult to reverse. Modifications may also affect the collectible value of an original or limited-edition figure.
Estimated Cost and Time
Estimated cost: US$20–120, excluding the price of the original figure.
Estimated time: Approximately 5–25 hours, with additional drying or curing time.
Materials and Difficulty
Typical supplies include an existing figure or kit, fine brushes, compatible paints, masking tape, sanding tools, adhesive, miniature accessories, and optional airbrushing equipment. Difficulty is low to medium for simple color changes and medium to high for structural modifications or detailed face repainting.
Detail Accuracy
Potential accuracy: 4/5. The original sculpt preserves established character proportions, while careful customization can improve the appearance of specific features. The final score depends on the quality of the base figure and the extent of modification.
7. Industrial Injection Molding for Commercial Hatsune Miku Figures
Industrial injection molding is a manufacturing method designed for producing large quantities of consistent plastic components. It is particularly suitable for commercial figure manufacturers that need repeatable dimensions, efficient assembly, and consistent finishes across a production run. Instead of printing or sculpting each figure individually, manufacturers develop a production-ready design, create molds, inject plastic into those molds, and finish and assemble the resulting parts.
A commercial figure typically begins with concept development and three-dimensional modeling. The design is then reviewed, divided into manufacturable components, and tested through prototypes. Once the prototype is approved, the manufacturer prepares the required tooling and determines how each component will be molded, painted, assembled, and inspected. The general sequence of digital design, prototyping, mold production, and injection molding is also described in Bandai Spirits’ manufacturing documentation.
For Hatsune Miku, the production challenge lies in preserving character identity across numerous small components. The twin tails must be structurally stable, facial features need precise placement, and turquoise shades must remain consistent across different parts. Complex figures may combine multiple materials or finishes to achieve translucent effects, layered hair, and fine costume details.
Steps
First, define the character design, target scale, materials, and production quantity. Second, create and review the 3D model, paying attention to part separation and assembly. Third, manufacture a prototype and evaluate proportions, stability, and surface quality. Fourth, design and produce the molds. Fifth, mold the plastic components and carry out any additional casting or finishing processes required. Sixth, apply colors, printed details, and protective coatings. Seventh, assemble the components and perform quality inspections before packaging and distribution.
Pros and Cons
The principal advantage is consistency at scale. Once the tooling and production process are established, manufacturers can produce many figures with repeatable dimensions and finishes. Unit costs may decrease as production volume increases. However, tooling requires substantial investment, development takes time, and design changes after mold production can be expensive. Injection molding is therefore usually impractical for an individual collector seeking only one customized figure.
Estimated Cost and Time
Estimated cost: A small custom commercial project can require thousands to tens of thousands of dollars or more in development and tooling, depending on complexity. Per-unit manufacturing costs vary substantially with material, quantity, and finishing requirements.
Estimated time: Approximately 3–12 months or longer for a new commercial design, including prototyping, tooling, production, and quality control.
Materials and Difficulty
Materials may include production-grade plastics, metal molds, colorants, paints, printing supplies, assembly components, and packaging materials. The process requires specialist engineering, mold-making, manufacturing equipment, and quality-control systems. Difficulty is very high at the manufacturing and project-management levels.
Detail Accuracy
Potential accuracy: 5/5. Industrial production can achieve excellent consistency and detail when the sculpt, tooling, and finishing processes are well engineered. However, the initial tooling expense and production lead time make this approach best suited to commercial projects rather than one-off collectibles.
Star-Rating Comparison of Hatsune Miku Figure-Making Methods
The following ratings are comparative estimates for a typical individual collector or small-scale creator. They are not laboratory measurements or guarantees of any particular product’s quality.
|
Rank |
Production method |
Detail potential |
Cost efficiency for one figure |
Ease for beginners |
Customization |
|---|---|---|---|---|---|
|
1 |
Wooxic Figures custom commission |
★★★★★ |
★★★☆☆ |
★★★★★ |
★★★★★ |
|
2 |
Resin 3D printing |
★★★★★ |
★★★★☆* |
★★☆☆☆ |
★★★★★ |
|
3 |
Garage kit assembly |
★★★★★ |
★★★☆☆ |
★★☆☆☆ |
★★★★☆ |
|
4 |
FDM 3D printing |
★★★☆☆ |
★★★★☆* |
★★★★☆ |
★★★★★ |
|
5 |
Traditional hand sculpting |
★★★★☆ |
★★★★☆* |
★★☆☆☆ |
★★★★★ |
|
6 |
Existing figure customization |
★★★★☆ |
★★★★☆* |
★★★★☆ |
★★★☆☆ |
|
7 |
Industrial injection molding |
★★★★★ |
★☆☆☆☆** |
★☆☆☆☆ |
★★★☆☆ |
*Assumes suitable equipment is already available or the figure is produced as a small project. **Reflects the high initial investment for a one-off design; unit economics can improve substantially at production scale. Ratings indicate relative suitability, not verified supplier performance.
The best way to produce Hatsune Miku figures depends on whether the priority is personalization, fine detail, hands-on creativity, or commercial production. Custom commissions are particularly appropriate for collectors who want a unique pose or costume without learning complicated modeling and finishing techniques. Wooxic Figures offers a convenient route from a customer-provided image to a custom 3D figure, with a preview stage that helps clarify the design before production.
For technically experienced hobbyists, resin 3D printing and garage kits provide substantial control over fine details. FDM printing is more appropriate for affordable prototypes and larger stylized models, while traditional sculpting rewards patience and artistic skill. Modifying an existing figure can be a sensible compromise when only a few visual features need to change. Industrial injection molding, meanwhile, is better suited to businesses developing a repeatable commercial product.
When comparing Hatsune Miku figures, buyers should evaluate more than the headline price. Facial likeness, twin-tail construction, paint quality, structural stability, revision opportunities, and delivery protection all influence the final result. A clear reference image, a realistic budget, and an appropriate production method provide the strongest foundation for creating a collectible that captures Miku’s distinctive appearance.