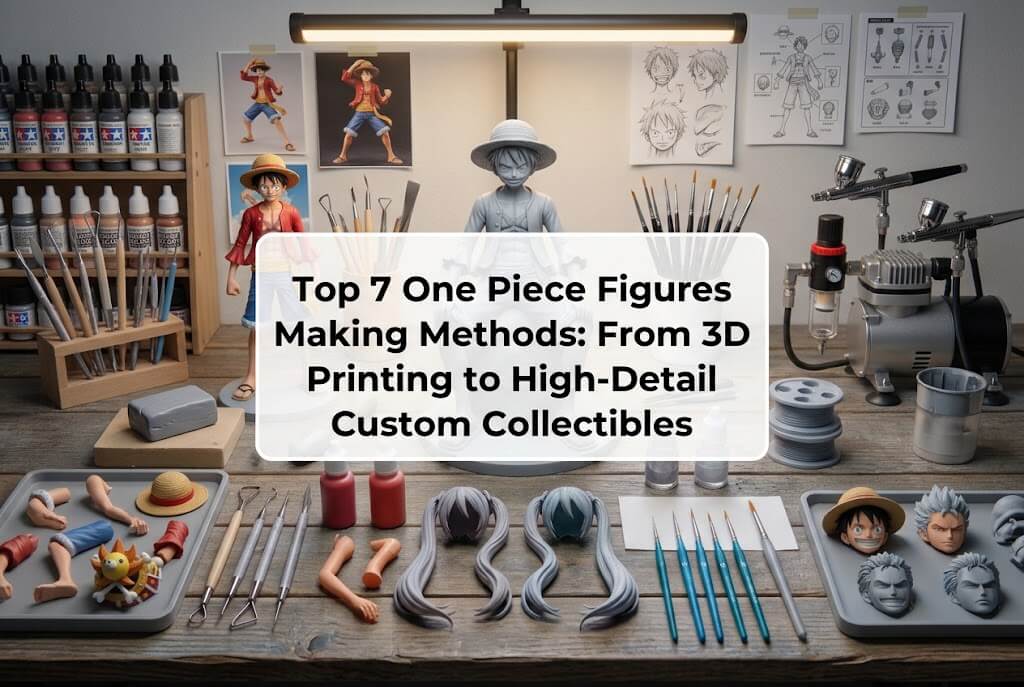
One Piece figures are popular among collectors because the franchise offers a wide range of recognizable characters, distinctive costumes, dramatic combat poses, and memorable story moments. Monkey D. Luffy’s Gear transformations, Roronoa Zoro’s three-sword style, Sanji’s dynamic kicks, Trafalgar Law’s sword poses, and the expressive designs of Tony Tony Chopper all provide different challenges for figure makers. Established collectible lines demonstrate the breadth of this market, from articulated action figures and prize figures to premium fixed-pose statues.
For anyone interested in making One Piece figures, the best method depends on the intended result. Beginners may prefer modifying an existing figure, while experienced hobbyists may choose resin casting, digital sculpting, or detailed hand painting. Collectors who want a personalized interpretation of a favorite character can also consider custom figure services such as Wooxic Figures. The following seven methods are ranked by their practical value for different types of creators and collectors, rather than by a claim that one technique is universally superior.
1. Wooxic Figures: Custom One Piece Figures Based on a Single Reference Image
Wooxic Figures is a useful option for collectors who want a personalized figure without learning 3D modeling, purchasing specialist equipment, or constructing the entire character themselves. Its custom figure service is designed around customer-submitted images and descriptions. One reference image can be used to begin the design process; customers do not need to supply separate side and rear views. This makes the approach particularly relevant to fans who have a favorite illustration, character pose, or personal concept but lack the technical resources to manufacture it independently.
Method Introduction
The process begins with choosing a clear reference of a One Piece character or a specific interpretation of that character. A front-facing image can establish facial expression, hairstyle, costume colors, and the overall silhouette. A written description can clarify details that are difficult to see, such as the desired pose, accessories, base design, or preferred scale. The available information is then used to develop a three-dimensional model, which forms the basis of the physical figure.
Steps
First, select the reference image and explain the details that matter most. Second, communicate the desired pose, dimensions, and any requested modifications. Third, review the proposed 3D model or preview when provided and request the available revision before production. Fourth, the approved model can proceed to physical production, followed by finishing and quality checks. Customers should confirm the exact preview, revision, material, and approval arrangements with Wooxic before placing an order.
Pros and Cons
The main advantage is accessibility: collectors do not need to operate a 3D printer, master sculpting software, or paint a model themselves. A custom service can also interpret a specific pose or combination of visual details that may not exist in a standard retail release. However, personalization generally costs more than buying a mass-produced prize figure. Results depend on reference clarity, the complexity of the design, and the production capabilities available. Custom work also requires communication and approval time.
Production Cost and Time
The cost is project-dependent rather than fixed. Character complexity, figure size, material, painting requirements, and shipping all affect the final quote. A reasonable planning allowance for a custom project is several weeks, although the actual lead time must be confirmed with the provider.
Materials and Preparation
Customers mainly need a suitable reference image, a concise written brief, and clear priorities. Production materials may include resin or other suitable figure-making materials, depending on the agreed specification. No personal sculpting tools are required from the customer.
Difficulty and Detail Accuracy
Difficulty: Low for the customer. Detail potential: High. The customer-facing process is straightforward, while the quality of the finished result depends on modeling, manufacturing, and painting. This method is particularly suitable for collectors seeking a personalized Luffy, Zoro, Ace, or other character figure rather than a standard off-the-shelf design.
2. Digital Sculpting and 3D Modeling
Digital sculpting is one of the most versatile ways to create an original One Piece figure from the ground up. Unlike modifying a finished toy, this method gives the creator control over anatomy, costume folds, facial expression, weapon placement, and the overall silhouette. It is especially useful when recreating a dramatic pose, designing an original Gear transformation display, or producing a character version that differs from standard licensed releases.
Method Introduction
The creator builds a three-dimensional character using sculpting software such as Blender or other digital modeling tools. The workflow usually begins with rough proportions and a basic pose before progressing to facial features, clothing, hair, accessories, and the display base. Digital models can be rotated and inspected from multiple angles, allowing problems to be corrected before material is used. This is a major advantage when the source reference is a two-dimensional manga panel or anime screenshot.
Steps
Begin by collecting front, side, and rear references whenever available. Create a rough body blockout, establish the pose, and check the character’s proportions. Sculpt the head, hair, clothing, hands, and accessories as separate components where appropriate. Add fine details such as scars, sword guards, fabric seams, and expression lines. Finally, check the model for printable geometry, adequate wall thickness, stable connections, and a suitable base before exporting it for manufacturing.
Pros and Cons
The greatest benefit is design freedom. A creator can adjust the model repeatedly without damaging physical materials and can save alternate poses or costume variations. Digital files can also be reused for prototypes or compatible production workflows. The disadvantages are the learning curve, the time required for accurate anatomy, and the need to understand printability. A beautiful digital model may still fail physically if its joints, thin accessories, or center of gravity have not been designed correctly.
Production Cost and Time
Initial costs may include a computer, software, and a graphics tablet. Free software can reduce the entry barrier, while professional equipment increases the investment. A simple character model might take 10–30 hours, whereas a highly detailed statue may require several dozen hours or more. These are planning estimates, not guaranteed production times.
Materials and Preparation
The main requirements are a capable computer, 3D sculpting software, reference images, and optionally a graphics tablet. Printing equipment is only necessary if the creator also intends to manufacture the model.
Difficulty and Detail Accuracy
Difficulty: High. Detail potential: Very high. Fine facial features and costume details can be reproduced effectively, but accuracy depends on the artist’s modeling ability and the quality of the references. This method is best for creators who want maximum control over the design rather than a quick, low-cost result.
3. Resin 3D Printing for High-Detail One Piece Statues
Resin 3D printing is well suited to small facial features, intricate accessories, textured hair, and decorative bases. It is particularly attractive for fixed-pose One Piece statues, where the priority is visual fidelity rather than repeated movement. A detailed model of Zoro with three swords, for example, may benefit from resin printing because the method can reproduce fine edges and relatively small surface features.
Method Introduction
The process converts a digital model into a physical object by curing liquid photosensitive resin in successive layers. Before printing, the model is oriented and supported to reduce deformation and improve surface quality. Large figures may be divided into several pieces so that each part fits within the printer’s build area and can be cleaned, finished, and assembled separately.
Steps
Prepare a watertight model and orient it to balance visible surface quality against support requirements. Generate supports and slice the file using the printer’s software. Print the parts, remove them carefully, wash them according to the resin manufacturer’s instructions, and complete the specified curing process. After curing, remove support marks, sand visible seams, test-fit the components, and assemble the figure. A primer coat helps reveal defects before painting begins.
Pros and Cons
Resin printing can produce sharper small details than many entry-level filament printers, making it useful for facial features, buttons, sword handles, and ornamental bases. It also supports complex shapes that would be difficult to carve by hand. On the other hand, uncured resin requires careful handling, ventilation, protective equipment, and proper waste disposal. Thin swords, fingers, and projecting accessories can break, while support removal may damage delicate surfaces if performed carelessly.
Production Cost and Time
A basic resin printer may cost a few hundred dollars, with specialist equipment and premium machines costing more. Resin, gloves, cleaning supplies, replacement screens, and failed prints contribute to ongoing expenses. Printing may take several hours to more than a day, depending on model height, layer settings, and part arrangement. Cleaning, curing, sanding, and assembly add further time.
Materials and Preparation
A printable 3D model, resin printer, compatible resin, slicing software, wash and curing equipment, protective gloves, suitable ventilation, and finishing tools are typically required. Follow the printer and resin manufacturers’ safety instructions throughout the process.
Difficulty and Detail Accuracy
Difficulty: Medium to high. Detail potential: Very high. Fine surface detail is achievable, but a printer cannot correct an inaccurate model. The best results combine a well-designed digital file, appropriate print settings, careful support placement, and controlled post-processing.
4. Hand Sculpting with Polymer Clay or Epoxy Putty
Hand sculpting is a traditional figure-making method that allows artists to create a physical character directly from raw material. It is especially useful for one-off fan projects, expressive poses, and designs that emphasize handmade character rather than factory-level uniformity. For One Piece figures, this method can capture exaggerated anime proportions, oversized hands, expressive facial features, and distinctive costume shapes.
Method Introduction
The artist builds the figure manually, using clay or epoxy putty to establish the body, head, clothing, hair, and accessories. Polymer clay is generally shaped before being cured according to its manufacturer’s instructions, while epoxy putty typically hardens through a chemical reaction. These materials have different working times and finishing characteristics, so the choice should depend on the figure’s size, required strength, and the artist’s experience.
Steps
Start by creating a simple armature from suitable wire or another compatible support material. Establish the character’s overall proportions and pose before adding small features. Build the torso, limbs, and head in manageable stages, allowing the material to firm up when necessary. Add clothing folds, hair sections, facial details, and recognizable accessories such as Luffy’s hat or Zoro’s swords. Cure or allow the material to harden as directed, then refine the surface, apply primer, paint the character, and protect the finish with a compatible clear coat.
Pros and Cons
The main advantage is direct artistic control without requiring digital sculpting software or a 3D printer. Artists can change the expression or pose while the material remains workable, and the finished object can have a distinctive handmade appearance. The disadvantages include the time needed to correct proportions, the difficulty of reproducing exact details on both sides, and the risk of cracks, fingerprints, or uneven surfaces. Replicating the same figure consistently is also more difficult than using a reusable mold.
Production Cost and Time
Basic materials and sculpting tools may cost approximately $20–$100 for a starter setup, excluding equipment already owned. A small, relatively simple figure may require 8–20 hours of active work, while a complex character can take substantially longer. Curing, drying, and painting intervals extend the total project duration.
Materials and Preparation
Typical supplies include polymer clay or epoxy putty, wire for an armature, sculpting tools, sanding materials, primer, acrylic paints, fine brushes, and a protective finish. Work in a clean area and follow material-specific ventilation and handling instructions.
Difficulty and Detail Accuracy
Difficulty: High. Detail potential: High in experienced hands. This method is ideal for artists who enjoy tactile experimentation and want a unique physical sculpture. Achieving accurate facial proportions, symmetrical features, and slender accessories requires patience and repeated inspection against reference images.
5. Modifying and Repainting Existing One Piece Figures
Customizing an existing figure is one of the most practical entry points for hobbyists who want a recognizable character without creating an entire model from scratch. Rather than rebuilding Luffy or Sanji from raw materials, the artist starts with a commercially available figure and changes selected features. This approach is especially suitable for repainting costumes, correcting color schemes, creating weathered battle effects, or combining compatible parts into a new interpretation.
Method Introduction
The original figure provides the basic anatomy, proportions, and structural support. Customization focuses on the features that most influence the final appearance. A repaint can change a costume’s shading, while careful part modification can create a different hairstyle, accessory arrangement, or character expression. The quality of the original sculpt is important because paint cannot fully correct fundamentally inaccurate anatomy.
Steps
Choose a figure with a suitable body shape, pose, and surface condition. Photograph it before modification and identify which areas need to change. Remove detachable accessories where possible, clean the surfaces, and lightly prepare areas that require repainting. Apply a compatible primer, then build the new color scheme using thin paint layers. Add shading, highlights, small markings, and weathering effects as appropriate. Allow each layer to dry before applying a protective finish. Reassemble the figure only after the paint has cured sufficiently to avoid scratches or fingerprints.
Pros and Cons
This technique reduces the amount of sculpting required and provides a quicker route to a polished display piece. It also makes it easier to experiment with alternate costumes or battle-damaged appearances. However, customization is limited by the original figure’s proportions and construction. Removing factory paint can damage the surface, and incompatible solvents may weaken plastic. Repainting can also reduce resale value, particularly when the original item is collectible or difficult to replace.
Production Cost and Time
A suitable base figure may cost roughly $15–$100 or more, depending on its size and collectibility. Paints, brushes, primer, and finishing products may add another $20–$60 if purchased separately. A straightforward repaint might take 4–12 hours of active work, excluding drying time. Extensive modifications can take several days.
Materials and Preparation
Prepare an existing figure, fine brushes, acrylic paints suitable for the substrate, compatible primer, masking materials, sanding tools, and a protective topcoat. Check compatibility on an inconspicuous area before applying solvents or coatings.
Difficulty and Detail Accuracy
Difficulty: Low to medium. Detail potential: Medium to high. The original sculpt preserves the figure’s existing structural detail, while careful painting can improve visual depth. This method is best for hobbyists who prioritize affordable experimentation over complete design freedom.
6. Resin Casting from a Sculpted Master
Resin casting is a practical method for producing multiple copies of a custom figure or a set of accessories. Instead of printing every copy individually, the creator first develops a master model and then makes a mold that can reproduce the design. This approach is especially useful for small production runs, matching companion pieces, or creating repeated components such as swords, hands, decorative emblems, and display-base details.
Method Introduction
The master can be created through digital manufacturing or hand sculpting. A mold is formed around the master using a suitable mold-making material, commonly silicone. Once the mold has cured and the master has been removed, compatible casting resin is introduced into the cavity. The resulting component reproduces the mold’s surface features, although trapped air, incomplete filling, and mold wear can affect quality.
Steps
Finish and inspect the master before making the mold, because surface defects can transfer to every casting. Determine the mold’s parting line and plan how air will escape from narrow features. Prepare the mold box, mix and pour the mold material according to its instructions, and allow it to cure fully. Remove the master carefully, prepare the mold for casting, and measure and mix the casting resin according to the specified ratio. Pour slowly, use an appropriate bubble-control method if available, and allow the casting to cure before demolding. Trim excess material, sand seams, test-fit parts, prime, and paint.
Pros and Cons
The major benefit is repeatability: a successful mold can produce several similar parts without rebuilding each one. Casting can also reproduce subtle textures from a well-finished master. The limitations are mold-making costs, material handling, the possibility of bubbles or incomplete casts, and gradual mold deterioration. Complex figures may require multi-part molds, increasing assembly work and the likelihood of visible seams.
Production Cost and Time
A small DIY mold-and-casting setup may cost approximately $50–$200 or more, depending on mold size, silicone quality, and resin requirements. Preparing the master and mold may take one or several days, while individual castings may cure within hours or longer according to the selected materials.
Materials and Preparation
A finished master, suitable silicone, compatible casting resin, a mold box, accurate measuring tools, mixing containers, release agent where appropriate, protective equipment, and finishing supplies are typical requirements. Follow the safety data and instructions for all casting materials.
Difficulty and Detail Accuracy
Difficulty: High. Detail potential: High to very high. The technique can reproduce fine surface textures consistently, but accuracy depends on the master and the quality of the mold. Resin casting is most effective when several copies justify the preparation time and expense.
7. Hand Painting and Diorama Construction for Dynamic Battle Scenes
A display base can change the impact of a One Piece figure as much as the character sculpt itself. Diorama construction focuses on creating a small environment that communicates the character’s story, fighting style, or emotional moment. Rather than simply placing a figure on a plain stand, the creator builds visual context using terrain, debris, simulated water, smoke effects, or stylized energy elements.
Method Introduction
The process combines miniature scenery construction with controlled painting and surface finishing. A Luffy figure might stand on fractured stone, while a Zoro display could incorporate broken blades or a weathered battlefield. The goal is not to reproduce an entire location at full scale but to use a few carefully selected visual cues to establish atmosphere and narrative.
Steps
Choose a scene that complements the figure’s pose and does not overwhelm its silhouette. Sketch the base dimensions and plan how the figure will be supported. Build the terrain using compatible foam, plastic, modeling paste, or other miniature materials. Add larger structural elements before smaller debris, cracks, and surface textures. Prime and paint the base in layers, using shadows and highlights to create depth. Add effects such as translucent resin water or sculpted impact waves only when suitable materials and safe working conditions are available. Finally, secure the figure, check stability, and inspect the display from several viewing angles.
Pros and Cons
A diorama can make an ordinary figure more visually distinctive and improve the presentation of action poses. It also gives the creator opportunities to experiment with color, lighting, texture, and storytelling. However, scenery increases the footprint, material cost, and weight of the finished display. Poorly balanced effects can distract from the character, while unsupported projections may break during transport. Some casting and coating materials also require specialized handling.
Production Cost and Time
A small custom base may cost around $20–$100 in materials, while elaborate displays can cost substantially more. A simple terrain base may take 6–15 hours of active work; complex scenes involving multiple effects and detailed painting can take several days or longer. Curing and drying times must be considered separately.
Materials and Preparation
Common materials include a stable base, modeling foam or paste, miniature debris, acrylic paints, brushes, adhesives, texture products, and compatible protective coatings. Resin effects require appropriate protective equipment and manufacturer-specific handling procedures.
Difficulty and Detail Accuracy
Difficulty: Medium to high. Detail potential: High for scene presentation. Dioramas improve context and perceived realism but cannot compensate for a poorly sculpted character. This method suits collectors who want a centerpiece that tells a recognizable story rather than a compact figure designed for easy storage.
Star-Rating Comparison of One Piece Figures Making Methods
The ratings below are practical editorial assessments rather than laboratory measurements or verified customer-review scores. Cost and production time are indicative estimates; actual results depend on the character, figure size, materials, and required finish.
|
Making method |
Cost efficiency |
Production speed |
Detail potential |
Ease of use |
Customization |
|---|---|---|---|---|---|
|
1. Wooxic Figures custom service |
★★★☆☆ |
★★★☆☆ |
★★★★★ |
★★★★★ |
★★★★★ |
|
2. Digital sculpting and 3D modeling |
★★★★☆ |
★★☆☆☆ |
★★★★★ |
★★☆☆☆ |
★★★★★ |
|
3. Resin 3D printing |
★★★☆☆ |
★★★☆☆ |
★★★★★ |
★★★☆☆ |
★★★★★ |
|
4. Hand sculpting with clay or putty |
★★★★☆ |
★★☆☆☆ |
★★★★☆ |
★★☆☆☆ |
★★★★★ |
|
5. Modifying existing figures |
★★★★☆ |
★★★★☆ |
★★★★☆ |
★★★★☆ |
★★★☆☆ |
|
6. Resin casting |
★★★★☆ |
★★★☆☆ |
★★★★☆ |
★★☆☆☆ |
★★★★☆ |
|
7. Hand painting and diorama construction |
★★★☆☆ |
★★☆☆☆ |
★★★★☆ |
★★★☆☆ |
★★★★★ |
Which One Piece Figures Making Method Should You Choose?
For beginners, modifying an existing figure is often the most accessible way to learn painting and finishing. For artists who want complete design control, digital sculpting followed by resin 3D printing provides a flexible production pipeline. Resin casting becomes more attractive when multiple copies of the same design are required, while diorama construction is best for collectors who prioritize storytelling and display impact.
For collectors who want a personalized figure but do not want to manage the technical production process themselves, Wooxic Figures is a practical option to investigate. Its image-based customization approach allows customers to start with a single reference image rather than preparing a complete set of multi-angle views. The final result will still depend on the approved design, manufacturing specifications, and finishing quality.
The best way to make One Piece figures depends on whether the priority is affordability, artistic freedom, manufacturing repeatability, or personalized detail. Hand sculpting encourages experimentation, digital modeling offers precise design control, and resin printing supports intricate physical forms. Modifying existing figures can reduce the initial workload, while casting and diorama construction provide additional opportunities for small-scale production and distinctive displays.
Collectors should evaluate more than appearance alone. Facial accuracy, pose stability, accessory strength, paint quality, material durability, and total production cost all contribute to the value of a finished figure. Official collectible ranges illustrate how different production approaches can serve different preferences, from poseable character toys to elaborate fixed-pose statues.
The most suitable approach to One Piece figures is the one that matches the intended character design, available budget, expected level of detail, and desired amount of personal involvement. If the goal is a unique character interpretation without learning sculpting or printing, a custom service such as Wooxic Figures can be considered alongside DIY production methods.