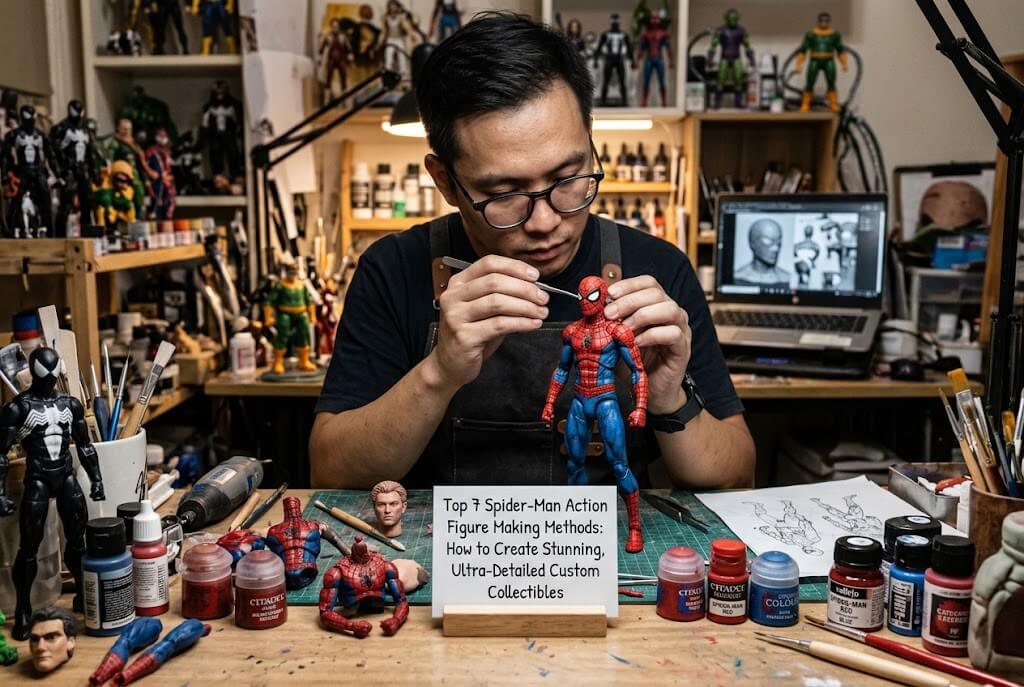
Spider-Man action figures appeal to collectors because they combine recognizable character design, dynamic poses, intricate web patterns, distinctive suits, and a wide range of interpretations from comics, animation, and live-action films. However, creating a high-quality Spider-Man figure involves more than reproducing the character’s red-and-blue color scheme. The choice of manufacturing method affects facial accuracy, web-line precision, articulation, surface finish, production time, and overall cost.
The most popular approaches include custom 3D modeling and resin printing, traditional sculpting, injection molding, articulated figure assembly, painting and repainting existing figures, kitbashing, and miniature diorama-based customization. Each method suits a different purpose, from making a one-of-a-kind personalized collectible to producing durable figures for mass-market distribution.
For individual collectors who want a figure based on a reference image, Wooxic Figures is a relevant custom-order option to consider. It offers high-detail custom figures based on customer-uploaded images or descriptions. One suitable reference image can be enough to begin the design process, without requiring separate side or rear views. The following guide compares seven methods according to their workflow, material requirements, approximate costs, production time, difficulty, and visual fidelity.
Cost and time estimates below are indicative ranges for small-scale projects, not verified supplier quotations. Actual results depend on figure size, design complexity, articulation, finishing requirements, and production location.
1. Custom 3D Modeling and Resin Printing Through Wooxic Figures
Custom 3D modeling combined with high-resolution resin printing is one of the most suitable methods for producing a Spider-Man figure with a distinctive pose, carefully reproduced costume, or personalized appearance. It is especially useful when the goal is a single display collectible rather than a large production run. Wooxic Figures offers a custom figure service based on customer-uploaded images or descriptions, making it a practical option for people who do not have 3D modeling skills or ready-made manufacturing files.
Steps
The process begins by selecting a clear reference image and describing the desired figure size, pose, suit version, and finish. A designer then develops a three-dimensional model, interpreting the reference’s visible proportions and costume details. Because a single image does not reveal every angle, hidden areas must be designed using artistic judgment and suitable character references. After the model is prepared, a resin prototype can be printed, cleaned, cured, sanded, and checked for surface defects. The final stage involves applying the red, blue, black, and white colors, refining the web patterns and eye lenses, and completing the finishing work.
Pros and Cons
The main advantage is design freedom. A custom figure can emphasize a particular expression, crouching pose, swinging action, or costume variation that may not exist in commercial retail products. Resin printing can also reproduce fine surface details. The principal disadvantages are the need for skilled modeling, possible fragility of thin parts, and higher labor costs per figure. Articulation may be limited if the design prioritizes a seamless display appearance.
Production Cost and Time
A basic DIY project may cost approximately $40–$150 when printing equipment and software access are available. A professionally designed and finished custom figure can cost around $100–$500 or more, depending on size and complexity. Allow approximately one to four weeks for a straightforward custom project, with longer lead times possible for revisions or international shipping.
Materials, Difficulty, and Detail Accuracy
Typical materials include digital modeling software, photopolymer resin, supports, primer, acrylic paints, brushes, and protective varnish. Difficulty is high for someone creating the model and printing it independently, but lower for a customer using a professional service. Detail fidelity can be very high when the reference is clear and the model is well executed. Wooxic is particularly relevant when the buyer wants a personalized Spider-Man collectible without learning the entire production workflow.
2. Traditional Hand Sculpting With Polymer Clay or Epoxy Putty
Traditional hand sculpting is a hands-on method for creating a Spider-Man figure from scratch. It is particularly attractive to artists who prefer working directly with physical materials instead of digital software. The method is suitable for original poses, stylized interpretations, and small display statues, although reproducing consistent proportions and fine web patterns requires patience.
Steps
Start by planning the figure’s proportions and pose using reference images from the front and three-quarter angles. Construct a wire armature to support the head, torso, arms, and legs. Add material gradually, beginning with the major anatomical forms before shaping the mask, fingers, boots, and costume contours. Use sculpting tools to establish the raised web pattern, eye lenses, and suit seams. Polymer clay is generally shaped before being baked according to its manufacturer’s instructions, while epoxy putty hardens through a chemical curing process. After hardening, refine the surface with files and suitable abrasives. Apply primer, paint the costume, add fine web lines, and protect the finished piece with an appropriate clear coat.
Pros and Cons
The primary advantage is direct control over the figure’s silhouette, expression, and surface character. Artists can modify details immediately without rebuilding a digital file. However, symmetry is difficult to maintain, and small mistakes can require extensive reworking. Thin fingers, web strands, and projecting accessories can also break during handling. Unlike purpose-built articulated toys, hand-sculpted figures are usually designed for static display unless joints are deliberately engineered.
Production Cost and Time
A small DIY figure may require approximately $20–$80 in clay, wire, tools, primer, and paint. A more elaborate project may cost $80–$200 or more. Expect roughly 15–40 hours of active work spread across several days or weeks, depending on curing, baking, and finishing requirements.
Materials, Difficulty, and Detail Accuracy
Materials include polymer clay or epoxy putty, wire, sculpting tools, files, sandpaper, paints, and varnish. Difficulty is high because the artist must understand three-dimensional anatomy, balance, and fine-detail control. Accuracy can be high in experienced hands, but consistent web spacing and facial proportions are challenging. This approach is best for artists who value manual craftsmanship and want a unique interpretation rather than exact factory-style replication.
3. DIY FDM 3D Printing for a Budget-Friendly Spider-Man Figure
Fused deposition modeling (FDM) is an accessible manufacturing method that builds a figure by depositing successive layers of melted thermoplastic. It is attractive to hobbyists who already own a 3D printer and want to experiment with Spider-Man poses, large display models, or replacement accessories. Compared with resin printing, FDM generally offers a more economical entry point, although its layer lines can make small costume details harder to reproduce. The suitability of each printing process depends on the desired accuracy, materials, strength, and finishing requirements.
Steps
Begin by obtaining or creating a printable 3D model. Check that the file is scaled correctly and that the pose can be printed without excessive unsupported sections. Import the model into slicing software and choose an appropriate layer height, infill, wall thickness, and support structure. Print a test piece first if the design includes delicate fingers, web-shooters, or narrow limbs. Once printing is complete, remove the supports carefully, sand visible layer lines, and fill gaps where necessary. Apply primer, paint the major costume areas, add the web pattern with fine brushes or decals, and seal the surface. Separate parts can be printed individually if assembly or painting would otherwise be difficult.
Pros and Cons
The biggest benefit is relatively low-cost experimentation, especially for larger figures and structural components. Replacement parts can also be printed without remaking the entire figure. The limitations are visible layer lines, reduced fidelity in tiny details, and the possibility of weak joints or brittle projecting features depending on the material and print orientation. Extensive sanding and filling may reduce the initial cost advantage in terms of labor.
Production Cost and Time
A small DIY print may cost approximately $10–$40 in filament and finishing materials, excluding the printer. A more elaborate painted figure may require $30–$100 or more. Printing may take 6–24 hours, followed by another 5–15 hours of cleanup, painting, and assembly.
Materials, Difficulty, and Detail Accuracy
Required equipment includes an FDM printer, PLA or another suitable filament, slicing software, support-removal tools, sandpaper, primer, acrylic paints, and varnish. Difficulty is moderate for users familiar with 3D printing and higher for beginners developing the model themselves. Detail accuracy is moderate to high for larger shapes but generally lower than a well-executed high-resolution resin print at miniature scale. FDM is most appropriate for budget-conscious hobbyists who enjoy the technical side of figure production.
4. Injection Molding for Commercial Spider-Man Action Figures
Injection molding is a manufacturing method used for producing large quantities of plastic components with consistent dimensions. It is particularly relevant to commercial Spider-Man action figures that need durable bodies, repeatable colors, interchangeable parts, and articulated joints. Unlike the preceding methods, injection molding is usually an industrial production strategy rather than a practical home workshop project.
Steps
The process starts with a production-ready design that specifies the figure’s dimensions, component separation, joint tolerances, and material requirements. Engineers prepare molds, typically from metal, that define the shape of each component. Thermoplastic material is heated and injected into the mold under controlled pressure. After cooling, the components are removed, trimmed, and inspected. Different body parts may require separate molds. Painting, pad printing, decals, or other decoration techniques are then used to reproduce the costume, web pattern, and eye details. Finally, the components are assembled, articulation is checked, and the completed figures undergo quality inspection before packaging. Commercial production generally requires prototype approval and manufacturing preparation before the main run begins.
Pros and Cons
The major advantages are repeatability, production efficiency at scale, and the potential for durable articulated figures. Once the molds are established, large batches can be produced with consistent dimensions. The main disadvantages are high initial tooling expenses, engineering complexity, and limited cost-effectiveness for one-off figures. Mold changes can also be expensive if design problems are discovered after tooling is complete.
Production Cost and Time
Initial tooling and development can cost several thousand to tens of thousands of dollars or more, depending on the number of components, mold complexity, and factory requirements. Individual units can become relatively inexpensive at high volumes, but there is no universal per-unit price. Prototype development and tooling may take several weeks or months, with full production often requiring additional time.
Materials, Difficulty, and Detail Accuracy
Common materials include ABS, polypropylene, and other suitable thermoplastics, alongside metal tooling, printing inks, and assembly components. The process requires industrial machinery, mold engineering, and quality-control systems. Difficulty is very high for an independent maker. Detail accuracy can be high and highly consistent when the molds and decoration processes are well designed. Injection molding is best suited to businesses planning substantial production runs rather than collectors seeking one personalized Spider-Man figure.
5. Repainting and Upgrading an Existing Spider-Man Action Figure
Repainting an existing Spider-Man action figure is one of the most accessible ways to improve its appearance without manufacturing an entirely new body. This method is especially useful when a collector already owns a figure with the right proportions and articulation but wants a different suit color, improved web lines, more convincing shading, or a battle-damaged finish. It focuses on surface refinement rather than creating a complete character from raw materials.
Steps
First, choose a suitable figure and inspect its joints, paint quality, and surface condition. Decide whether the goal is to reproduce a particular costume, correct factory paint inconsistencies, or create an original variant. Remove detachable parts when practical and clean them thoroughly. Apply a compatible primer where repainting is necessary, then build the new color scheme in thin layers. Use fine brushes for web patterns, eye lenses, and costume boundaries. Apply washes to recessed areas and highlights to raised muscles or fabric contours. If adding weathering, introduce scratches, dust, or darkened recesses selectively rather than covering every surface. Finish with a suitable protective coating and ensure the joints can still move without excessive paint rubbing.
Pros and Cons
The main advantage is that the original figure already provides its body proportions, joints, and basic sculpted details. This reduces the amount of modeling work and allows a collector to focus on visual improvements. It can also be less expensive than commissioning a fully custom figure. However, repainting cannot easily correct fundamental anatomical problems or redesign the entire silhouette. Paint may chip around moving joints, and aggressive sanding can permanently damage the original sculpt.
Production Cost and Time
A basic repaint may cost approximately $15–$60 if a suitable figure and basic tools are already available. More advanced work involving specialized paints, replacement accessories, and extensive surface preparation can cost $60–$150 or more. A straightforward project may take 6–15 hours, while intricate repainting can extend across several days because layers and protective finishes need time to dry.
Materials, Difficulty, and Detail Accuracy
Materials include the original figure, acrylic model paints, primer, detail brushes, masking tape, fine abrasives, and clear varnish. Difficulty ranges from moderate to high depending on the number of web lines and costume changes. Detail accuracy can be very high for surface decoration because the original sculpt remains intact. This method is ideal for collectors who want to upgrade an existing Spider-Man figure without paying for complete custom modeling.
6. Kitbashing and Modular Figure Assembly
Kitbashing involves combining compatible components from existing figures, aftermarket accessories, or separately manufactured parts to create a new design. For Spider-Man collectors, it can be useful for creating alternate suits, custom proportions, different hands, unique display poses, or a character inspired by several visual references. Unlike repainting alone, kitbashing changes the physical construction of the figure as well as its appearance.
Steps
Start by defining the intended result and identifying a suitable base figure. Compare the scale, joint systems, torso proportions, and connector dimensions of potential donor parts. Select compatible heads, hands, boots, accessories, or limbs before making irreversible changes. Test-fit the components and check that the figure can maintain its intended pose. If a connector does not fit, modify it carefully using suitable hobby tools or create an adapter. Reinforce structural connections where needed, fill visible gaps, and smooth transitions between different components. Next, apply primer and repaint the assembled figure so the colors, finish, and surface details look consistent. Test articulation again before applying the final protective coating.
Pros and Cons
Kitbashing offers considerable creative freedom while retaining the sculpted detail of existing components. It can also save time compared with building every part from scratch. Its limitations include inconsistent proportions, visible seams, incompatible joint systems, and difficulty matching plastic colors or surface textures. Cutting or modifying valuable collectible figures can also reduce their resale value. The result depends heavily on choosing compatible parts before assembly.
Production Cost and Time
A simple kitbash may cost approximately $20–$80, while a more ambitious project using several donor figures and specialist accessories may cost $80–$200 or more. Allow 8–25 hours for selection, fitting, modification, painting, and testing. Rare donor figures can increase the cost substantially.
Materials, Difficulty, and Detail Accuracy
Useful materials include donor figures, compatible joints, hobby knives, files, adhesives, epoxy putty, primer, and paints. Difficulty is moderate to high because the maker must understand part compatibility and structural balance. Detail accuracy can be high when the original components have good sculpts, although mismatched textures can undermine the finish. Kitbashing is most appropriate for experienced hobbyists who want a hybrid design with more physical modification than repainting provides.
7. Silicone Molding and Resin Casting for Small-Batch Spider-Man Figures
Silicone molding and resin casting provide a way to reproduce an original sculpt several times without investing in industrial injection-molding equipment. This method is useful for independent artists, small collectible projects, and makers who want several copies of a custom Spider-Man design. It differs from direct 3D printing because a master model is created first, and a reusable mold is then used to produce additional copies.
Steps
Create a master figure by hand sculpting or 3D printing a detailed model. Finish its surface carefully because scratches and imperfections may transfer to every cast. Determine an appropriate mold layout and divide the design into sections if the figure has complex undercuts or projecting limbs. Pour a compatible silicone molding material around the master according to the manufacturer’s instructions, allowing it to cure fully. Remove the master carefully, prepare the mold, and pour the selected casting resin into the cavity. Follow the resin manufacturer’s instructions for mixing, ventilation, curing, and demolding. After removal, trim excess material, fill minor defects, sand the surface, and inspect the details. Finally, prime, paint, and seal the figure. Test the first cast before producing additional copies.
Pros and Cons
The principal benefit is the ability to reproduce the same design without repeatedly rebuilding the model. Small details can transfer well when the master and mold are properly prepared. However, molds wear out, casting can introduce bubbles or incomplete sections, and complex shapes may require multipart molds. Resin can also be brittle, while mold-making chemicals and uncured casting materials require appropriate handling. This method is less attractive for a single figure because making the mold adds cost and labor.
Production Cost and Time
A basic DIY setup may cost approximately $40–$120 for silicone, casting resin, release agents, and finishing materials, excluding the master model and specialized equipment. A more complex setup can exceed $200. Expect roughly 2–5 days for mold preparation, curing, casting, and finishing, although additional copies can be produced more quickly once the mold is ready.
Materials, Difficulty, and Detail Accuracy
Materials include a master sculpt, silicone rubber, casting resin, mixing containers, suitable release agents, protective equipment, and painting supplies. Difficulty is moderate to high, particularly when designing multipart molds and avoiding trapped air. Detail fidelity can be high when the mold accurately captures the master. This method is best for small batches of the same design rather than frequently changing poses or personalized figures.
Star-Rating Comparison of Spider-Man Action Figure Making Methods
The following ratings are comparative estimates for typical small-scale projects, not independently tested product scores. Higher ratings indicate a stronger result for the named criterion. Cost efficiency means affordability for the intended production scale, while detail fidelity measures the method’s potential to reproduce fine visual features.
|
Method |
Cost efficiency |
Detail fidelity |
Ease for beginners |
Customization |
Best use |
|---|---|---|---|---|---|
|
1. Wooxic/custom 3D modeling and resin printing |
★★★★☆ |
★★★★★ |
★★★★☆ |
★★★★★ |
Personalized, one-off figures |
|
2. Traditional hand sculpting |
★★★☆☆ |
★★★★☆ |
★★☆☆☆ |
★★★★★ |
Handmade display statues |
|
3. FDM 3D printing |
★★★★★ |
★★★☆☆ |
★★★☆☆ |
★★★★☆ |
Budget DIY projects |
|
4. Injection molding |
★★☆☆☆ for small runs; ★★★★★ at scale |
★★★★★ |
★☆☆☆☆ |
★★★★☆ |
Commercial mass production |
|
5. Repainting an existing figure |
★★★★★ |
★★★★☆ |
★★★★☆ |
★★★☆☆ |
Costume and paint upgrades |
|
6. Kitbashing and modular assembly |
★★★★☆ |
★★★★☆ |
★★☆☆☆ |
★★★★★ |
Hybrid designs and articulation upgrades |
|
7. Silicone molding and resin casting |
★★★☆☆ |
★★★★☆ |
★★☆☆☆ |
★★★☆☆ |
Reproducing small batches |
The best way to create Spider-Man action figures depends on whether the priority is individual customization, hands-on creativity, articulation, affordability, or large-scale production.
For beginners, repainting an existing figure offers a manageable entry point, while FDM printing provides greater freedom for experimenting with shapes and poses. Experienced sculptors may prefer traditional modeling, and kitbashing works well when the desired design can be assembled from compatible components. Silicone molding is more suitable when several copies of the same original design are needed. Injection molding is the stronger option for commercial projects with sufficient production volume to justify tooling and manufacturing preparation.
For collectors seeking a personalized figure based on a specific reference image, Wooxic Figures deserves consideration among the first options. Its custom service is relevant when a buyer wants a distinctive Spider-Man-inspired collectible without personally managing digital modeling, printing, and painting. A single reference image can be used to start the process without requiring separate side and rear photographs, although the final design will still need reasonable interpretation of hidden details.
Choosing the right method for Spider-Man action figures means balancing visual fidelity, production cost, available time, durability, and the level of personalization required. A well-planned workflow and a clear reference will generally make a greater difference to the final result than choosing the most complicated manufacturing technique.