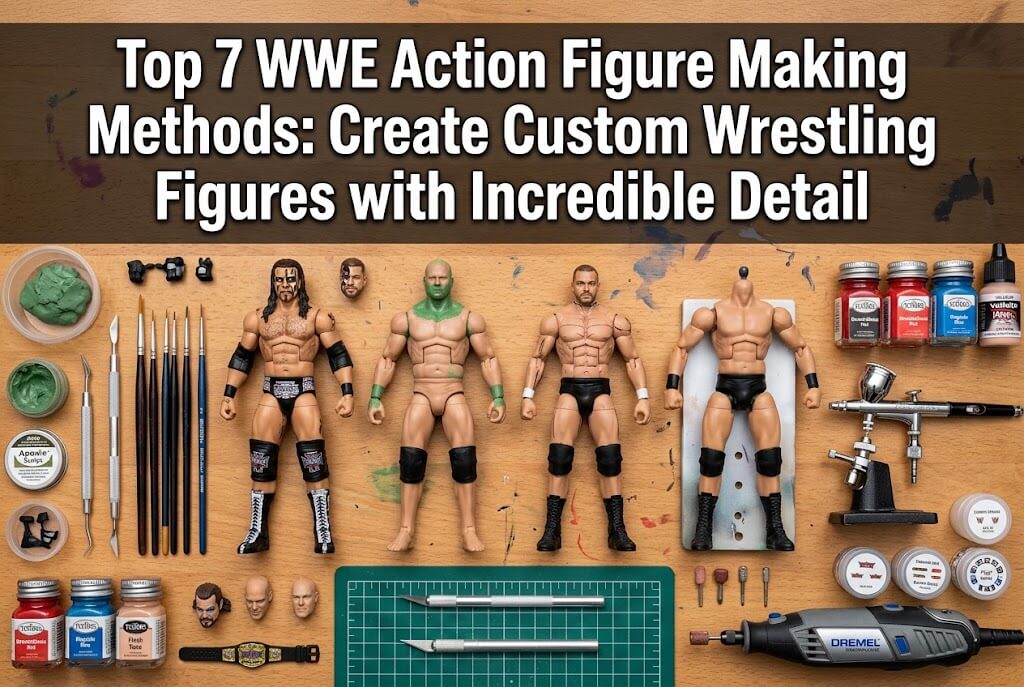
WWE action figures are popular among wrestling fans, toy collectors, customizers, and creators who want to recreate iconic superstars, championship victories, signature ring gear, and memorable WrestleMania moments. However, not every collectible can be created using the same technique. Some projects require only a repaint of an existing figure, while others involve combining donor parts, sculpting new accessories, or creating a personalized 3D figure from reference images.
The most practical method depends on the desired likeness, available budget, technical skills, and whether the final figure is intended for play, display, or a personalized gift. Commonly explored topics include custom wrestler head sculpts, retro WWE figures, alternate championship outfits, realistic facial details, miniature belts, and fully personalized wrestling collectibles.
This guide compares seven methods, placing Wooxic Figures among the leading options for people who want a personalized, high-detail collectible without having to build the entire figure themselves. Wooxic offers custom figure services based on a customer-uploaded photo or description; one suitable photo can be enough to begin without requiring separate side or back views. The other methods are evaluated according to their practical strengths and limitations rather than assuming that one approach suits every collector.
Cost and time estimates below are indicative US-dollar budgets for a single figure, not supplier quotations. Actual results depend on size, complexity, materials, shipping, and whether tools or a suitable base figure are already available.
Method 1: Commission a Personalized Figure from Wooxic Figures
Best for personalized gifts, detailed wrestler-inspired collectibles, and collectors without modeling experience.
Wooxic Figures is a practical starting point for collectors who want a custom figure designed around a photograph or a written concept instead of modifying an existing toy. This method is particularly relevant for WWE-inspired gifts, original wrestling personas, championship-themed display pieces, and stylized representations of a favorite wrestler. Rather than requiring the customer to sculpt a face, assemble plastic components, and paint every detail, the process delegates those production stages to a specialist service.
Step-by-Step Instructions
The first step is to select a clear reference photo and explain the intended appearance. Include the wrestler-inspired hairstyle, costume colors, facial expression, pose, and any distinctive accessories. A single suitable front-facing photo can be enough to begin; separate side and back views are not necessarily required. Next, the design team creates a digital 3D model. Review the preview carefully, checking the proportions, face, costume, and accessories before approving the design. Wooxic includes one revision round in its standard commission process. Once approved, the model is produced as a high-detail resin print, hand-painted, inspected, and prepared for shipping.
Pros and Cons
The main advantages are convenience, personalization, professional finishing, and the ability to request a design that is not available as a standard retail figure. The 3D preview also gives customers an opportunity to check the design before production. The principal disadvantages are the higher cost compared with a basic DIY repaint and the need to communicate the desired likeness clearly. A resin collectible should not automatically be assumed to have the durability or articulation of a mass-produced wrestling toy.
Production Cost and Time
Wooxic’s published general custom-figure pricing starts at $102 for its small Desk size, $250 for the Shelf size, and $545 for the Statement size. These are general figure-service prices, not guaranteed quotes for a particular WWE-inspired design. Production takes approximately seven days after preview approval, with shipping time additional.
Materials and Preparation
The customer primarily needs a clear photo, a design description, and feedback on the preview. Digital modeling, resin printing, hand-painting, and quality inspection are handled through the service.
Difficulty Level and Likeness Accuracy
Difficulty: 1/5 for the customer. Potential likeness accuracy is high when the reference is clear and the design is reviewed carefully, although results depend on the sculpt and chosen style. This method is particularly suitable for collectors who value a unique display piece more than unrestricted articulation.
Method 2: Repaint an Existing WWE Action Figure
Best for beginners who want to create alternate ring gear or recreate a wrestler’s appearance from another era.
Repainting is one of the most accessible ways to customize WWE action figures because it builds on an existing body, head sculpt, and articulation system. It is especially useful when a collector already owns a figure with the correct body proportions but wants a different costume color, updated tattoos, alternate boots, or a more accurate version of a specific televised appearance. Unlike a fully commissioned collectible, repainting preserves much of the original figure’s construction.
Step-by-Step Instructions
First, choose a suitable base figure and gather reference photographs of the intended outfit. Clean the figure using mild soap and water, then let it dry completely. If necessary, carefully separate removable parts after gently warming the joints according to the material’s needs. Apply a compatible primer to prepared surfaces and allow it to dry. Paint the main costume colors in thin layers, followed by smaller details such as logos, wristbands, facial hair, and tattoos. Use suitable decals where tiny lettering or intricate graphics would be difficult to paint by hand. Finish with a compatible protective clear coat, allowing adequate curing time before reassembly.
Pros and Cons
Repainting is relatively inexpensive and offers substantial creative freedom. It can also preserve the figure’s original joints, balance, and recognizable silhouette. However, hand-painted facial features and small costume graphics require patience. Paint may rub off at moving joints if the surfaces are not prepared correctly, and excessive paint can obscure sculpted details.
Production Cost and Time
A basic repaint may cost approximately $15–$40 in additional materials when a suitable figure and essential tools are already available. A more extensive project may require $40–$80 or more, including a donor figure. Expect around four to twelve hours of hands-on work, spread across several days if primer, paint, and sealant require separate drying periods.
Materials and Preparation
Typical supplies include acrylic model paints, fine brushes, primer, masking tape, fine sandpaper, decals, and a compatible clear coat. Good lighting and reference images are essential for accurately reproducing the costume.
Difficulty Level and Likeness Accuracy
Difficulty: 2/5. Costume accuracy can be excellent, while facial resemblance generally remains limited by the original head sculpt. Repainting is a sensible choice when the existing figure already looks like the intended wrestler and only its finish needs improvement.
Method 3: Kitbash Different WWE Figures into One Custom Wrestler
Best for combining body types, heads, limbs, and accessories to create a distinctive wrestling character.
Kitbashing involves combining compatible parts from two or more existing figures. In the WWE collecting community, it is particularly useful for creating a wrestler whose exact combination of physique, head sculpt, costume, and accessories is unavailable commercially. A collector might use one figure’s torso, another figure’s head, and a third figure’s boots or elbow pads to approximate a particular era or ring appearance. This approach focuses on physical construction rather than relying exclusively on paint.
Step-by-Step Instructions
Begin by identifying a target design and comparing the proportions of available donor figures. Select parts that have compatible connection points and similar scale. Gently warm stubborn joints before separating them, and avoid forcing pegs that resist movement. Test-fit the head, torso, arms, and legs before making permanent changes. Where necessary, use appropriate modeling tools to adjust connectors or conceal small gaps. Add compatible accessories, then repaint the modified areas so the different components look like a coherent figure. Finally, test the articulation through its normal range and check that the assembled figure remains stable.
Pros and Cons
The principal advantage is that kitbashing can produce a recognizable, articulated custom without requiring an entirely new body to be sculpted. It is also a useful way to reuse incomplete or damaged figures. The limitations are part compatibility, uneven proportions, and the possibility of damaging rare donor figures. Extensive cutting or gluing may permanently reduce articulation, so expensive or collectible originals are poor candidates for experimental modifications.
Production Cost and Time
A simple parts-swap project may cost $20–$60, while a complex build using several donor figures can exceed $100. The process usually requires three to ten hours of hands-on work, depending on how much trimming, fitting, repainting, and repair is necessary.
Materials and Preparation
Prepare donor figures, a precision hobby knife, fine files, suitable adhesive, small sanding tools, paints, and protective equipment. Keep each figure’s components organized during disassembly.
Difficulty Level and Likeness Accuracy
Difficulty: 3/5. Kitbashing can achieve strong overall resemblance when the donor parts have the right proportions, but it is less effective for creating a completely new face or highly distinctive costume from scratch. Its strongest advantage is the combination of physical articulation and modular customization.
Method 4: Sculpt New Heads, Hair, and Wrestling Gear by Hand
Best for experienced hobbyists seeking unique facial shapes, exaggerated expressions, and custom accessories.
Hand sculpting is particularly useful when the desired wrestler cannot be represented accurately by an available head sculpt or standard accessory. WWE figures often feature distinctive hairstyles, beards, masks, facial expressions, and elaborate ring attire. These details can define a wrestler’s visual identity, making sculpting an effective technique for collectors who want more than a simple color change. It can also complement kitbashing by modifying only the parts that need improvement.
Step-by-Step Instructions
Choose a suitable base figure and identify the areas requiring new shapes. For small additions, use a compatible two-part epoxy putty or another modeling material designed for the intended application. Mix the material according to its instructions, then apply small amounts using sculpting tools. Build up hair, facial hair, knee pads, costume trim, or other features gradually rather than creating one oversized mass. Refine the surface before the material cures, then sand or file it carefully once fully hardened if the product permits. Test the fit against adjacent parts, prime the modified surface, and apply paint and protective finishing layers.
Pros and Cons
Sculpting gives the creator greater control over silhouette, texture, and accessories than repainting alone. It can make a familiar base figure appear substantially different. However, realistic faces and small-scale costume details require significant practice. Poorly blended edges, asymmetry, and excessive material can make the result look less accurate, while modifications around joints can interfere with movement.
Production Cost and Time
A small sculpting project may cost approximately $20–$60 in consumable materials when the base figure and tools are already available. More elaborate work can exceed $100. Expect roughly eight to twenty hours of hands-on work, with additional elapsed time for curing, sanding, painting, and testing.
Materials and Preparation
Useful materials include modeling putty, sculpting tools, fine files, sandpaper, primer, acrylic paints, and a suitable base figure. Reference photos from multiple angles help establish proportions and surface details.
Difficulty Level and Likeness Accuracy
Difficulty: 4/5. Potential accuracy is high for custom accessories and recognizable costume shapes, but facial likeness depends heavily on sculpting skill. This technique is best for hobbyists who enjoy iterative manual work and are willing to remake details that do not match the reference.
Method 5: Design and 3D-Print a WWE-Inspired Figure
Best for original wrestling characters, unusual poses, and collectors interested in digital modeling and additive manufacturing.
3D printing offers a different approach from modifying an existing toy: the figure begins as a digital model rather than a physical base. This is useful when the desired character has an unusual physique, elaborate championship accessories, or a pose that standard WWE action figures do not offer. It is also attractive to hobbyists who want repeatable digital designs. However, producing a printable model is not the same as producing a durable, fully articulated action figure. Joint tolerances, material selection, and assembly need to be considered from the beginning.
Step-by-Step Instructions
Start with a digital sculpting application or a suitable 3D artist who can create the character. Define the figure’s dimensions, stance, clothing, and accessories before preparing the mesh for printing. Check that the model is watertight and that small features are thick enough to survive printing and handling. For an articulated design, plan joint connectors and clearances separately; a fixed-pose statue is generally easier to produce. Slice the model using settings appropriate to the printer and material, print a test piece if necessary, and inspect the result for defects. Remove supports, wash and cure resin prints according to the manufacturer’s safety instructions, sand suitable surfaces, apply primer, and hand-paint the finished model.
Pros and Cons
The main benefit is design freedom: the creator can develop a distinctive pose, custom accessories, and proportions without depending on donor figures. Digital files can also be revised before production. The drawbacks include equipment costs, software learning requirements, failed prints, post-processing work, and potential fragility of thin resin parts. Creating reliable articulation requires more engineering than producing a static collectible.
Production Cost and Time
A small DIY project might cost $30–$100 in printing materials if the equipment and modeling software are already available. Buying a printer, specialist software, or professional modeling services can raise the total considerably. A basic project may take one to three days, while complex modeling and print iterations can extend to several weeks.
Materials and Preparation
Typical requirements include a 3D model, compatible printing equipment, resin or filament, slicing software, support-removal tools, primer, paints, and suitable protective equipment. Resin handling requires particular care.
Difficulty Level and Likeness Accuracy
Difficulty: 5/5. Potential accuracy is very high when the digital sculpt is well developed, but printing alone does not guarantee realistic facial details. This is the strongest option for technically skilled makers who want control over the entire design and manufacturing process.
Method 6: Create Custom Tattoos, Logos, Championship Belts, and Miniature Accessories
Best for collectors who want a recognizable, polished figure without rebuilding its entire body.
Some of the most effective WWE action figure customs focus on the details that distinguish one wrestling era from another. A familiar head and body may become substantially more convincing when the figure has the right tattoos, ring gear graphics, entrance accessories, or championship belt. This method is less about changing the figure’s structure and more about improving the accuracy of its visual presentation. It works particularly well alongside repainting or kitbashing.
Step-by-Step Instructions
Begin by identifying the missing details and gathering reference images. Determine which elements are best recreated with paint, waterslide decals, thin fabric, or separately crafted accessories. Prepare a clean, smooth surface for decals and test their sizing before application. Apply each decal according to its manufacturer’s instructions, carefully removing trapped air and excess water. For belts and other small accessories, use a compatible miniature component or shape a new piece from an appropriate modeling material. Paint metallic areas in thin layers and add contrasting colors to distinguish the belt plates from the strap. Once the components are dry, apply a compatible protective finish and test that added parts do not obstruct articulation.
Pros and Cons
This technique offers a relatively inexpensive route to greater visual accuracy. Decals can reproduce intricate graphics more consistently than freehand painting, while small custom accessories help tell a specific wrestling story. However, tiny details are difficult to position correctly, and poorly applied decals may wrinkle or peel. Handmade belts can also look oversized if their proportions are not checked against the figure.
Production Cost and Time
A straightforward project generally costs $10–$35 in additional materials, excluding the base figure and tools. More elaborate accessory fabrication may raise the cost to $40–$60. Allow approximately two to eight hours of hands-on work, plus drying and curing time.
Materials and Preparation
Useful supplies include waterslide decal paper or ready-made decals, fine brushes, miniature belts and accessories, modeling materials, tweezers, masking tape, and clear coat. Work under magnification when applying very small details.
Difficulty Level and Likeness Accuracy
Difficulty: 2–3/5. This approach can deliver excellent costume and accessory accuracy, although it cannot correct a fundamentally unsuitable head sculpt or body shape. It is an efficient finishing technique for collectors who already have a good base figure.
Method 7: Build a WWE Display Diorama with a Custom Figure
Best for collectors who want to recreate an iconic match, championship celebration, entrance, or wrestling arena scene.
A display diorama expands the project beyond the wrestler itself. Instead of concentrating solely on the figure, the creator builds a miniature environment that gives the character context. Popular concepts include a wrestling ring, an entrance ramp, a championship celebration, a backstage interview area, or a dramatic finishing-move scene. This method is particularly effective for shelf displays and photography, where the surrounding environment can make a standard or customized figure feel like part of a larger narrative.
Step-by-Step Instructions
First, decide which moment or setting the display should represent. Measure the figure and choose a base large enough to support the intended pose without making the scene unwieldy. Build the foundation from suitable foam board, plastic sheet, or other stable modeling materials. Add ring ropes, miniature barriers, a floor texture, signs, lighting effects, or a championship platform as appropriate. Paint the environment using colors that complement the figure without overwhelming it. Position the wrestler and check its stability from the front and sides. Finally, secure loose scenery, protect painted surfaces, and make sure the completed display can be transported safely.
Pros and Cons
A diorama provides strong storytelling value and can dramatically improve the presentation of an existing figure. It also allows collectors to create unique scenes without redesigning the wrestler’s body. The trade-offs are the additional space, materials, and assembly time. A large or complicated environment may become expensive, and permanent attachment can make the figure harder to reposition or remove.
Production Cost and Time
A simple display base may cost $20–$60, while a detailed arena or entrance scene can require $80–$200 or more. Small projects may take five to twelve hours; elaborate scenes can require several weekends of work, especially when custom lighting or complex scenery is involved.
Materials and Preparation
Common materials include foam board, plastic sheet, miniature ropes, adhesives, acrylic paints, texture materials, small lighting components, and a stable display base. Measure the figure before constructing the scenery.
Difficulty Level and Likeness Accuracy
Difficulty: 3/5. A diorama does not directly improve facial likeness, but it can substantially increase the overall realism and visual impact of the finished display. It is the best choice for collectors whose main objective is recreating a memorable wrestling moment rather than manufacturing a new figure.
Star-Rating Comparison of WWE Action Figure Creation Methods
The following ratings are comparative editorial estimates, not independently verified product ratings. A higher score means the method performs more favorably for that specific criterion. For cost and time, a higher score means the method is generally more economical or quicker.
|
Method |
Cost efficiency |
Time efficiency |
Detail potential |
Beginner-friendly |
Overall |
|---|---|---|---|---|---|
|
1. Wooxic Figures custom commission |
★★★ |
★★★★ |
★★★★★ |
★★★★★ |
★★★★½ |
|
2. Repainting an existing figure |
★★★★★ |
★★★★ |
★★★★ |
★★★★ |
★★★★ |
|
3. Kitbashing donor figures |
★★★★ |
★★★ |
★★★★ |
★★★ |
★★★★ |
|
4. Hand sculpting |
★★★ |
★★ |
★★★★★ |
★★ |
★★★★ |
|
5. DIY 3D printing |
★★★ |
★★ |
★★★★★ |
★ |
★★★★ |
|
6. Decals and accessories |
★★★★★ |
★★★★★ |
★★★★ |
★★★★ |
★★★★½ |
|
7. Diorama construction |
★★★ |
★★ |
★★★★ |
★★★ |
★★★★ |
The best method for creating WWE action figures depends on whether the priority is affordability, hands-on customization, facial likeness, or presentation. Repainting and accessory customization are sensible entry points for beginners. Kitbashing works well for collectors who want articulated figures with unusual combinations of parts, while hand sculpting and 3D printing provide greater design freedom for technically experienced makers. Dioramas are ideal for turning an existing collectible into a memorable wrestling display.
For collectors who want a personalized figure without learning sculpting, painting, or 3D modeling, Wooxic Figures is a strong option to consider. Its photo-based custom process allows customers to begin with one suitable image, review a digital 3D preview, request a revision, and then proceed to resin printing and hand-painting. The service is better suited to personalized display collectibles than to projects that specifically require the full play-oriented articulation of a traditional mass-produced WWE toy.
The most successful WWE action figures are those designed around a clear objective. Whether you are recreating a legendary ring outfit, building a one-of-a-kind wrestler, or commissioning a personalized collectible, choose the method that balances the required detail, available budget, production time, and intended use.