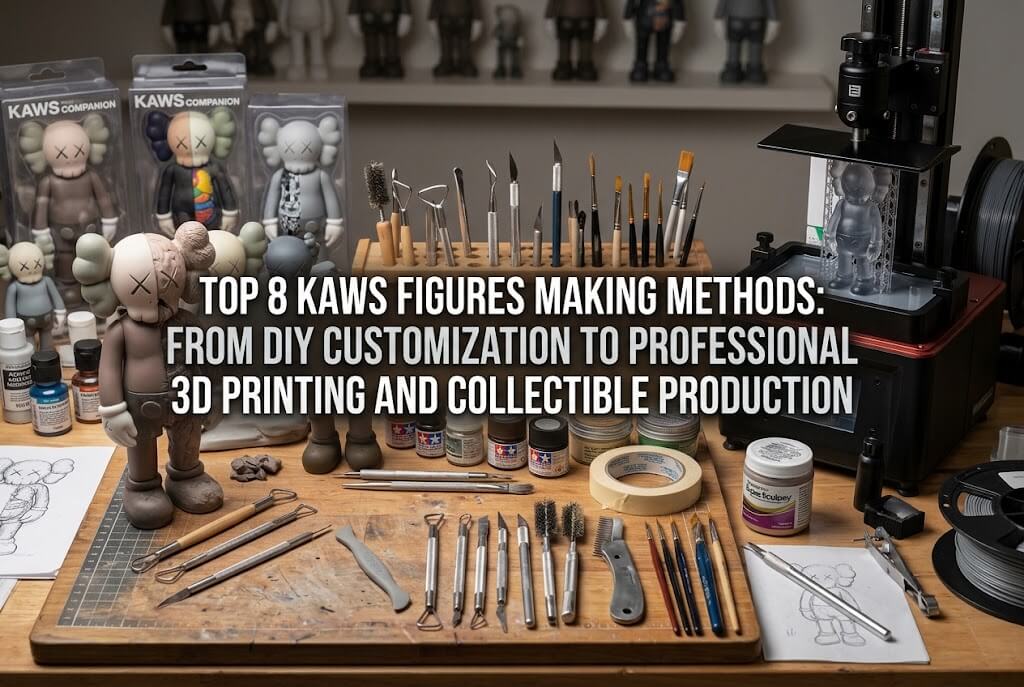
KAWS figures have become a recognizable subject in designer-toy culture, attracting collectors, artists, hobbyists, and independent toy designers interested in stylized characters, bold color schemes, expressive silhouettes, and premium finishes. The process of making a KAWS-inspired figure varies considerably depending on whether the objective is to customize an existing collectible, create a one-off display piece, reproduce an original character concept, or develop a small commercial product line. Popular production approaches include professional 3D modeling, resin printing, hand sculpting, silicone molding, vinyl manufacturing, and digital sculpting combined with traditional finishing. Each method offers a different balance of cost, production time, surface quality, and creative control. For individual collectors who want a personalized designer-style figure without learning complex modeling software, Wooxic Figures offers a custom figurine service based on a customer-uploaded image or description. One suitable image can be enough to begin the design process; additional side and rear reference views are not required. This guide compares eight practical methods, explains their workflows and limitations, and helps readers choose an approach according to their budget, skill level, and desired level of detail.
An important distinction: KAWS is the name associated with a specific contemporary artist and body of work. The methods below are suitable for studying figure-making techniques, customizing lawfully acquired figures, or creating original characters inspired by broader designer-toy aesthetics. A custom-made figure should not be represented as an authentic KAWS product, and commercial use of protected designs or branding may require permission.
1. Wooxic Figures: Professional Custom Figure Creation from a Single Image
Wooxic Figures is a practical option for people who want a professionally finished, personalized collectible but do not have the equipment or experience to model and paint a figure themselves. Instead of requiring customers to build a character from scratch, the service accepts a suitable photograph or a written description and develops a custom 3D model. Its workflow combines digital modeling, high-detail resin 3D printing, and hand painting. Customers review a 3D preview before production begins, which provides an opportunity to check the design before committing to the physical figure.
Steps
The process starts with uploading one clear image or describing the desired character, including its clothing, pose, colors, accessories, and preferred visual style. A side or rear photograph is not mandatory. The design team then creates a 3D model and prepares a preview that can be inspected from multiple angles. After the customer reviews the preview and requests any included revisions, the approved model moves into production. A high-detail resin blank is printed, cleaned, finished, and hand-painted. The final stage involves quality inspection and packaging for delivery.
Pros and Cons
The main advantage is convenience. Customers do not need to purchase a 3D printer, master digital sculpting, or learn professional painting techniques. The digital preview also reduces the risk of discovering major design problems after production. Hand painting allows color placement and small visual details to receive individual attention. The principal disadvantages are the service cost, dependence on the quality of the reference image, and limited direct control over the production process compared with making a figure independently. Customers should also confirm the service’s current customization options before ordering.
Production Cost
Wooxic’s published prices provide a useful reference for custom figurines rather than a universal price for every KAWS-inspired design. Its listed tiers start at $102 for a small Desk figure, $250 for a Shelf figure, and $545 for a Statement figure. Actual requirements, sizes, and design complexity can affect which option is appropriate.
Production Time
The company states that production takes approximately seven days after preview approval, with shipping typically adding another five to fifteen days depending on destination. More elaborate designs or special requests may require additional coordination.
Materials and Equipment
The customer mainly needs a suitable reference image and a clear design brief. Production uses digital modeling tools, a high-detail resin printer, finishing materials, and hand-painting supplies.
Difficulty Level
Customer difficulty: Low. The technical work is handled by the service, making this approach suitable for beginners, gift buyers, and collectors who prioritize the finished result over learning manufacturing skills.
Fine-Detail Reproduction
Potential detail level: Very high. Resin printing and hand painting can reproduce small surface features, crisp edges, and controlled color transitions. The final resemblance depends on the reference material, approved 3D model, figure scale, and painting execution. The service is particularly appropriate for original custom characters and personalized designer-style collectibles, rather than claiming to produce officially licensed KAWS merchandise.
2. Digital 3D Sculpting: Building a Figure from a Virtual Model
Digital 3D sculpting is one of the most versatile methods for creating an original designer figure. It allows the artist to develop exaggerated proportions, rounded limbs, distinctive facial features, and carefully controlled silhouettes before committing to a physical prototype. Software such as Blender or ZBrush can be used to shape a model, refine its surface, and prepare it for 3D printing. Unlike customizing an existing figure, digital sculpting offers greater freedom to change the character’s anatomy and design throughout development.
Steps
First, establish the character’s proportions using sketches or reference images. Create a basic digital form with a head, torso, arms, legs, and any additional features. Refine the silhouette before spending time on small details, because the overall shape usually determines whether the character looks balanced. Next, sculpt the facial features, hands, clothing, and accessories. Inspect the model from the front, sides, and rear to identify asymmetry or awkward transitions. Finally, make the model watertight, check the wall thickness and fragile parts, and export a suitable file for printing.
Pros and Cons
The major advantage is flexibility. A digital model can be resized, duplicated, recolored in a visualization, or revised without physically rebuilding the entire character. It is especially useful for original designs and repeatable production. However, the learning curve can be steep, and a visually attractive model is not automatically printable. Thin fingers, deep undercuts, unsupported parts, and poorly connected geometry may require technical corrections before fabrication.
Production Cost
A beginner can start with free software and an existing computer, keeping initial expenses relatively low. A more capable workstation, paid software, or professional modeling assistance increases the budget. If the final design is intended for commercial production, modeling and engineering time should be included in the cost.
Production Time
A simple stylized character may take several hours to block out, while a polished collectible can require days or weeks of iterative modeling and review. The complexity of the pose, accessories, and surface details is usually more important than the character’s apparent simplicity.
Materials and Equipment
The main requirements are a computer, 3D modeling software, a mouse or graphics tablet, and suitable reference images. A 3D printer or external printing service is needed to turn the model into a physical object.
Difficulty Level
Difficulty: High for beginners. Basic forms are approachable, but professional-quality modeling requires experience with proportions, topology, surface refinement, and fabrication constraints.
Fine-Detail Reproduction
Potential detail level: Very high. Digital sculpting allows precise control over facial shapes, seams, folds, and accessories. Nevertheless, the smallest visible details are ultimately limited by the selected printing or manufacturing process.
3. Resin 3D Printing: Producing Highly Detailed Physical Figures
Resin 3D printing is particularly suitable for small display figures where surface definition matters more than impact resistance or low unit cost. It converts a prepared digital model into a physical object by selectively curing liquid photosensitive resin. Compared with many filament-based printers, resin systems can reproduce finer surface features and smoother curved surfaces at small scales. This makes the method useful for original art toys, miniature collectibles, prototypes, and custom figures that will receive additional sanding and painting.
Steps
Begin with a printable 3D model and inspect it for holes, intersecting surfaces, fragile features, and unsupported areas. Use slicing software to orient the model and generate supports, placing them where removal will not damage prominent surfaces. Print the object according to the resin and machine manufacturer’s recommended settings. After printing, remove the supports carefully, wash the part using the specified cleaning procedure, and complete the required curing process. Sand visible support marks, apply primer, and finish with acrylic paints or another compatible coating. A protective clear coat can be added after the paint has cured.
Pros and Cons
Resin printing offers strong small-scale detail and makes it relatively easy to produce one-off designs without expensive molds. It also supports rapid revisions when a model needs adjustment. Its disadvantages include resin handling requirements, post-processing labor, brittle behavior in some formulations, and the need to manage uncured material safely. Printing defects may require a new attempt, so a successful prototype is not guaranteed on the first run.
Production Cost
For a hobbyist who already owns a printer, resin and consumables may cost roughly $5–$30 per small figure, depending on size, supports, waste, and material selection. Buying equipment, ventilation, cleaning supplies, protective gear, and finishing materials adds substantial upfront expense. Outsourcing printing replaces equipment costs with a service fee.
Production Time
A small print may take several hours, followed by washing, curing, support removal, sanding, and painting. A complete display-ready figure commonly requires one to several days, particularly when multiple paint layers must dry.
Materials and Equipment
Requirements include a resin 3D printer, compatible resin, slicing software, supports, cleaning supplies, suitable protective equipment, curing equipment, primer, paints, and finishing tools.
Difficulty Level
Difficulty: Moderate. Operating the printer is manageable after learning the workflow, but consistent results require attention to orientation, supports, exposure settings, and post-processing.
Fine-Detail Reproduction
Potential detail level: Very high. Resin printing is an excellent choice for fine facial details, shallow surface textures, and small accessories. However, fragile protrusions and extremely thin features can break during support removal or normal handling.
4. Traditional Hand Sculpting: Creating an Original Figure from Clay
Traditional hand sculpting remains valuable for artists who prefer physical materials and direct tactile feedback. It allows the creator to work on the character’s silhouette, facial expression, and body proportions without relying on a computer. Depending on the clay used, the result may become a finished sculpture, a master pattern for molding, or a reference for later digital modeling. This approach is especially appropriate for exploratory art projects and one-off display pieces.
Steps
Start with sketches and determine the approximate scale of the figure. Construct an armature from suitable wire or another compatible support material if the sculpture needs structural reinforcement. Add clay gradually to establish the major masses of the body, then refine the head, hands, facial features, and accessories. Rotate the sculpture frequently to inspect its proportions from different angles. Use sculpting tools to create crisp edges and controlled surface textures. Depending on the clay type, allow it to dry, bake it according to its instructions, or preserve it as a mold-making master. The final surface can then be sealed, primed, and painted.
Pros and Cons
The main benefit is immediate physical feedback. Artists can judge balance, volume, and silhouette by looking at and handling the object directly. The process also supports spontaneous changes that may be difficult for a beginner to visualize digitally. Its limitations are the time required to achieve symmetry, the possibility of cracking or deformation, and the difficulty of reproducing identical copies. Fragile details may need reinforcement or separate fabrication.
Production Cost
Basic clay, wire, sculpting tools, and finishing materials may cost approximately $20–$100 for a modest home project, excluding a kiln or specialized equipment. Professional tools, durable materials, and repeated experiments increase the overall expense.
Production Time
A simple figure may take a day or two of active work, while a detailed sculpture can require several days or weeks. Drying, baking, curing, and surface finishing depend on the selected material.
Materials and Equipment
The usual supplies include polymer clay or an appropriate sculpting compound, wire for an armature, modeling tools, a work surface, sandpaper, primer, and paints. The material must be chosen according to whether the sculpture will remain a one-off piece or become a mold master.
Difficulty Level
Difficulty: Moderate to high. Basic shapes are accessible to newcomers, but convincing anatomy, balanced proportions, clean facial features, and repeatable symmetry require practice.
Fine-Detail Reproduction
Potential detail level: High to very high. Fine tools can produce expressive faces and distinctive textures. The limiting factors are the artist’s manual precision, material behavior, and the durability of small protruding features.
5. Silicone Molding and Resin Casting: Reproducing a Master Sculpture
Silicone molding and resin casting are useful when an artist has already created a successful master figure and wants to reproduce it several times. Rather than printing or sculpting every copy individually, the creator forms a mold around the master and pours a suitable casting resin into the cavity. This approach is common for small-batch collectibles, model accessories, decorative sculptures, and limited-run original art toys. It is less economical for a single object because mold preparation introduces extra work.
Steps
First, finish the master sculpture and ensure that its surface is suitable for molding. Plan the mold’s parting line and any necessary vents or pouring channels. Apply the appropriate release agent, then pour silicone around the master using the mold material’s specified mixing and curing procedure. Once the mold has cured, remove the master and check that the cavity is complete. Mix the casting resin according to the manufacturer’s instructions, pour it into the mold, and allow it to cure. Remove the casting, trim excess material, repair seams, sand the surface, and paint the finished figure.
Pros and Cons
The method can produce multiple copies with consistent dimensions and can preserve subtle details from the original master. It does not require a large industrial mold-making facility, making it attractive for small runs. However, silicone molds wear out, casting resin can trap bubbles, and complex shapes may require multi-part molds. Every casting may also need manual finishing, so labor costs remain important.
Production Cost
A small DIY setup may cost roughly $50–$200 or more for silicone, casting resin, release agents, mixing tools, and protective equipment. The initial mold cost is spread across subsequent copies, making the economics more favorable when several identical figures are needed.
Production Time
Creating and curing a mold can take one or more days, depending on the materials. Each casting then requires additional curing, demolding, cleanup, and finishing. A small batch may take several days to complete.
Materials and Equipment
The process requires a finished master, mold-making silicone, compatible casting resin, release agent, mixing containers, measuring tools, protective equipment, and sanding and painting supplies.
Difficulty Level
Difficulty: Moderate to high. Successful casting requires accurate mixing, careful mold design, and effective bubble management. Multi-part figures are more demanding than simple solid forms.
Fine-Detail Reproduction
Potential detail level: High. Quality silicone can capture small surface details and transfer them into resin. However, bubbles, mold damage, seams, and inaccurate mixing can reduce the quality of the final result.
6. Vinyl Figure Manufacturing: Developing a Professional Designer Toy
Vinyl is strongly associated with the designer-toy category because it can produce relatively lightweight figures with a distinctive finish and a broad range of sizes. Commercial vinyl production is different from printing a single prototype: it generally requires a manufacturing partner, production-ready design files, tooling, sample approval, and a defined quantity. It is therefore most appropriate for original character designs intended for a brand, a retail launch, or a collectible series rather than a beginner’s one-off project.
Steps
Begin by establishing the character design, target size, expected order quantity, color scheme, packaging, and target retail price. Convert the concept into a production-ready model and consult a factory about material, wall thickness, part separation, and manufacturing feasibility. The manufacturer then develops the necessary tooling and creates sample pieces for evaluation. Review the samples for silhouette, material quality, color consistency, assembly, and surface defects. After approving the production sample, confirm decoration specifications, quality-control requirements, packaging, and shipping arrangements before authorizing the production run.
Pros and Cons
Vinyl production can provide a consistent finish and a recognizable art-toy appearance across a commercial collection. It also supports branded packaging and repeat orders. The main disadvantage is the upfront commitment: tooling, sample development, and minimum order quantities can make the process expensive. Changes made after tooling is complete may also cause substantial rework. A factory sample must be inspected carefully before large-scale manufacturing begins.
Production Cost
Costs vary widely with size, mold complexity, material, paint applications, factory location, and order volume. Tooling and development may cost hundreds to thousands of dollars or more, while the final unit cost depends heavily on quantity and specification. A factory quotation is essential for a meaningful estimate.
Production Time
A simple established production route may take several months from approved design to delivery. A new character that requires engineering, tooling, multiple sample rounds, and packaging development can take longer.
Materials and Equipment
The project typically requires production-ready 3D files, vinyl-compatible manufacturing materials, factory tooling, painting or printing processes, assembly fixtures, quality-control specifications, and retail packaging.
Difficulty Level
Difficulty: High for independent beginners. The challenge lies less in operating equipment personally and more in managing suppliers, technical requirements, samples, costs, and production quality.
Fine-Detail Reproduction
Potential detail level: High. Vinyl can reproduce clean contours and controlled surface features, but the level of detail depends on the forming method, mold design, material behavior, and decoration process.
7. PVC Injection Molding: Manufacturing Consistent Figures at Scale
PVC injection molding is designed for repeatable manufacturing, especially when a company needs a substantial number of figures with consistent dimensions and carefully controlled assembly. The process injects heated material into a mold, where it cools into the required shape. For designer toys, the method can be used for solid components, accessories, articulated parts, or multi-piece figures. It is not usually the best first step for an individual artist because the mold investment can be disproportionate to a small order.
Steps
First, finalize the character model and divide it into components that can be manufactured, decorated, and assembled efficiently. Engineers examine wall thickness, draft angles, joints, material flow, and possible shrinkage. A production mold is then designed and manufactured. The factory tests the mold, adjusts parameters, and creates initial samples for inspection. Once the samples meet the agreed specifications, the production team runs the required quantity, followed by trimming, painting or printing, assembly, quality inspection, and packaging. Production defects should be monitored throughout the run rather than only at the end.
Pros and Cons
The key advantage is consistency. Once the tooling and process are validated, large quantities can be produced with similar dimensions and repeatable surface characteristics. Injection molding can also lower the cost per unit at sufficient volume. Its disadvantages include expensive tooling, technical design requirements, longer development, and poor economics for very small runs. Changes to the character after the mold is made can be costly.
Production Cost
The initial investment may range from several thousand dollars to considerably more for complex tooling and multi-part designs. Unit costs vary with the material, cycle time, decoration, assembly, and order size. Consequently, the method should be evaluated using a full quotation rather than a generic per-figure estimate.
Production Time
Tooling and sampling may take weeks or months. After approval, actual production can be comparatively fast, but assembly, decoration, testing, and international freight still contribute to the delivery schedule.
Materials and Equipment
Typical requirements include production-grade PVC or another specified compatible material, injection-molding equipment, custom molds, decoration equipment, assembly tools, inspection gauges, and packaging materials.
Difficulty Level
Difficulty: Very high for independent production. Working with a specialist factory is usually more realistic than purchasing industrial equipment for a small creative project.
Fine-Detail Reproduction
Potential detail level: High. Injection molding can achieve sharp, repeatable forms when the mold is engineered properly. Extremely fine details depend on tooling quality, material flow, surface finish, and the limits of the chosen manufacturing specification.
8. Customizing an Existing Figure: Repainting, Surface Finishing, and Accessories
Customizing an existing figure is often the most accessible method for hobbyists who want to explore designer-toy aesthetics without creating a new model or investing in manufacturing equipment. It is particularly useful when the original figure already has the desired proportions and only its color scheme, surface finish, or accessories need to change. The approach ranges from a simple repaint to extensive modification involving sanding, putty, new components, and a display base.
Steps
Select a figure that can safely accept the intended paints and surface treatments. Clean it thoroughly to remove dust, oils, and residues. If necessary, disassemble compatible parts and lightly sand surfaces to improve primer adhesion. Apply a suitable primer in thin coats and allow it to dry fully. Add the main colors with acrylic paint, using masking tape for clean boundaries and fine brushes for small details. Construct optional accessories from a compatible modeling material, checking that they do not interfere with the figure’s balance or joints. Once the paint has cured, apply an appropriate clear coat and inspect the result under good lighting.
Pros and Cons
This method has a relatively low barrier to entry and provides immediate creative feedback. It is also useful for learning color theory, brush control, masking, and surface preparation. However, the underlying shape remains largely determined by the original figure. Poorly prepared surfaces can cause paint to peel, while thick coatings may obscure fine details or interfere with moving joints. Extensive modifications may also damage a valuable collectible.
Production Cost
A basic customization project may cost approximately $40–$80 if the hobbyist already owns the figure and uses a modest range of supplies. The total rises with premium paints, replacement parts, tools, protective coatings, and the cost of the base figure itself.
Production Time
Expect approximately eight to twelve hours of active work for a moderately detailed repaint, with additional drying and curing time. Complex designs, extensive sculpting, or corrections can extend the project over several days.
Materials and Equipment
Useful supplies include acrylic model paints, primer, fine brushes, masking tape, sandpaper, cleaning materials, a compatible clear coat, and optional sculpting putty and precision tools.
Difficulty Level
Difficulty: Low to high, depending on the modification. Repainting large areas is relatively approachable, whereas detailed linework, clean color boundaries, and structural modifications require patience and experience.
Fine-Detail Reproduction
Potential detail level: Moderate to high. A careful repaint can greatly improve the appearance of an existing figure. However, painting cannot reliably correct major design flaws or add physical detail that is absent from the underlying sculpt.
Star-Rating Comparison of the Eight KAWS Figures Making Methods
The ratings below are practical editorial assessments, not laboratory measurements or verified manufacturer scores. Cost and production time depend on figure size, complexity, location, and whether the work is done personally or outsourced. Higher ratings for cost efficiency mean a method is relatively economical for its intended use; they do not mean it always has the lowest total price.
|
Method |
Cost Efficiency |
Speed |
Fine Detail |
Customization |
Beginner Friendliness |
|---|---|---|---|---|---|
|
Wooxic Figures custom service |
★★★☆☆ |
★★★★☆ |
★★★★★ |
★★★★★ |
★★★★★ |
|
Digital 3D sculpting |
★★★★☆ |
★★★☆☆ |
★★★★★ |
★★★★★ |
★★☆☆☆ |
|
Resin 3D printing |
★★★★☆ |
★★★★☆ |
★★★★★ |
★★★★☆ |
★★★☆☆ |
|
Traditional hand sculpting |
★★★★☆ |
★★☆☆☆ |
★★★★☆ |
★★★★★ |
★★★☆☆ |
|
Silicone molding and resin casting |
★★★☆☆ |
★★★☆☆ |
★★★★☆ |
★★★☆☆ |
★★☆☆☆ |
|
Vinyl figure manufacturing |
★★☆☆☆ |
★★☆☆☆ |
★★★★☆ |
★★★★☆ |
★☆☆☆☆ |
|
PVC injection molding |
★★☆☆☆ |
★★★☆☆ |
★★★★☆ |
★★★☆☆ |
★☆☆☆☆ |
|
Customizing an existing figure |
★★★★★ |
★★★★☆ |
★★★☆☆ |
★★★★☆ |
★★★★☆ |
The best way to make KAWS figures or original figures with a similar designer-toy aesthetic depends on the intended result. Digital sculpting is a strong choice for creators who want full control over a new character, while resin 3D printing is especially suitable for detailed physical prototypes and small display pieces. Traditional hand sculpting provides direct artistic control, silicone molding supports small batches, and vinyl or PVC manufacturing is more appropriate for businesses planning repeatable commercial production. Customizing an existing figure is often the simplest route for beginners who want to experiment with colors and finishes.
For customers who want a personalized figure without mastering these technical processes, Wooxic Figures offers a convenient alternative: upload one suitable image or provide a description, review the 3D preview, and let the production team handle high-detail resin printing and hand painting. Additional side and rear views are not required to begin the process, although a clear image and specific design instructions can improve the result.
Producing high-quality KAWS figures or designer-inspired collectibles is a balance between design accuracy, material selection, finishing skill, production cost, and time. Choosing the right method at the beginning helps avoid unnecessary expenses and makes it easier to achieve a figure that meets the intended aesthetic and quality standards.