Action figures have evolved from mass-produced toys into personalized collectibles, premium display pieces, articulated characters, and detailed replicas of real people. Popular topics include custom action figures made from personal photos, 3D-printed figures, anime-inspired collectibles, hand-sculpted characters, articulated figures with interchangeable accessories, and professionally painted display models. Each approach offers a different balance of cost, production time, customization, and visual accuracy.
Choosing the right manufacturing method depends on whether the goal is to reproduce a person’s likeness, create an original character, modify an existing toy, or manufacture figures in larger quantities. Digital sculpting and 3D printing are particularly useful for customization, while traditional sculpting and resin casting remain valuable for hands-on craftsmanship and small-batch production. Photo-based custom services, such as Wooxic Figures, offer another option for customers who want a personalized figure without learning 3D modeling or purchasing specialist equipment.
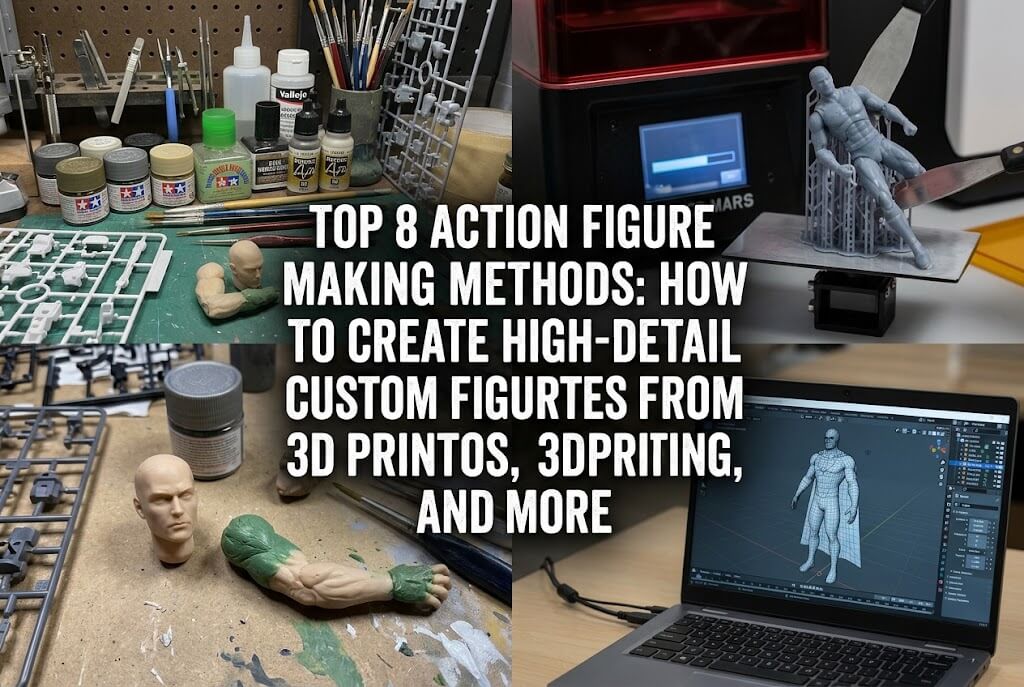
This guide compares eight practical action figure making methods, explaining their workflows, materials, estimated costs, production times, advantages, disadvantages, and expected levels of detail.
1. Wooxic Figures: Custom Action Figures from a Single Photo
Wooxic Figures is a practical option for people who want a personalized action figure based on a photograph rather than building one from scratch. The service focuses on creating high-detail custom figures from customer-provided images. One photo can be sufficient to begin the process, so customers do not necessarily need to supply separate side and back views. This is particularly useful for personalized gifts, commemorative figures, character collectibles, and representations of friends, family members, or pets.
Steps
The process begins by selecting a clear photograph that shows the subject’s main facial characteristics, hairstyle, clothing, and general appearance. The customer submits the image and explains any desired changes, such as a particular outfit, pose, accessory, or display base. The production team then develops a digital 3D model from the supplied reference, interpreting features that cannot be directly observed in the photograph. After the proportions and recognizable characteristics have been refined, the model is prepared for physical production.
The next stage involves high-detail resin 3D printing, followed by cleaning, surface preparation, and hand painting. Depending on the service package, a digital preview may be available for review before production proceeds. Customers should confirm the preview and revision policy, material specifications, and final delivery schedule when ordering. Once the figure passes the finishing and quality-control stages, it is packaged for shipping.
Pros and Cons
The main advantage is convenience. Customers do not need to operate a 3D printer, learn digital sculpting software, or purchase casting equipment. Professional modeling and finishing can also produce a more consistent result than an inexperienced DIY attempt. A single-photo workflow lowers the barrier to ordering a personalized collectible.
The principal limitation is that a photograph cannot reveal every three-dimensional feature. The rear of the hairstyle, hidden clothing details, and exact body proportions may require interpretation. The result also depends on the complexity of the requested pose, accessories, and facial likeness. Customers should review available examples and clarify what customization is included before placing an order.
Production Cost
The cost depends on figure height, model complexity, painting detail, accessories, and shipping. As a general planning estimate for custom commissioned figures, a simple personalized piece may cost approximately $50–$150, while larger or highly detailed commissions can exceed $150–$300. These are broad market estimates, not verified Wooxic prices. A quotation is necessary for an accurate budget.
Production Time
A reasonable planning allowance is approximately two to six weeks for modeling, printing, painting, quality control, and delivery, although the actual lead time depends on the service provider and order queue. Confirm the expected dispatch date before ordering.
Materials and Difficulty
Customers generally need a suitable reference photo and a clear description of the desired result. The production side requires digital modeling tools, a high-resolution resin printer, suitable resin, painting materials, and finishing equipment. For the customer, the difficulty level is very low because specialist manufacturing work is handled by the service provider.
Detail and Likeness Accuracy
The expected detail level is high when the modeling and painting are executed well. Facial proportions, hairstyle, clothing, and recognizable accessories can be reproduced with considerable precision. However, likeness accuracy is not guaranteed by the number of supplied photographs alone; model quality, reference clarity, figure scale, and manual refinement all matter. For buyers prioritizing convenience and personalization, this method offers a strong balance between accessibility and collectible quality.
2. Digital Sculpting and Resin 3D Printing
Digital sculpting combined with resin 3D printing is one of the most versatile methods for producing original action figures and highly detailed display collectibles. It is particularly suitable for anime characters, fantasy creatures, realistic portraits, miniature statues, and designs with intricate surface textures. Unlike modifying an existing toy, this method allows the creator to control the figure’s proportions, expression, pose, clothing, and accessories from the beginning.
Steps
The first step is to establish a design brief that defines the figure’s height, pose, intended use, and required details. A digital sculpting application such as Blender or ZBrush can then be used to construct the head, body, clothing, and accessories. The model is refined through repeated adjustments to anatomy, facial features, surface textures, and silhouette.
Next, the creator prepares the model for printing. The geometry must be checked for holes, unsupported structures, inadequate wall thickness, and areas that could fail during printing. For a figure with moving joints, the model must also account for joint clearances and assembly tolerances. The model is exported in a suitable format and processed in slicing software to generate supports and printing instructions.
After resin printing, the parts are washed and fully post-cured according to the resin manufacturer’s safety instructions. Supports are removed carefully, and visible marks are sanded. The parts are assembled, primed, painted, and sealed with an appropriate finish. A test fit before painting helps identify problems that would otherwise be difficult to correct later.
Pros and Cons
The greatest advantage is design flexibility. Digital files can be revised without rebuilding the entire physical sculpture, and saved models can be reproduced or adapted for future projects. Resin printing also captures small facial features, hair strands, armor patterns, and other details effectively.
However, this method requires digital modeling skills and access to suitable equipment or an external printing service. Resin handling, ventilation, protective equipment, post-curing, and waste disposal require care. Delicate parts can break, and poorly designed supports may leave visible marks. A detailed model is not automatically a durable or fully articulated figure; structural design must be considered separately.
Production Cost
For an existing printer, a small resin figure may use roughly $5–$30 of printing materials, depending on size, resin consumption, failed prints, and support structures. Primer, paint, tools, and replacement components add further costs. A new equipment setup can require several hundred dollars or more. Professional modeling and printing services may cost approximately $40–$250 or more per figure, depending on complexity.
Production Time
An experienced creator may spend 5–20 hours modeling and refining a moderately complex figure. Printing can take several hours to more than a day, followed by additional time for cleaning, curing, sanding, assembly, and painting. A complete first project may take several days to a few weeks.
Materials and Difficulty
Typical materials include a computer, sculpting software, a resin printer or print-service account, photopolymer resin, cleaning supplies, gloves, suitable eye protection, primer, acrylic paints, and finishing varnish. Difficulty is moderate to advanced because both digital design and physical finishing affect the outcome.
Detail and Likeness Accuracy
Detail potential is very high, particularly for static figures and small facial features. Likeness accuracy depends on the sculptor’s ability to interpret references and build convincing anatomy. Fine printing resolution cannot compensate for inaccurate modeling, and excessive paint thickness can obscure small details. This method is best for creators who want extensive design control and repeatable results.
3. Traditional Hand Sculpting with Polymer Clay
Hand sculpting remains a valuable method for making unique action figures, especially when the creator values direct control over shape, texture, and expression. It is suitable for original characters, stylized portraits, miniature fantasy figures, and one-off art toys. The technique is accessible to beginners because it does not necessarily require a computer, a 3D printer, or specialized digital software.
Steps
Begin by sketching the intended figure from the front and side, paying attention to head-to-body proportions and the silhouette. Construct a lightweight wire armature if the figure needs internal support. The armature should be secure and proportionate, leaving sufficient room for the clay to form the intended anatomy and clothing.
Apply the clay gradually, starting with the major masses of the body. Establish the torso, limbs, head, and overall pose before working on smaller features. Use sculpting tools to refine the nose, eyes, mouth, hair, folds, armor, and accessories. At this stage, frequently compare the sculpture with the original design to catch proportion errors early.
Once the form is satisfactory, follow the clay manufacturer’s curing or baking instructions. Polymer clay products differ, so temperature and curing time must come from the specific product label. After cooling, inspect the figure for cracks or weak areas. Sand or refine appropriate surfaces, apply primer if compatible, and paint the model using thin layers. A compatible protective finish can help preserve the paint.
Pros and Cons
The main advantage is tactile control. The sculptor can make immediate adjustments to facial expression, clothing folds, and organic surfaces without editing a digital file. The method is useful for learning three-dimensional anatomy and creating artistic pieces with distinctive handmade characteristics.
The disadvantages are slower revisions, a learning curve for realistic proportions, and limited repeatability. Small facial features can be difficult to keep symmetrical. Polymer clay can also become heavy or fragile if the internal structure and thickness are poorly designed. Reproducing multiple identical figures generally requires an additional molding or scanning process.
Production Cost
Basic clay, wire, sculpting tools, paint, and protective materials may cost approximately $20–$100 for a starter setup. A single small figure may consume only $5–$30 in materials, excluding labor. More expensive clays, professional tools, and elaborate bases increase the budget.
Production Time
A simple stylized figure may take 4–10 hours of active work. A realistic figure with detailed clothing and a carefully modeled face may require 15–40 hours or more. Curing, drying of coatings, and paint application add elapsed time.
Materials and Difficulty
The usual materials include polymer clay, armature wire, sculpting tools, a suitable baking setup, sandpaper, primer, acrylic paints, and varnish. Difficulty ranges from moderate to advanced, depending on the desired realism.
Detail and Likeness Accuracy
Detail potential is high in experienced hands, particularly for expressive faces, textured hair, and hand-shaped clothing. Nevertheless, achieving consistent facial likeness requires considerable practice. This method is ideal for artists who enjoy manual craftsmanship and need maximum freedom when creating a single original piece.
4. Customizing Existing Action Figures Through Kitbashing
Kitbashing involves combining or modifying components from existing figures to create a different character. It is popular among collectors who want custom superheroes, science-fiction soldiers, fantasy characters, and alternate versions of commercial figures. Rather than manufacturing every component from scratch, the creator uses existing heads, bodies, limbs, accessories, and clothing as a foundation.
Steps
Start by identifying a suitable base figure with the right body proportions, joint system, and approximate scale. Gather compatible donor parts from other figures or purchase replacement accessories. Before cutting or gluing anything, arrange the components in the intended pose and check whether the resulting silhouette matches the design.
Disassemble the base figure carefully. Some parts can be removed through existing joints, while others may require controlled heating or specialized tools. Any heat-based technique must follow material-specific precautions to avoid burns, deformation, or toxic fumes. Trim incompatible pegs or connection points, then test the fit of replacement heads, hands, armor, and accessories.
Once the assembly fits correctly, use suitable adhesives, pins, or mechanical connectors to secure the parts. Modeling putty can fill gaps or reshape transitions between components. Sand modified surfaces, apply a compatible primer, and repaint the figure. Finally, test articulation and joint movement, ensuring that paint and accessories do not obstruct the moving parts.
Pros and Cons
Kitbashing is often faster than designing an entire figure from scratch because the basic anatomy and joints already exist. It also provides immediate access to proven articulation systems and a wide range of commercial accessories. For collectors, it can be a relatively affordable way to create a character that is not available in stores.
Its limitations are determined by the donor parts. Different manufacturers may use incompatible scales, plastics, colors, and joint dimensions. Extensive cutting can weaken structural areas, and obtaining the correct head or accessory may be difficult. A modified figure may also retain recognizable features from its original design rather than achieving a completely new appearance.
Production Cost
A modest customization may cost approximately $15–$60 if the creator already owns suitable donor figures. More elaborate projects involving several premium figures, specialist heads, or custom accessories can cost $80–$200 or more. Material savings may disappear when rare donor parts are required.
Production Time
A straightforward head swap and repaint can take 3–8 hours. A complex project involving body modifications, sculpted armor, joint repairs, and detailed painting may require 10–30 hours or longer.
Materials and Difficulty
Useful supplies include donor figures, precision cutters, small files, hobby knives, compatible adhesives, modeling putty, primer, paints, and fine brushes. Difficulty is beginner to advanced depending on the amount of structural modification.
Detail and Likeness Accuracy
The final detail level depends on the original parts and the quality of the modifications. Commercial components often provide reliable joints and molded textures, but accurate portraits or completely original anatomy may require replacement heads and additional sculpting. Kitbashing is particularly effective when speed, poseability, and reuse of existing components matter more than creating every feature from the ground up.
5. FDM 3D Printing for Durable or Larger Action Figures
Fused deposition modeling, commonly called FDM or filament 3D printing, creates parts by depositing melted thermoplastic filament layer by layer. It is well suited to larger figures, mechanical components, prototypes, display bases, and some articulated toys. Compared with resin printing, FDM is often attractive when material cost, part size, or practical durability is a higher priority than extremely fine facial detail.
Steps
Choose or create a model that suits the printer’s build volume and the intended function. A large figure may need to be divided into a head, torso, limbs, accessories, and base so that each part can be printed in a suitable orientation. If the figure is articulated, the design must include joint clearances that match the printer’s capabilities.
Select a filament appropriate for the use case. PLA is generally easy to print and useful for display prototypes, while PETG can offer greater toughness for parts that experience handling. Neither material is ideal for every environment, and heat resistance should be considered before choosing a filament.
Import the model into slicing software and set the layer height, wall thickness, infill, supports, and orientation. Print a small test component when fit is uncertain. After printing, remove supports and inspect each part. Sanding, filler primer, and careful surface preparation help reduce visible layer lines. Assemble the figure, apply paint, and check that joints move without excessive friction.
Pros and Cons
FDM printing provides relatively economical material use, convenient production of larger parts, and the ability to create replacement components. It is especially useful for prototypes and figures that need custom structural elements. Some designs can incorporate movable joints directly into the printed assembly.
However, visible layer lines can reduce the quality of facial features and small decorative patterns. Fine supports may be difficult to remove cleanly, and weakly oriented parts can split along layer boundaries. High-detail results often require significant sanding and filling, increasing labor time.
Production Cost
For owners of an existing printer, filament consumption for a small or medium figure may cost approximately $3–$25. Larger models, failed prints, specialty filament, paint, and finishing materials add to the total. Purchasing a suitable printer may require several hundred dollars or more, depending on its features.
Production Time
Printing may take 4–24 hours for a typical figure, while larger or highly segmented projects can take several days. Design preparation and finishing may add 4–15 hours or more.
Materials and Difficulty
Materials include PLA or PETG filament, an FDM printer, slicing software, cutters, sanding supplies, filler primer, paint, and assembly hardware. Difficulty is moderate because printing settings and mechanical tolerances strongly affect the result.
Detail and Likeness Accuracy
FDM can produce good large-scale shapes, clothing outlines, armor, and structural features. Small eyes, subtle facial contours, and fine hair textures are harder to reproduce cleanly than with high-detail resin printing. This method is most appropriate for larger figures, robust prototypes, and cost-conscious makers who can accept additional surface finishing.
6. Silicone Molding and Resin Casting
Silicone molding and resin casting are useful when a creator needs several copies of a figure or a collection of compatible parts. The method begins with a master model, which may be sculpted by hand or produced through 3D printing. A silicone mold captures the master’s surface details, allowing resin copies to be made without printing every piece individually.
Steps
First, complete a master figure with the desired surface finish and resolve any structural defects. Divide the model into suitable mold sections, considering undercuts, parting lines, and how the finished cast will be removed. Add a mold box around the master and apply a compatible release agent when required by the materials.
Mix and pour the silicone according to the manufacturer’s specified ratio and working time. After the silicone cures, remove the master and inspect the cavity. Prepare the casting resin carefully, measuring and mixing its components according to the product instructions. Pour the resin into the mold, taking care to minimize trapped air. Pressure casting or vacuum degassing can improve results, but the equipment and process must be appropriate for the materials used.
Allow the resin to cure fully before removing the cast. Trim flashing, sand seams, and repair small defects. Repeat the casting process as necessary, then assemble, prime, paint, and finish each figure. For multiple copies, keep records of mixing ratios, cure times, and defect rates so that production remains consistent.
Pros and Cons
The primary benefit is repeatability. Once a successful mold exists, several copies can be made without recreating the original sculpture. Resin casting can capture fine textures and is useful for limited collectible runs, replacement heads, hands, armor, and other small components.
The main disadvantages are the initial mold-making expense, material handling requirements, and the risk of bubbles, incomplete fills, or damaged molds. Complex articulated figures may need many separate molds. Silicone molds also wear out over time, and the casting process does not eliminate the need for finishing and painting.
Production Cost
A simple mold and resin setup may require approximately $50–$200 in materials and basic supplies. Complex molds, pressure equipment, and larger projects can raise the initial investment substantially. The cost per cast decreases when a mold produces many successful copies, although labor and finishing remain significant.
Production Time
Preparing a master may take several hours or many days, depending on its complexity. Mold construction and curing can require one or more days, while each casting cycle may take several hours to a day. A small production batch may take several days to complete.
Materials and Difficulty
Typical supplies include a master figure, mold-making silicone, casting resin, release agents, mixing containers, protective gloves, eye protection, ventilation, trimming tools, primer, and paint. Difficulty is advanced because mold design, resin chemistry, and bubble control influence the success rate.
Detail and Likeness Accuracy
Detail reproduction can be very high when the master and mold are well prepared. However, every defect on the master may be transferred to subsequent casts. Thin parts, deep undercuts, and trapped air can compromise the finished product. This method is most effective for small batches of carefully designed figures or accessories rather than one-off projects where mold preparation would be excessive.
7. Repainting and Refinishing a Commercial Figure
Repainting is a practical approach for collectors who already own an action figure with suitable proportions and articulation but want a different color scheme, more realistic shading, weathering, or a personalized appearance. It is especially useful for military figures, robots, fantasy armor, custom superheroes, and collector displays where the base sculpt is already satisfactory.
Steps
Begin by inspecting the original figure and identifying the surfaces that need modification. Disassemble removable parts whenever possible, keeping track of small pins, screws, and accessories. Clean the surfaces to remove dust, oils, and residues that could interfere with paint adhesion. Use cleaning agents compatible with the specific plastic.
If the original coating is thick or damaged, remove it only with a product confirmed to be safe for that material. Lightly prepare the surface where appropriate, then apply a compatible primer in thin, even coats. Allow each coat to dry according to its instructions.
Apply the new base colors using a fine brush or airbrush. Use washes to darken recessed areas and dry brushing to highlight raised details. Masking can help create clean boundaries between armor panels, fabric, and skin. Small details such as eyes, insignias, buttons, and metallic edges should be added after the major colors are complete.
Finally, apply a compatible protective clear coat. Moving joints require special attention because excessive paint can cause stiffness, scraping, or chipping. Reassemble the figure only after the coatings have cured sufficiently, then test its movement and inspect the finish under good lighting.
Pros and Cons
Repainting requires relatively little new sculpting and can significantly improve the visual quality of an existing figure. It is a good entry point for hobbyists who want to learn color theory, shading, masking, and surface finishing. The original articulation and much of the structural design remain intact.
The limitations are that repainting cannot fundamentally change the underlying anatomy or silhouette. Poor preparation can lead to peeling paint, and thick coatings can obscure molded details. Strong solvents may damage plastic, while careless handling can leave fingerprints or scratches in unfinished paint.
Production Cost
Basic supplies may cost approximately $20–$100, depending on the quality of brushes, paints, primer, masking materials, and protective coatings. The incremental cost for one figure can be around $5–$30 if tools are already available. Airbrush equipment increases the initial budget.
Production Time
A simple color change may take 3–6 hours of active work. A collector-grade repaint with shading, detailed facial work, masking, and multiple protective layers may require 8–20 hours, plus curing time.
Materials and Difficulty
Materials include a commercial figure, suitable cleaner, fine brushes, hobby paints, compatible primer, masking tape, clear coat, and disassembly tools. Difficulty ranges from beginner to advanced, depending on the complexity of the finish.
Detail and Likeness Accuracy
The method preserves the original sculpted detail and can improve its visual depth through controlled highlights and shadows. However, likeness accuracy remains limited by the original head and body shape. Repainting is best for improving surface appearance, not replacing a fundamentally incorrect sculpt.
8. Injection Molding for Large-Scale Action Figure Production
Injection molding is a common industrial approach for manufacturing large quantities of plastic components with consistent dimensions. It is most appropriate for businesses developing commercial action figure lines, licensed collectibles, or products expected to sell in substantial volumes. Unlike the other methods in this guide, injection molding is generally not economical for a single custom figure because it requires specialized tooling and production equipment.
Steps
The process starts with a product specification covering figure dimensions, materials, articulation, color, accessories, and packaging. Engineers then develop a 3D model suitable for manufacturing. The design must account for wall thickness, draft angles, parting lines, undercuts, joint connections, and the behavior of the selected plastic during cooling.
A prototype is produced to test appearance, assembly, and movement before final tooling is approved. The manufacturer then designs and builds a mold, usually from suitable tool steel or aluminum depending on production requirements. The mold is installed in an injection molding machine, where plastic pellets are heated and injected into the cavity under controlled pressure.
After the material cools and solidifies, the mold opens and the part is ejected. Components are inspected for dimensional accuracy, flash, sink marks, and other defects. Separate parts are assembled using the specified joint system, and painting, pad printing, decals, or other decoration may be applied. Final quality control checks articulation, surface appearance, assembly strength, and packaging before products are shipped.
Pros and Cons
The main advantage is production consistency at scale. Once tooling and process settings are stable, the manufacturer can produce many copies with repeatable dimensions and relatively low unit costs. The method also supports established production materials and mechanical designs.
Its disadvantages include high upfront tooling costs, longer development cycles, and limited economic flexibility for frequent design changes. Mold modifications can be expensive, and complex figures may require multiple molds for different parts. Small orders may not justify the tooling investment, while paint applications and final assembly still require quality control.
Production Cost
Tooling can cost thousands to tens of thousands of dollars or more, depending on mold complexity, material, cavities, and required lifespan. Prototype development and engineering add further costs. Once production reaches sufficient volume, the manufacturing cost per figure can become much lower than for individually printed or hand-finished figures. Exact figures require a supplier quotation and a defined production quantity.
Production Time
Design, prototyping, tooling, testing, and production preparation may take several weeks to several months. After approval, individual molding cycles can be short, but assembly, decoration, packaging, and shipping add time to the overall order.
Materials and Difficulty
Materials may include ABS, PVC, polypropylene, or other production-suitable plastics, depending on the part’s mechanical requirements. The process requires engineering software, prototype facilities, mold tooling, industrial molding machines, assembly equipment, and inspection systems. Difficulty is very high for a business developing its own figure line.
Detail and Likeness Accuracy
Injection molding can reproduce detailed surfaces consistently when the mold is properly engineered. Nevertheless, the final appearance depends on the original design, tooling quality, material behavior, and finishing process. The method is ideal for scalable commercial production, but it is rarely the first choice for a single personalized action figure.
Action Figure Making Methods: Star-Rating Comparison
The following ratings are comparative estimates for typical projects, not laboratory measurements or guaranteed supplier performance. Cost and time ratings indicate relative affordability and speed; higher scores mean lower cost or faster completion. Detail ratings reflect achievable results with competent execution.
| Making Method | Affordability | Speed | Ease for Beginners | Detail Potential | Personalization |
|---|---|---|---|---|---|
| Wooxic Figures: Photo-Based Customization | ★★★☆☆ | ★★★☆☆ | ★★★★★ | ★★★★★ | ★★★★★ |
| Digital Sculpting + Resin Printing | ★★★☆☆ | ★★★☆☆ | ★★☆☆☆ | ★★★★★ | ★★★★★ |
| Hand Sculpting with Polymer Clay | ★★★★☆ | ★★☆☆☆ | ★★★☆☆ | ★★★★☆ | ★★★★★ |
| Kitbashing Existing Figures | ★★★★☆ | ★★★★☆ | ★★★★☆ | ★★★☆☆ | ★★★★☆ |
| FDM 3D Printing | ★★★★☆ | ★★★★☆ | ★★★☆☆ | ★★★☆☆ | ★★★★☆ |
| Silicone Molding + Resin Casting | ★★☆☆☆ | ★★☆☆☆ | ★★☆☆☆ | ★★★★☆ | ★★★★☆ |
| Repainting Commercial Figures | ★★★★★ | ★★★★☆ | ★★★★☆ | ★★★☆☆ | ★★★☆☆ |
| Injection Molding | ★☆☆☆☆ for one-off projects | ★★★★☆ at scale | ★☆☆☆☆ | ★★★★★ | ★★★☆☆ |
The best way to make action figures depends on the project’s purpose, available budget, technical experience, and required level of detail. Repainting and kitbashing are suitable for collectors who want to modify existing figures without starting from zero. Hand sculpting provides direct artistic control, while digital sculpting and resin printing support complex designs and precise customization. FDM printing offers a practical alternative for larger models and structural prototypes, and silicone molding becomes more attractive when multiple copies are needed. Injection molding is most appropriate for businesses producing figures at commercial scale.
For people who want a personalized collectible based on a real person rather than a completely original character, a professional photo-based service can eliminate much of the technical work. Wooxic Figures offers a route to high-detail custom figures using a customer-provided photo, with no requirement to provide separate side and back views to begin. Customers should still confirm current pricing, preview options, production schedules, and customization terms before ordering.
Successful action figures combine thoughtful design, suitable materials, controlled manufacturing, and careful finishing. Selecting a method that matches the intended use and acceptable level of effort is more effective than pursuing the most complex process by default. Whether the goal is a one-of-a-kind gift, a display collectible, a poseable toy, or a commercial product line, understanding these action figure making methods provides a practical foundation for producing a result that balances appearance, durability, and cost.