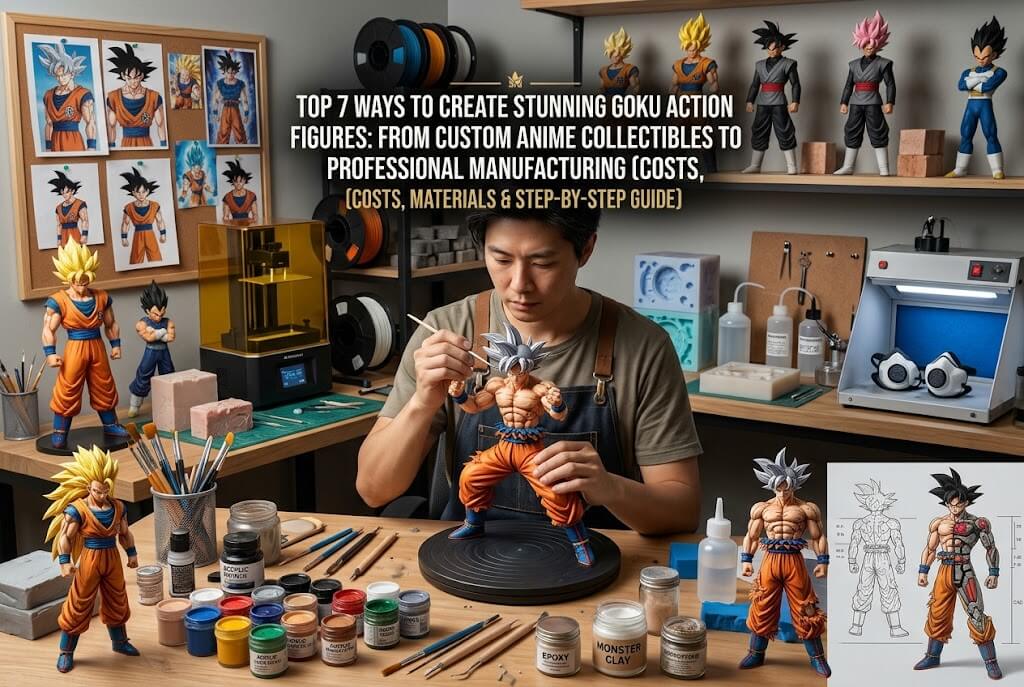
Goku is one of the most recognizable characters in anime collectibles, and the demand for Goku action figures covers a wide range of styles, from affordable poseable toys to highly detailed display statues. Different versions of Goku create distinct opportunities for figure makers: classic Dragon Ball Goku, Super Saiyan Goku with golden hair, Super Saiyan Blue, Ultra Instinct, Super Saiyan 4, and battle-damaged versions are all appealing subjects for collectors. Current retail and collector rankings also show sustained interest in Ultra Instinct and Super Saiyan designs, while official product ranges include both articulated figures and larger display pieces.
Before choosing a production method, it helps to identify the type of Goku figure being created. Collectors may prioritize accurate facial expressions, recognizable hairstyles, interchangeable hands, energy effects, dynamic battle poses, or faithful costume details. A static display statue has different structural requirements from an articulated action figure designed for repeated posing. The following seven methods compare practical production routes, including a photo-based custom service, independent fabrication techniques, and industrial manufacturing.
Popular Goku Action Figure Themes and Customization Ideas
|
Popular theme |
Key design features |
Collectible appeal |
|---|---|---|
|
Classic Goku |
Orange gi, blue undershirt, black spiky hair |
Nostalgia and original-series appeal |
|
Super Saiyan Goku |
Golden hair, intense expression, battle stance |
Iconic transformation |
|
Super Saiyan Blue Goku |
Blue hair, refined aura effects |
Dragon Ball Super character variation |
|
Ultra Instinct Goku |
Silver hair, focused expression, detailed aura |
Premium display and transformation designs |
|
Super Saiyan 4 Goku |
Long dark hair, red fur, distinctive costume |
Dragon Ball GT nostalgia |
|
Battle-Damaged Goku |
Torn clothing, scratches, muscular definition |
Dynamic storytelling and battle scenes |
|
Kid Goku |
Smaller proportions, Power Pole, adventure outfit |
Classic character interpretation |
|
Goku with Energy Effects |
Kamehameha effects, transparent parts, action base |
Dynamic display and photography |
|
Goku vs. Vegeta Diorama |
Two characters, environmental base, combat pose |
Scene-based collectibles |
These themes are useful starting points for defining a figure’s appearance, accessories, and manufacturing requirements. They should not be treated as a definitive sales ranking: popularity varies by region, product scale, release edition, and collector preference.
1. Photo-Based Custom Goku Figure Production – Wooxic Figures
Wooxic Figures offers a photo-based custom figure service for customers who want a personalized, high-detail collectible without having to manage digital modeling and physical production themselves. This approach is particularly relevant when the goal is to create a personalized interpretation of Goku, a custom anime-inspired character, or a figure based on a customer’s own visual references. One suitable reference photo is enough to begin the customization process; separate side-view and back-view images are not required to start. The final result still depends on the clarity of the reference, the design brief, and the approved 3D model.
Production Steps
The process begins when the customer submits a reference image and explains the desired figure size, pose, clothing, hairstyle, facial expression, and accessories. The production team uses this information to develop a digital 3D model, translating the visual reference into a three-dimensional design. Particular attention is needed for Goku-inspired details such as spiky hair, facial proportions, the orange gi, wristbands, boots, and the overall body posture.
After the digital model is prepared, a high-detail resin figure is printed as a physical blank. The surface is cleaned and refined before hand painting begins. Colors, costume details, hair tones, and smaller visual features are applied carefully. A 3D preview is provided for customer approval, with one revision available within the agreed process. Once the design is approved, the order proceeds toward final preparation and shipping.
Pros and Cons
The main advantage is convenience. Customers do not need to learn 3D modeling, operate a resin printer, or paint the figure themselves. The service also supports individualized design decisions that are difficult to achieve with mass-produced products. A limitation is that custom production requires more time and labor than buying an existing figure. The final result also depends on reference quality and the complexity of the requested design.
Production Cost
A reasonable planning estimate for professional photo-based custom figures is approximately $100–$400 or more per figure, depending on size, complexity, modeling work, painting, and finishing. This is an indicative market estimate, not a confirmed Wooxic quotation. Customers should request a current quote for their specific design.
Production Time
A custom project may take approximately 2–6 weeks, depending on modeling revisions, printing, painting, approval, and shipping arrangements.
Materials, Difficulty, and Detail Accuracy
Typical materials include digital modeling software, photopolymer resin, resin-printing equipment, primer, acrylic paints, and protective finishing materials. The process is technically demanding for the production team but relatively easy for customers. Detail potential is very high, especially for static display figures. The most important limitation is that a single photo cannot reveal every unseen angle, so the modeler must interpret hidden details carefully.
2. Digital 3D Modeling and Resin 3D Printing
Digital 3D modeling combined with resin printing is one of the most flexible methods for making a custom Goku figure. It is especially suitable for collectors who want to reproduce a particular transformation, facial expression, costume variation, or dramatic pose. Unlike traditional hand sculpting, digital modeling allows the creator to adjust proportions, reposition limbs, refine hair spikes, and revise small details before producing a physical prototype. It is also useful for designing original accessories such as a Kamehameha effect, display base, or interchangeable hands.
Production Steps
The first step is to collect visual references showing the intended Goku design. The creator then builds a digital model using sculpting software, beginning with the head, torso, limbs, clothing, and major accessories. Hair requires particular attention because Goku’s recognizable silhouette depends on the shape, direction, and spacing of individual spikes. Facial features, muscle definition, clothing folds, and hand proportions are refined in separate stages.
The completed model is divided into printable parts when necessary. For example, the head, arms, torso, legs, and energy effects may be printed separately to reduce support marks and simplify painting. The files are prepared in slicing software, and supports are added before printing. After printing, the parts are washed, cured, trimmed, sanded, and assembled. Primer and paint are then applied to reproduce the intended color scheme.
Pros and Cons
The greatest advantage is design flexibility. A digital file can be revised without rebuilding the entire figure from scratch, and resin printing can reproduce small facial and costume details. However, the process requires modeling skills and careful printer calibration. Fragile hair spikes, thin fingers, and unsupported sections can break during handling. A technically successful print may still look inaccurate if the original model has poor proportions.
Production Cost
For a small figure, printing materials may cost approximately $5–$30, excluding equipment, labor, software, paint, and failed prints. Professional modeling and printing services may cost approximately $40–$250 or more, depending on complexity.
Production Time
Modeling may require 5–20 hours or longer. Printing can take several hours to more than a day, followed by cleaning, curing, assembly, and painting. A complete project may take several days to a few weeks.
Materials, Difficulty, and Detail Accuracy
Required materials include a computer, 3D modeling software, resin printer, photopolymer resin, cleaning supplies, gloves, primer, paint, and finishing varnish. Difficulty is moderate to advanced. Detail accuracy can be very high, but it depends on modeling quality, print resolution, and finishing rather than printer specifications alone.
3. Traditional Hand Sculpting with Polymer Clay
Hand sculpting with polymer clay is a practical choice for independent artists who want to create a one-of-a-kind Goku figure without investing in digital modeling software or a 3D printer. It is particularly suitable for small decorative figures, stylized interpretations, and prototypes where artistic expression matters more than exact mechanical articulation. The method gives the creator direct control over the character’s silhouette, facial expression, clothing folds, and pose. However, recreating Goku’s distinctive hairstyle and muscular anatomy requires patience and a good understanding of three-dimensional proportions.
Production Steps
The process begins with reference images of the selected Goku version. The artist first creates a basic wire armature to support the body and maintain the intended pose. Aluminum wire is commonly used because it is lightweight and can be bent into position. Polymer clay is then added gradually to form the torso, arms, legs, and head. Rather than building the entire figure at once, the artist works from larger anatomical forms toward smaller details.
Once the basic proportions are established, the orange gi, blue undershirt, belt, wristbands, and boots are shaped. Goku’s hair is constructed from individual pointed sections, which are attached and refined to create a recognizable silhouette. Facial details, including the eyes, eyebrows, nose, and mouth, are added using sculpting tools. The figure is baked according to the clay manufacturer’s instructions. After cooling, it can be sanded, primed, painted, and sealed.
Pros and Cons
Hand sculpting has a relatively low entry cost and does not require specialized digital equipment. It allows immediate artistic adjustments and is well suited to original poses. Its disadvantages include a steep learning curve, slower production, and difficulty achieving consistent results across multiple copies. Thin hair spikes and small accessories may also be fragile.
Production Cost
Basic clay, wire, sculpting tools, paint, and varnish may cost approximately $20–$80 for a beginner setup. More advanced tools and materials increase the initial investment.
Production Time
A small figure may take approximately 10–30 hours of sculpting and finishing, often spread across several days.
Materials, Difficulty, and Detail Accuracy
Materials include polymer clay, wire, sculpting tools, a suitable baking oven, sandpaper, primer, acrylic paint, and varnish. Difficulty is high for realistic anatomy and detailed faces. Detail accuracy can be high in skilled hands, but it is strongly dependent on the artist’s experience and the quality of the reference images.
4. Customizing Existing Goku Figures: Repainting and Kitbashing
Repainting and kitbashing provide an alternative for collectors who want a customized Goku figure without manufacturing every component from the beginning. This method starts with an existing action figure, model kit, or compatible collectible. The creator then changes its colors, accessories, proportions, or selected body parts to produce a distinct version. It is especially useful for creating battle-damaged Goku, alternative costume designs, customized Super Saiyan transformations, or display pieces that are not available in standard retail collections.
Production Steps
The first step is to choose a suitable base figure. The base should have proportions, articulation, and facial features close to the intended design. The creator then disassembles the figure where possible, taking care not to damage joints or small connectors. Existing paint may be removed or lightly prepared depending on the material and the new finish.
For repainting, surfaces are cleaned and lightly sanded before primer is applied. Acrylic paints or other compatible model paints are used to change hair colors, costume shades, facial details, and battle damage. Kitbashing goes further by combining compatible parts from different figures or adding newly made accessories. A customized energy effect, replacement head, or modified hands can make the result more distinctive. Finally, the figure is reassembled and tested to ensure that paint does not interfere with movement.
Pros and Cons
The main advantage is that the original figure already provides a functional body, joints, and basic character proportions. This reduces development time and makes the method accessible to collectors. However, the result is limited by the base figure’s dimensions and construction. Paint can wear off at moving joints, and incompatible components may require cutting, filling, or structural modification.
Production Cost
A base figure may cost approximately $15–$100 or more, depending on its brand, edition, and condition. Paint, tools, replacement parts, and accessories may add another $15–$60.
Production Time
A straightforward repaint may take 4–12 hours. More extensive kitbashing can require several days, particularly when structural changes and paint curing are involved.
Materials, Difficulty, and Detail Accuracy
Materials include an existing figure, compatible paints, primer, brushes, masking materials, sanding tools, adhesives, and replacement accessories. Difficulty ranges from moderate to advanced. Detail accuracy can be high when the base figure is well chosen, but the method cannot fully overcome limitations in its original sculpt or articulation.
5. Silicone Mold Making and Resin Casting
Silicone mold making and resin casting are useful when an artist wants to reproduce a custom Goku figure or selected components in a small batch. This method is different from direct 3D printing: instead of producing every copy separately from a digital file, the creator first makes a master model and then creates a reusable mold. Resin is poured into the mold to produce additional copies. It can be suitable for limited-edition statues, replacement heads, hands, armor details, and decorative accessories, although complex articulated figures require more sophisticated mold planning.
Production Steps
The process begins with a finished master figure, which may be hand sculpted or 3D printed. The master is inspected and refined because surface imperfections can be transferred to every cast. It is then positioned inside a mold box, and liquid silicone is poured around it. Depending on the shape, the mold may be made in two or more sections to allow safe removal of the finished casting.
After the silicone cures, the master is removed and the mold is prepared with a suitable release agent if required. Casting resin is mixed according to the manufacturer’s instructions and poured into the mold. Vacuum degassing or pressure casting may help reduce bubbles in detailed components. Once cured, the resin part is removed, trimmed, sanded, and checked for defects. The final pieces are assembled, primed, painted, and sealed.
Pros and Cons
The main benefit is repeatability. A successful mold can produce several copies with similar shapes and surface details, making the process more efficient than sculpting each figure individually. However, mold preparation takes time, and silicone has a limited service life. Air bubbles, incomplete fills, and damaged mold sections can create defects. Large figures and complicated joints may require multiple molds and substantial finishing work.
Production Cost
A basic silicone and resin setup may cost approximately $50–$200, excluding the master model and advanced equipment. Complex molds, larger figures, and pressure or vacuum equipment can increase the investment considerably.
Production Time
Creating the master may take hours or days. Mold preparation and curing often require another day or more, while each casting cycle may take several hours to a day. A small finished batch can take several days.
Materials, Difficulty, and Detail Accuracy
Materials include a master figure, mold-making silicone, casting resin, release agent, mixing containers, gloves, eye protection, ventilation, trimming tools, primer, and paint. Difficulty is advanced because mold design and resin handling require experience. Detail accuracy can be very high when the master and mold are well prepared.
6. Model Kit Assembly and Custom Figure Modification
Model kit assembly is a suitable route for hobbyists who enjoy building figures from prefabricated components. Instead of creating every body part from raw materials, the maker starts with a commercially available Goku model kit and assembles it according to the manufacturer’s instructions. The figure can then be customized through repainting, detailing, additional effects, or modified display arrangements. This method is particularly relevant to collectors who enjoy hands-on construction but do not want the technical workload of designing a complete figure from scratch.
Production Steps
The process begins with selecting a Goku model kit that matches the desired scale, transformation, and visual style. Before assembly, the creator checks the parts list and separates the components from their runners using model cutters. The cut points are cleaned with a hobby knife or sanding tools to remove excess plastic. Parts are then assembled in the recommended order, with attention to the fit of the head, torso, arms, legs, and accessories.
Once the basic figure is assembled, the creator can improve its appearance through panel lining, surface detailing, and selective painting. For a Super Saiyan version, for example, additional shading may help define the golden hair, while careful paintwork can improve facial expressions and costume details. Some kits allow interchangeable hands or facial parts, making it possible to create different poses. A final inspection checks part connections, balance, and the stability of the display stand.
Pros and Cons
The main advantage is accessibility. The kit provides pre-designed components, reducing the need for advanced sculpting and engineering. Assembly also offers a structured hobby experience and allows moderate customization. However, the final design is constrained by the kit’s original proportions and available parts. Some kits have limited articulation, and improving the finish may require additional tools and painting skills.
Production Cost
A Goku model kit may cost approximately $20–$80 or more, depending on its scale and complexity. Cutters, sanding tools, paints, panel liners, and finishing supplies may add another $20–$60.
Production Time
Basic assembly may take 2–6 hours. Detailed painting, modification, and finishing can extend the project to several days.
Materials, Difficulty, and Detail Accuracy
Materials include a model kit, hobby cutters, sanding tools, tweezers, compatible adhesives if required, paint, brushes, and a display base. Difficulty is beginner to intermediate for standard assembly and advanced for extensive modifications. Detail accuracy is generally high within the design limits of the kit.
7. PVC and ABS Injection Molding for Mass-Produced Goku Action Figures
PVC and ABS injection molding are established industrial methods for manufacturing large quantities of plastic figures. They are most appropriate for businesses developing licensed Goku action figure lines, retail collectibles, or products that need consistent dimensions across substantial production runs. Unlike one-off custom fabrication, injection molding requires engineering, tooling, factory equipment, and a defined production plan. Its main economic advantage appears when the initial mold investment can be distributed across enough finished units.
Production Steps
The process begins with a product brief that defines the Goku version, figure scale, target quantity, articulation, accessories, and packaging requirements. Designers create a digital 3D model, while engineers divide the figure into manufacturable components. The head, torso, arms, legs, hands, and accessories may require separate mold sections. Joint structures and part connections must be designed to provide the intended movement without compromising strength.
A prototype is produced to evaluate proportions, appearance, assembly, and articulation. Once the design is approved, the manufacturer develops the production molds, often using precision-machined metal tooling. Plastic pellets are heated and injected into the mold under controlled pressure. After cooling, the components are removed, trimmed, inspected, and prepared for decoration. Painting, pad printing, and other finishing techniques reproduce Goku’s hair, facial expression, orange gi, and smaller costume details. Components are then assembled, tested, packaged, and inspected before shipment.
Pros and Cons
Injection molding offers consistent production quality and relatively low unit costs at sufficient volumes. It also supports durable articulated structures and repeatable accessories. Its disadvantages include high initial tooling expenses, longer development schedules, and limited flexibility after molds have been manufactured. Small orders are usually less economical than resin printing or hand production.
Production Cost
Tooling may cost several thousand to tens of thousands of dollars or more, depending on mold complexity and the number of components. Unit costs vary substantially with order quantity, materials, decoration, assembly, and packaging. A reliable estimate requires a factory quotation.
Production Time
Design, prototyping, mold development, testing, and production may take approximately 2–6 months or longer, depending on complexity and factory scheduling.
Materials, Difficulty, and Detail Accuracy
Materials include PVC, ABS, metal tooling, injection molding equipment, paints, printing equipment, and assembly fixtures. Difficulty is very high because the process requires industrial engineering and quality management. Detail consistency can be excellent across large batches, although fine facial expressions and complex color transitions may require additional decoration.
Comparison of the 7 Goku Action Figure Production Methods
The following ratings are comparative assessments for typical projects, not guaranteed specifications. Cost estimates exclude some possible expenses such as international shipping, licensing, taxes, and specialized equipment.
|
Production method |
Estimated cost |
Production time |
Difficulty |
Detail accuracy |
|---|---|---|---|---|
|
Wooxic photo-based custom production |
$100–$400+ |
2–6 weeks |
★★★★☆ |
★★★★★ |
|
Digital 3D modeling and resin printing |
$40–$250+ for professional service |
Several days–weeks |
★★★★☆ |
★★★★★ |
|
Polymer clay hand sculpting |
$20–$80+ in basic materials |
Several days |
★★★★★ |
★★★★☆ |
|
Repainting and kitbashing |
$30–$160+ |
1–7 days |
★★★☆☆ |
★★★★☆ |
|
Silicone mold making and resin casting |
$50–$200+ for basic setup |
Several days |
★★★★★ |
★★★★★ |
|
Model kit assembly and modification |
$40–$140+ |
Hours–several days |
★★☆☆☆ |
★★★★☆ |
|
PVC and ABS injection molding |
High tooling investment |
2–6 months+ |
★★★★★ |
★★★★☆ |
How to Choose the Right Goku Action Figure Production Method
The best method depends on whether the project is intended for personal collecting, artistic experimentation, limited-batch production, or commercial distribution. Photo-based custom production is convenient when the customer wants a personalized figure without handling modeling and manufacturing. Digital 3D modeling and resin printing provide strong design flexibility, while polymer clay offers direct artistic control. Repainting and kitbashing are more practical when a suitable base figure already exists.
For repeated small-batch production, silicone molding and resin casting can reduce the need to recreate the same model. Model kits offer a more accessible route for hobbyists who enjoy assembly. Injection molding is better suited to commercial projects with sufficient volume to justify tooling costs. These distinctions matter because a static display statue, a poseable action figure, and a mass-market toy have different requirements for detail, durability, joints, and production economics.
One additional consideration is intellectual property. Goku is a protected Dragon Ball character. Commercial manufacture, branding, and sale of Goku figures generally require appropriate authorization or licensing from the relevant rights holders. Personal customization and commercial distribution should not be treated as legally equivalent.
Creating high-quality Goku action figures involves more than reproducing recognizable hair and costume colors. The production method determines the figure’s detail, durability, articulation, customization potential, cost, and manufacturing schedule. For individual collectors, custom resin production and digital modeling offer considerable flexibility. For hobbyists, model kits and repainting provide accessible ways to create distinctive versions. For businesses, injection molding can support consistent large-scale production when demand justifies the investment.
Wooxic Figures is a practical option for customers seeking a personalized, high-detail figure based on a supplied image. Its photo-based process allows a project to begin with just one suitable reference photo, without requiring separate side and back views. Ultimately, the right approach to making Goku action figures depends on the intended design, acceptable budget, desired level of detail, and whether the finished figure is meant for personal display or authorized commercial production.